
• Skip to primary navigation
  • Skip to main content
Mamas Secret Recipes
  • About Me
    • Food Info
  • Blog
  • Recipes
  • Videos
  • Contact Me
  • Navigation Menu: Social Icons

    • Facebook
    • Instagram
    • Pinterest
    • Twitter
    • YouTube
menu icon
go to homepage
subscribe
search icon
Homepage link
  • About Me
  • Blog
  • Recipes
  • Videos
  • Food Info
  • Contact Me
    • Bloglovin
    • Facebook
    • Instagram
    • Pinterest
    • Twitter
    • YouTube
  • ×

    Menthya Matvadi Palya (Fresh Fenugreek sautéed with Lentils)

    March 3, 2019 by Fouzia Leave a Comment

    methi lentils sautéd

    methi lentils sautéd
    A vegetarian delicacy from Coorg, Karnataka, India that captivates you with its tantalizing flavours.  So aromatic and bursting with flavour this delightful sabzi (vegetarian dish) is called Menthya Matvadi Palya in Karnataka and Paruppu Usili in Tamil Nadu. Each time you take a mouthful, you want to eat more and more and never to stop. This is a forgotten recipe which is long lost in time and not really cooked in the Indian kitchens any more. So I have included it in the section: “The lost recipes of India”.

    It was my MIL who first introduced me to this dish and up till now I am still head over heels in love with it. The methi greens are cooked using a different technique to bring out all its flavour. They are first sautéed in ghee and oil till almost crispy and aromatic  then cooked in a coarsely ground paste of chana dal until it is just done and is a little moist. You could add a dollop of ghee in the final stage for extra flavour and moistness. It is best enjoyed hot with steamed rice. You could prepare in advance too but steam it or heat in the microwave closed just before eating.
    methi lentil subzi
    Ingredients:
    1 large bunch of methi greens
    1 tbs vegetable oil
    1 tbs ghee
    1/4 tsp cumin seeds
    a few fresh curry leaves
    1-2 dried red chillies
    Ground Lentil Paste:
    1/4 cup chana lentils (bengal gram dal)
    2 green chillies
    2 garlic cloves
    1/2 tsp cumin seeds
    1/4 small onion (optional)
    Instructions:
    1.Pick the methi greens, wash, drain, dry with paper towels, chop them and set aside.
    2. Soak the chana lentils for at least a couple of hours. Then grind together the chana lentils with garlic, green chillies, cumin seeds, onion and salt with a tbs of water to a coarse paste.
    3. Heat the oil and ghee in a non stick or thick bottomed pan. Add the dried red chillies, cumin seeds and as soon as they change colour drop in the fresh curry leaves followed by the methi greens.
    4. Sauté them well till all the moisture is gone and they begin to turn crispy. You would get a tantalizing aroma at this stage.
    5. It is now time to add the ground chana paste to the sautéed methi and keep stirring it continuously so that it gets mixed well and there are no lumps.
    6. Turn down the heat, cover with a lid and simmer for 5 minutes. That is all. The methi lentil melange is now ready to eat. As a finishing touch drizzle some ghee on top and serve hot.
    7. Enjoy with hot steamed rice.

    Notes:
    1. The chana dal paste should be coarse and not too runny.
    2. The methi greens should be sautéed well till they release an aroma for better flavour.
    3. This dish is at its best when enjoyed immediately.

    Please Note:
    Some of the links on this post and below are affiliate links. We are a participant in the Amazon Services LLC Associates Program, an affiliate advertising program designed to provide a means for us to earn a small commission by linking to Amazon.com and affiliated sites. Should you choose to buy them you could click on these links to go to the respective sites and make your purchase. I would really appreciate if you do that. Thank you.


    Filed Under: Eating Healthy, Fenugreek Leaves, Gluten Free, Lentils, Lost Recipes of India, Lunch, Methi Greens, Side Dishes, South Indian Cooking, Traditional Recipes, Vegan, Vegetarian Tagged With: fenugreek leaves & lentil subzi, Matodi palya, Matvadi palya, menthya matvadi palya, methi chana sabzi, methi greens, paruppu usili

    Lamb Paya (Trotters) Curry

    March 1, 2019 by Fouzia Leave a Comment

    paya curry

    paya curry

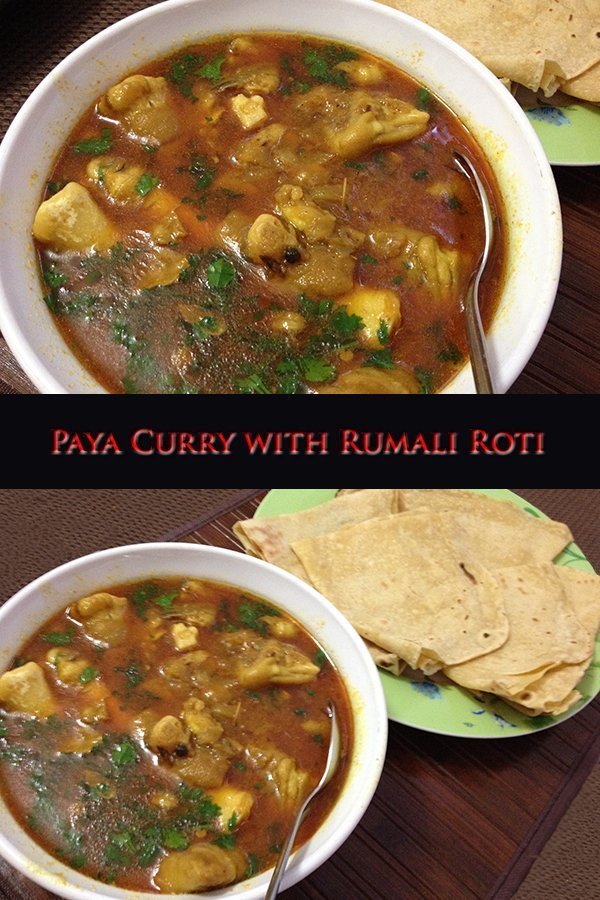
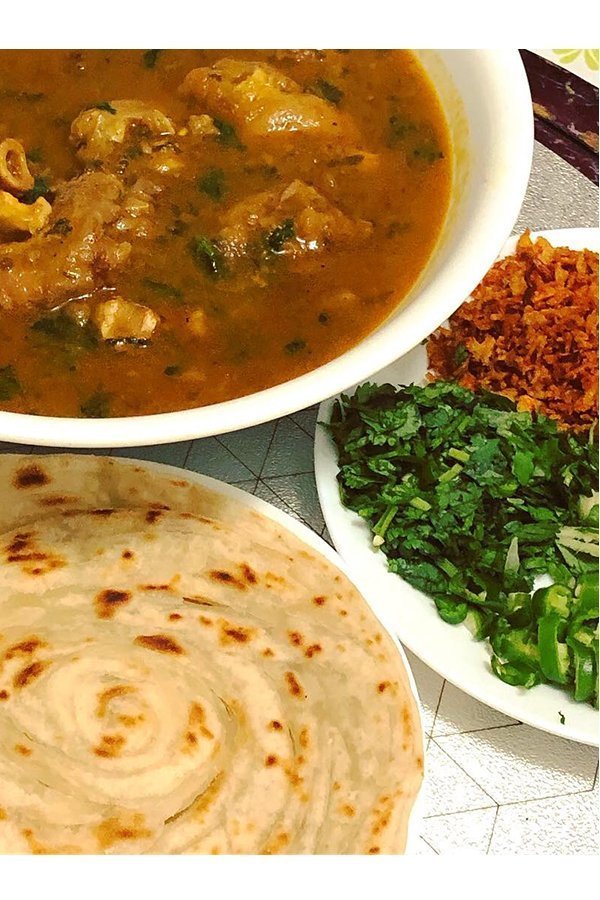
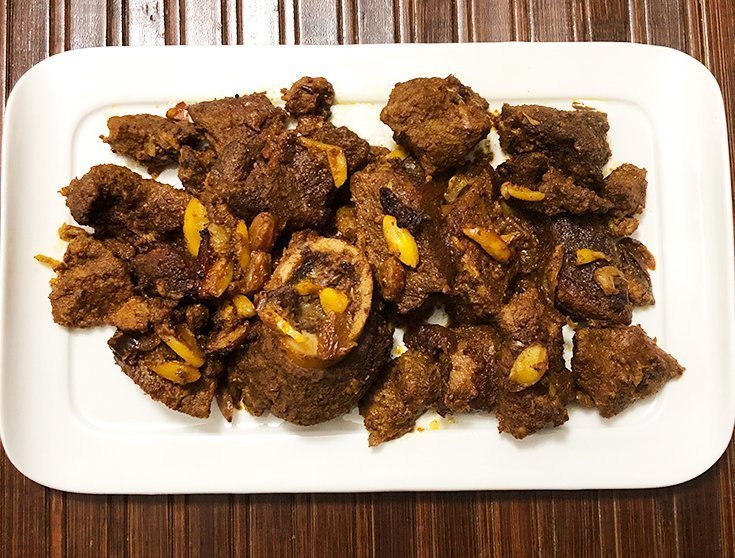
    Light, flavourful and delicious, this Lamb Paya Curry is a traditional south Indian delicacy which is relished by the muslims in South India. It is mostly enjoyed for breakfast with layered parotas or appam (rice hoppers). There are many variations of this recipe. It can be of soupy or gravy consistency according to your liking. Some restaurants in Chennai serve it as a white korma made with a blend of coconut, roasted gram etc flavoured with different whole spices. I will be adding that version soon.
    paya curry

    Ingredients:
    4 Lamb Paya (Trotters) plus some extra bones (4-6)
    2 tsp fresh ginger garlic paste
    2 onions( 2 cups sliced )
    6 cloves
    1 x 2 inch cinnamon stick
    4- 6 green cardamoms
    1/2 tsp fennel seeds
    1 bay leaf
    1/2 tsp turmeric
    1 tsp red chilli powder
    1 tsp coriander powder
    1/4 cup ground coconut
    4 – 6 green chillies
    1 tsp Shaan’s zafrani garam masala (optional)
    1/2 tsp crushed black pepper
    1/4 cup fresh cilantro
    4 – 6 tbs vegetable oil
    Fried onions, ginger juliennes, chopped fresh cilantro and thin onion rings as condiments and garnish.

    Instructions:
    1. Clean the lamb trotters well, scraping each piece separately. Cut in between the two hooves and remove the glands and discard them as shown in the video. Scrape them with a knife or scrub with a new scouring pad and rinse well at least 3 or 4 times till there are no small hairs or dirt at the edges or anywhere else. The bleached trotters are usually clean. Still it is better to scrape and clean them as well.
    2. Slice the onions, grind the ginger garlic paste, cut the ginger into juliennes, chop the cilantro and set aside.
    3. Place the cleaned lamb paya in the instant pot, add 2 – 3 cups of water, 1 tsp ginger garlic paste, salt, 2 green chillies then cover with the lid. Choose the pressure cook setting and set the time for 25 minutes.
    4. Meanwhile heat oil in a separate pot. Throw in the whole garam masala spices (cloves, green cardamoms, cinnamon, fennel seeds and bay leaf) followed by the sliced onions and fry them till translucent and golden brown.
    5. Now add the ginger garlic paste, turmeric, coriander powder and red chilli powder, whole green chillies (stems removed), stir to combine then add the ground coconut paste. Mix everything well. Switch of the stove and set aside.
    6. After 25 minutes when the Instant Pot beeps, allow it to NPR (Natural pressure release) or if you are in a rush, you can do a QPR too.
    7. Open the Instant Pot lid after all the steam is out and add the prepared masala. Mix well. Taste and adjust the salt. Take a paya piece and check to see how tender it is. Depending on how much it is cooked you could set your cooking time accordingly. Mine were half done after 25 minutes of cooking. Some payas (trotters) cook faster and some take longer to tenderize. They normally take about 45 mins to an hour to cook. They should be soft and should fall off the bone when handled. But still not so soft as to be mushy. If you over cook them the bones become softer too which is not enjoyable. So now you can set the time for another 25 minutes which is what I did and they were just perfect.
    8. When done remove the lid and add more chopped cilantro and let them simmer for 5 mins or till the oil rises on top. As for the consistency you could either reduce it and have it as a thick gravy or make it soupy. As a finishing touch you can add Shaan’s zafrani garam masala and crushed black pepper.
    9. Transfer to a serving bowl and serve them hot with ginger juliennes, crispy fried onions, diced green chillies, chopped cilantro and fresh onion rings as accompaniments or garnish.
    10. Add a ladle of Paya curry to your plate or bowl, sprinkle some crispy fried onions, green chillies, ginger juliennes and some cilantro on it, dip a piece of the layered flaky parotta in the curry and enjoy!

    Notes:
    1. Locate and remove the glands as shown in the video and discard them. Rinse the Paya thoroughly in running water and clean them well.
    2.Cooking time may vary with the Paya depending on the age of the lamb, the younger the lamb the faster they tenderize. So cooking time has to be adjusted accordingly. It also depends on your pressure cooker or Instant pot.
    3. Another option is to slow cook them using the Instant pot or slow cooker.
    4. You may add as much red chilli powder as you want according to your spice level, or even cook without it as the curry is still delicious.
    5. Paya is best enjoyed with appam (rice hoppers), layered parottas, Rumali roti and Naan.

    Filed Under: Breakfast, Brunch, Curries., Dinner, Hot and Spicy, Indian Cuisine, Instant Pot recipes, Lamb, Lunch, Main Dishes, South Indian Cooking, Spicy, Traditional Recipes Tagged With: Lamb Paya, lamb paya curry, lamb trotters, lamb trotters curry

    The Best Black Pepper Focaccia

    February 12, 2019 by Fouzia 6 Comments

    Black Pepper Focaccia

    Black Pepper Focaccia
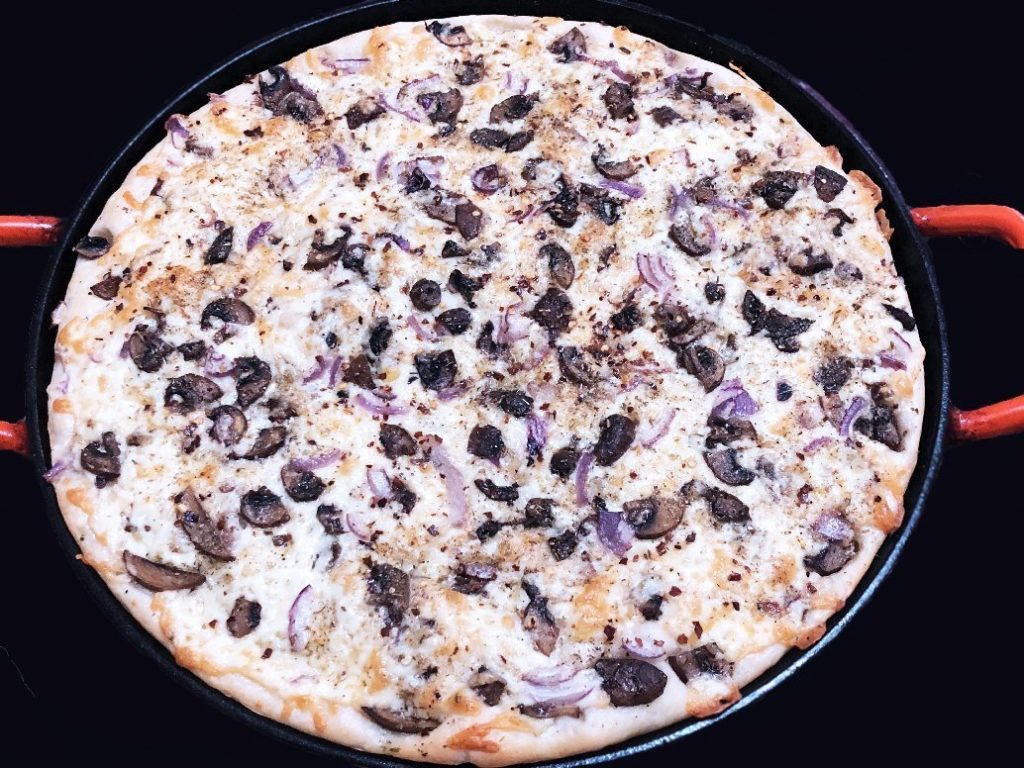
    This one is my best, not one of the best but the best focaccia I ever made! It’s a focaccia with a unique flavour that was so appealing to our taste buds. With sautéed cremini mushrooms, black pepper, red onions, Monterey jack and Mozzarella cheese, oregano, red pepper flakes and more black pepper- lots of it……..the black pepper flavour gave a new dimension to it and its  texture turned out perfect in my cast iron pizza pan. Everything came together in perfect harmony. It was like a symphony of flavours dancing on our taste buds singing in harmony with mother Nature. All Praise to God for all His blessings!
    Ingredients: 
    For the dough
    3 cups all purpose flour
    1 tbs yeast
    1/3 tbs sugar
    1 tsp salt
    For the toppings
    1 x 225g box of fresh cremini mushrooms
    1/2 a large red onion
    1 cup Mozzarella cheese
    1/2 cup Monterey Jack cheese
    2 tsp dried oregano spices
    4 tsp Black pepper
    1 tsp red pepper flakes
    4-6 tbs olive oil
    black pepper cheesy mushroom focaccia
    Instructions:
    1. Dissolve yeast with sugar in 1 cup of lukewarm water and wait for the yeast to bloom. Meanwhile measure 3 cups of flour into the food processor add salt and pulse to mix it.
    2. While the food processor is running pour the yeast solution through the feed tube carefully. Stop once you have poured it all in, then start pulsing till it forms into a ball of dough. If it is dry just sprinkle a little lukewarm water then pulse again. The dough should not be sticky (so do not add lot of water) but come together and at the same not too dry. Add one tbs olive oil and keep pulsing for short intervals till the dough starts spinning which means it is ready.
    3. Remove the dough from the food processor, make it into a round ball and place it in a greased bowl. Cover and let it rise in a cozy place on the counter for 1 – 2 hours.
    4. As the dough is rising get all the toppings ready. Grate the cheeses, slice the mushrooms, slice the onions then chop them roughly etc. Also sauté half the mushrooms in olive oil with salt and pepper until lightly brown and set aside.
    5. Preheat the oven to 400ºF. Check to see if the dough is double in size. Grease your pizza pan, a cast iron one is the best to get a perfect texture for your pizza as well as focaccia because it retains the heat while baking.
    6. Spread the dough on the pizza pan first with your fingers then in a circular motion by resting your wrist in the center of the dough and pressing the circumference with your fingers all around in a clockwise direction. Then adjust and make it evenly smooth all over. Prick the dough all over with a fork so that it doesn’t bubble up while baking.
    7.Now drizzle one or two tablespoons of oil generously on the focaccia dough and spread it all over with a brush. Fist spread the sautéed mushrooms on the crust, then the grated cheeses evenly all over. Now place the raw mushrooms then chopped onions (both seasoned with salt & pepper and mixed with olive oil) on top of the cheese all over the focaccia.
    8. Sprinkle with black pepper, red chilli flakes and dried oregano spices on top of the focaccia. Drizzle more olive oil on the toppings and the sides of the crust.

    black pepper cheesy focaccia
    9. Place the focaccia in the preheated oven and bake for 15 minutes until the cheese is lightly golden and the crust is crisp at the base and moist on top.
    10. The focaccia is now ready. Enjoy it hot for brunch or dinner with your favourite soup! Bon appetit!
    Notes:
    1. The focaccia dough should be soft and springy as it is one of the important steps that determines the texture of the pizza or focaccia.
    2. Secondly the pan should be thick enough to retain the heat. A cast iron works best. You could also use good quality non stick bakeware which is workable.
    3. Adding salt, pepper olive oil to the veggies just before topping them on the focaccia gives a better flavour to it.
    4. You could also use quick rising yeast and add it to the flour to save time. But first make sure that the yeast is not stale.
    5. You could also try using black pepper with other toppings for the focaccia.

    Please Note:
    Some of the links on this post above and below are affiliate links. We are a participant in the Amazon Services LLC Associates Program, an affiliate advertising program designed to provide a means for us to earn a small commission by linking to Amazon.com and affiliated sites. Should you choose to buy them you could click on these links to go to the respective sites and make your purchase. I would really appreciate if you do that. Thank you.


    Filed Under: American Cuisine, Baked Treats, Black Pepper, Brunch, Canadian Cuisine, Focaccia, Fusion, Grey Cup, Italian Cuisine, Mushrooms, Quick and easy, Side Dishes, Spicy, Super Bowl Snacks, Vegetarian Tagged With: black pepper focaccia, cheesy focaccia, Focaccia bread, Italian bread, italian focaccia, mushroom focaccia, spicy focaccia

    Coconut Chilli Crab (Hot and Spicy)

    February 11, 2019 by Fouzia Leave a Comment

    coconut chilli crab

    coconut chilli crab

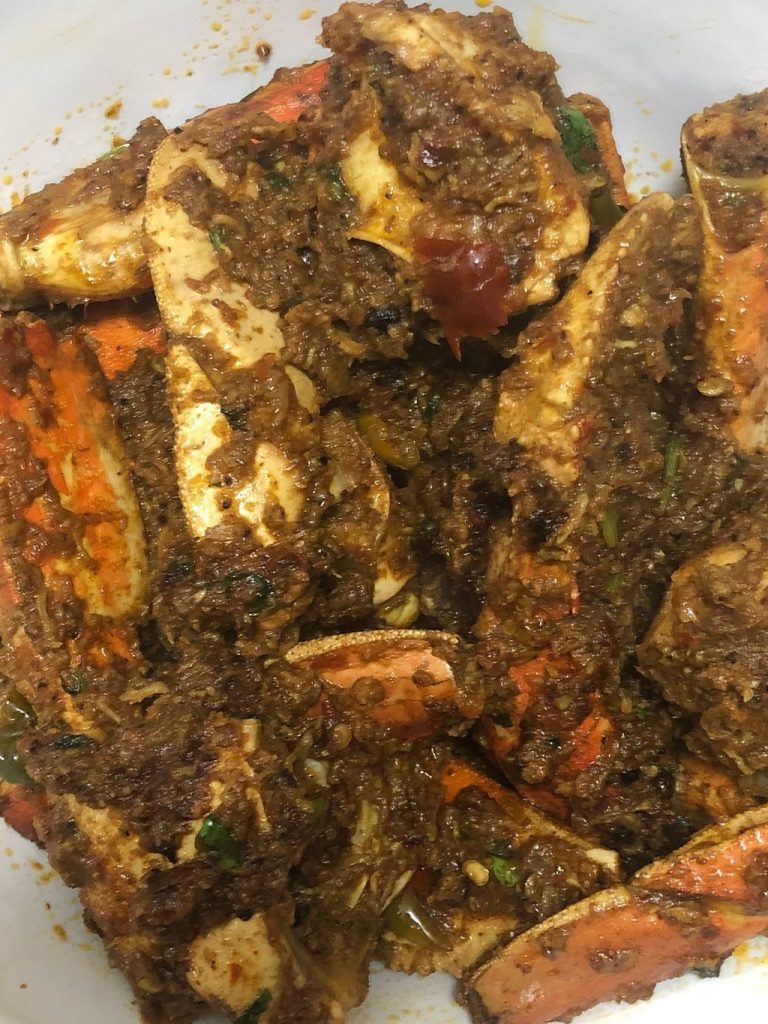
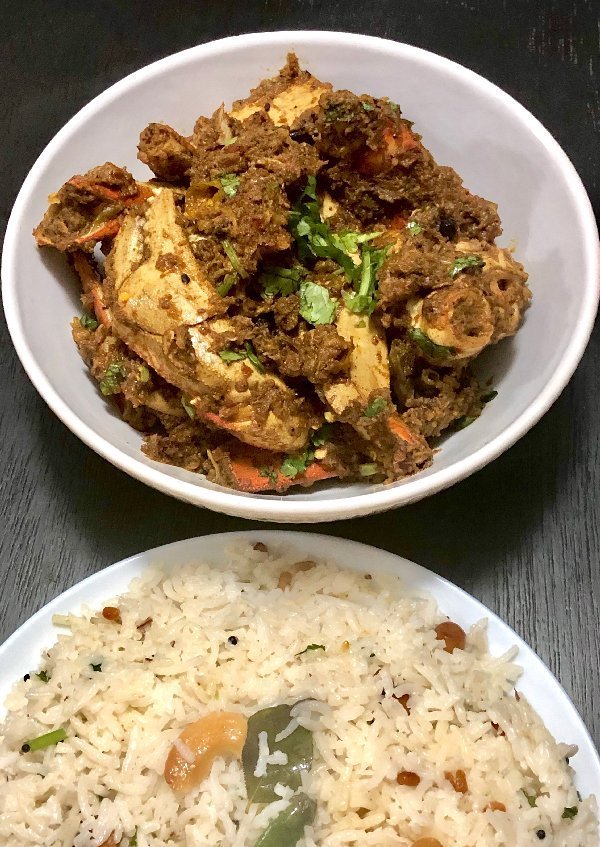
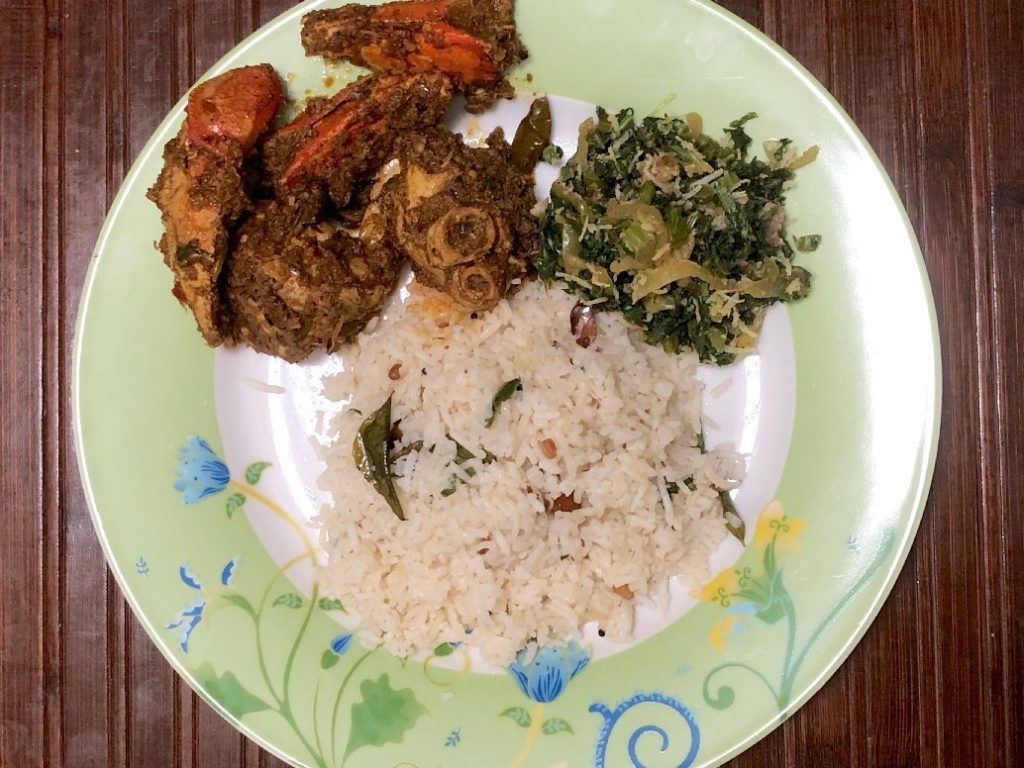
    This Coconut Chilli Crab is a lip smacking aromatic and flavourful dish with a lingering taste that makes my mouth water each time I think about it.  The sweet juicy roasted coconut flavour combined with the subtle aroma of the light spices and heat from the chillies that lightly sears your taste buds and the sweet taste of the crab flesh that is so flavourful yet not overpowered by the spices, is utter bliss indeed. I felt like I was on cloud 9 enjoying this delectable crab dinner with the coconut rice and the steamed  bok choy that complemented it so much.
    I would say that I created this dish out of fluke because of a small mistake in the process of cooking. But as the dish developed it took a different turn.

    I had some dried red chillies soaking in vinegar. So I ground them to a paste using all the vinegar. After sautéing the crab in the ground coconut masala I drizzled some of this chilli paste into the pot. Thank God I added a little……but the crab masala tasted so tangy! I   realized what a blunder it was adding up all the vinegar (which must have been at least 1/4 cup) to grind the chillies. I realized that the sour taste was killing the dish. I had to do something about it……. add something which should fix the taste. Whatever I would add now can either make it a hotchpotch dish of undesirable taste or a unique blend of flavours that sing in praise of each other. I looked around and spotted the pack of fried onions which gave me hope.  I took  a good 2 tbs, mixed in some red chilli, cumin and salt, then ground them up quickly and tossed this spicy ground onion masala into the pot. My jaw dropped when I tasted it. This magical potion not only took away the sourness but also infused a unique flavour which elevated the crab dish to a new dimension I could not have imagined. It was sensational!
    coconut chilli crab
    coconut chilli crab
    coconut chilli crab
      
    Ingredients:
    1 whole Dungeness crab 1 1/2 lbs
    1/2 tsp turmeric
    1 tsp black peppercorns
    4 green chillies
    2 tbs chopped cilantro
    2 tbs fried onions (store bought)
    1/4 tsp roasted cumin powder
    1/2 – 1 tsp red chilli powder
    4 cloves
    1 bay leaf
    1/2 tsp garam masala powder
    2 tbs unsalted butter
    1/4 cup oil (coconut or olive oil)
    For the red chilli paste:
    6 dried red chillies
    2 tbs white vinegar
    For the coconut ground masala
    1/2 a large onion sliced
    1/2 cup thinly sliced fresh coconut or dessicated coconut
    1/2 tsp cumin seeds
    1 tsp coriander seeds
    4 garlic cloves
    Fried onion masala:
    2 tbs fried onions
    1/2 – 1 tsp red chilli powder
    1/4 tsp cumin powder

    coconut masala
    Instructions:
    1. Soak 6 red chillies in 2 tbs of white vinegar for a couple of hours or overnight then grind them with the vinegar to a coarse paste.
    2. Scrape the shell of the crab with a knife, rub the shell with salt and clean the crab pieces well. Rinse well in cold running water, drain and keep aside.
    3. Lightly fry the coconut slices in a tsp of oil till they are lightly brown. Remove then add the cumin and coriander seeds to the pan and when they change colour and emit an aroma, throw in the 1/2 sliced onion quickly just till it softens. Remove and set aside. Crush the garlic cloves and sizzle them in the same pan in a few drops of oil till they change colour a bit and become aromatic, then remove.
    4. Put all the roasted ingredients and the fried coconut in a grinder when they cool down grind them to a paste adding a little water. Keep the ground coconut masala paste aside.
    5. In a pot or kadai add the 1/4 cup oil and the unsalted butter. When hot enough drop in the bay leaf, the cloves, slit green chillies and coarsely pounded pepper, then immediately add the crab. Sprinkle some salt on it, turn over and quickly fry in the oil for 1 minute, then add just 2 tbs of the *chilli paste, 1/2 tsp turmeric followed by the ground coconut masala. Mix well.
    coconut chilli crab
    6. Sprinkle half a cup of water from the sides of the pot, cover with a lid and simmer for 2 minutes.
    7. Meanwhile to make the fried dry onion masala, take 2 tbs of the crispy fried onions (store bought pack) and mix in 1/2 to 1 tsp chilli powder, 1/4 tsp roasted cumin powder then grind them
    8. Now open the lid from the pot, stir the crab dish, taste to adjust the salt. Then sprinkle this ground fried dry onion masala on the crab, followed by chopped cilantro and then garam masala powder. You could also add some crushed black pepper and red chilli flakes if you want it more spicy. Turn over and mix well. Simmer till the water gets absorbed and the masala just sticks to it as seen in the pictures.chilli crab dinner

    Notes:
    1. *Chilli paste: To make chilli paste soak 6 dried long red chillies in 2 tbs vinegar and leave them overnight, then grind them to a paste.
    2. I prefer using Shaan’s garam masala powder as it not only is aromatic like homemade but also has saffron in it which makes it even more appealing to the taste buds.
    3. You could use unsweetened shredded coconut if you don’t have fresh coconut and toast it in the same way as given in the recipe.
    4. You could omit the crushed black pepper and red chilli flakes in the final step if you don’t want it too spicy. You can add or reduce the red chilli powder, black pepper according to your desirable spice level.


    You may also like:
    coconut rice   Crab red masala, red chilli crab    black pepper crab  

    Please Note:
    Some of the links on this post and below are affiliate links. We are a participant in the Amazon Services LLC Associates Program, an affiliate advertising program designed to provide a means for us to earn a small commission by linking to Amazon.com and affiliated sites. Should you choose to buy them you could click on these links to go to the respective sites and make your purchase. I would really appreciate if you do that. Thank you.


    Filed Under: Coconut, Crab, Dinner, Gluten Free, Hot and Spicy, Indian Cuisine, Lunch, Main Dishes, Non-Vegetarian, Quick and easy, Sea Food, South Indian Cooking, Spicy Tagged With: chilli crab, coconut chilli crab, crab, crab dish, crab masala, crab meal, hot and spicy crab, Indian style crab, Nandu masala

    Cauliflower Pepper Fry

    January 13, 2019 by Fouzia Leave a Comment

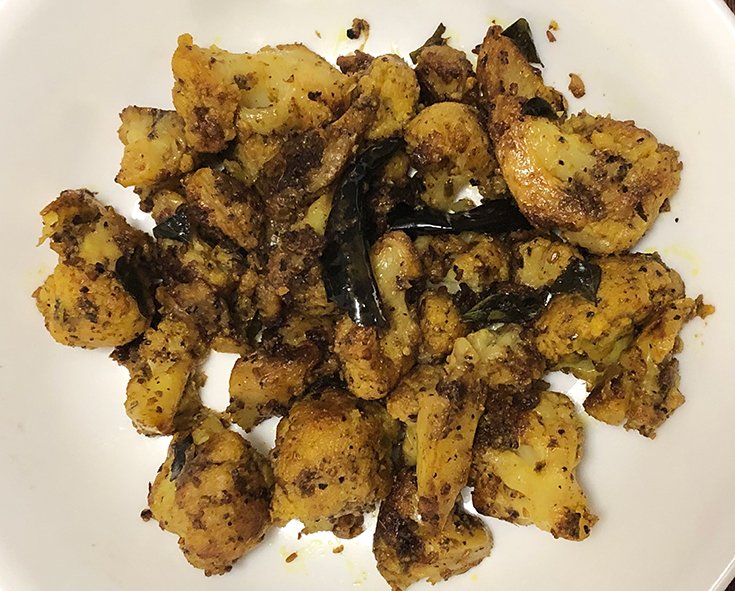
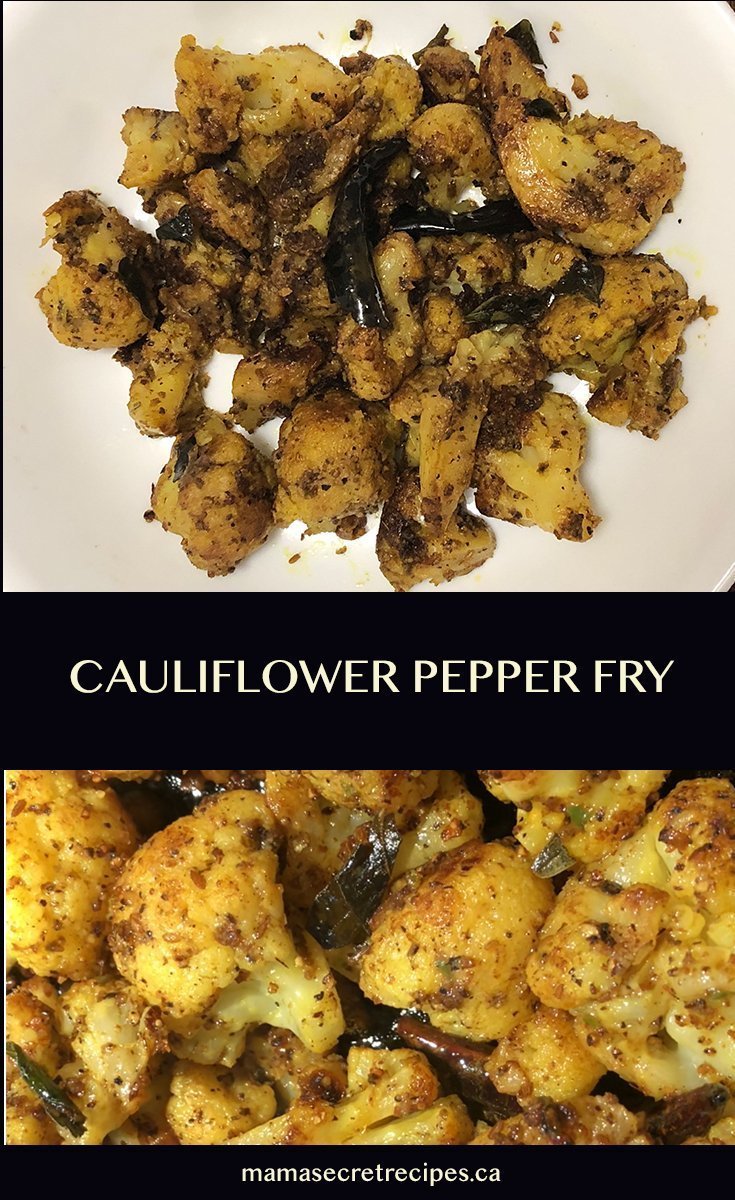
    cauliflower pepper fry

    Cauliflower Pepper Fry

    This is not only a quick and easy but a healthy version of cauliflower pepper fry dish that I created without any deep frying, keeping it light and simple but at the same time so flavourful and delicious.

    I didn’t want to add any onions or tomatoes just to retain the original taste of the cauliflower and not over power it with too many spices either. I loved the light peppery flavour of this dish and never enjoyed cauliflower so much as I did this one. It not only had a slight crunch to it but also so juicy and tasty.

    Here’s the recipe:

    Ingredients:
    2 cups Cauliflower florets
    1 tsp Turmeric
    1 tsp salt
    2 tbs canola oil
    1 tbs fresh curry leaves
    2 dried red chillies
    For the Pepper masala:
    1 tsp black pepper
    1/2 tsp cumin
    1 small green chilli
    2 cloves of garlic

    Instructions:
    1. Cut the cauliflower into medium sized florets, wash thoroughly in running water, put them in a bowl with two cups of water, turmeric and salt and let them soak in it for 5 minutes. Then transfer them to a strainer to drain. Set them aside.
    2. Meanwhile grind together the pepper masala ingredients in a dry/wet grinder and set aside.
    3. Heat oil in a saucepan or kadai. Toss in the dried red chillies, fresh curry leaves and when they begin to sizzle and change colour, add the cauliflower florets.
    4. Sauté well till they turn golden brown.
    5. Now add the ground pepper masala then add 2 tablespoons of water and mix well. Turn over and sauté well till the water evaporates and the pepper masala coats the cauliflower. Taste and adjust the salt according to your bliss point.
    6. The cauliflower pepper fry is now ready to enjoy with rice or rotis.

    Notes:
    1. You could add more green chillies or black pepper according to your spice level.
    2. Drain the cauliflower florets well before tossing them in the tempered hot oil to avoid any spluttering of oil or burns.
    3. The Cauliflower absorbs enough salt from soaking in salted water so there’s no need to add more salt, but you could do a taste testing in the end and check to see if it needs more. And if you want to add more salt do sprinkle a little water after adding it then sauté till the water evaporates.

    Filed Under: Dinner, Gluten Free, Hot and Spicy, Indian Cuisine, Lunch, Popular Recipes, Side Dishes, South Indian Cooking, Vegan, Vegetarian Tagged With: Cauliflower, Cauliflower pepper fry, Cauliflower pepper masala, Gobi pepper masala, Phool Gobi Masala

    Tangy Fish Curry

    December 8, 2018 by Fouzia Husainy Leave a Comment

    tangy fish curry3

    This is a delightfully aromatic, outrageously delicious, spicy and tangy fish curry that has a unique taste and flavour, so simple and easy to prepare and yet such an absolute delicacy! All the ingredients are combined together with the fish and cooked on simmer. The result is a hot and spicy aromatic gravy that tingles your taste buds and when enjoyed with steamed rice or lacy rice hoppers it is so delicious!

    tangy fish curry3

    Abounding in daily fresh catch because of its largest coastline, South india is famous for its delicious mouth watering seafood dishes and south indian curries are world famous. They are characterized by the liberal use of spices and herbs (especially curry leaves), coconut and tamarind. Every community in each city have their own traditional cuisine and revel in their own unique curry recipes.

    This curry has a different technique of preparation unlike the common fish curries. Its recipe has been passed down for generations in my husband’s family and I happened to learn it from his grand aunt when she visited us. Everyone in the family including me are very fond of it. I have made fish curries using different techniques but this one I would say is the best. And what is astonishingly wonderful about this fish curry is that it tastes even more tasty the next day. So do not throw away your leftover fish curry coz you could enjoy it even more with dosa, idli or rice hoppers the next day.

    Though the entire process of preparation is so simple and easy, it is important to keep in mind to use only fresh ingredients, especially curry leaves. Frozen or dried curry leaves lose almost all of their flavour. I recommend to use fresh and only fresh curry leaves for this curry. You could store them in the fridge in a ziplock bag, but once they start to lose their colour their flavour is lost. They can stay fresh and green upto 2 or 3 weeks in the fridge.

    For making this curry, firstly all the raw ingredients are added to the pot including the fish and then it is put on the stove and left to cook on medium heat. From time to time the pot is lifted to give a shake. You can’t stir this curry after it has started cooking for chances of breaking the fish which has to  be handled gently. Watch the video below.

    What you need for this fish curry:


    Ingredients:
    6 Perch Steaks
    1 large onion
    1 large tomato
    25 gms dried tamarind (seedless)
    1 heaped tbs coconut ground
    1 tsp red hot chilli powder
    1/2 tsp turmeric powder
    *2 tsp roasted cumin fenugreek powder
    1 tsp coriander powder
    8-10 green chillies small
    1/4 cup plus 2 tbs canola oil
    1/2 cup fresh curry leaves
    1/2 cup fresh cilantro

    tangy fish curry

    Instructions:
    1. Cut up the onion and coconut into small pieces and grind them separately to make a paste. The magic bullet comes in handy for grinding small quantities like one onion or one or two pieces of fresh coconut. Cut the tomatoes into quarters or dices. Roast the cumin and fenugreek seeds, grind them to a fine powder in a cast iron melting pot and keep it ready. Please check notes on how to make *roasted cumin fenugreek powder.
    2. Add to the cooking pot canola oil, fish steaks, onion paste, diced tomato, turmeric, red hot chilli (Deghi Mirch has good flavour and is ideal for this fish curry), coriander powder, *roasted cumin fenugreek powder, curry leaves, chopped cilantro, ground coconut and salt. Mix everything gently with a wooden spatula.
    3. Rinse the seedless tamarind and extract juice from it by adding some water. Then strain this into to the pot with the fish and other ingredients.
    4. Now put the pot on the stove, close the lid and let it cook on medium heat.
    5. After 5 minutes open the lid, lift the pot and give it a shake. Watch the video on how to do it. Extract more tamarind juice till the tamarind has no pulp left and strain it into the pot. Let it simmer for another five minutes.
    6. Shake once again and put the pot back on the stove and let it simmer till the sauce thickens and oil rises on top.
    7. As a finishing touch, when the sauce starts thickening, add a few more curry leaves and sprinkle 1/2 a tsp roasted cumin fenugreek powder for extra flavour.
    8. Garnish with chopped cilantro and serve hot with steamed rice or rice hoppers.

    fish curry with hoppers
    Tips:
    *Roasted cumin fenugreek powder:
    Take two parts of cumin seeds to one part of fenugreek powder and roast them in a cast iron melting pot with a handle. When they cool down grind them in a magic bullet and store in a glass jar. You could use this flavourful magical spice in tangy curries like Lamb Khalia  or sprinkle on sautéed veggies, potatoes etc for extra magical flavour.

    tangy fish curry

    Recipe

    tangy fish curry

    Tangy Fish Curry

    Author: Fouzia Husainy
    This is a delightfully aromatic, outrageously delicious, spicy and tangy fish curry that has a unique taste and flavour, so simple and easy to prepare and yet such an absolute delicacy!
    Course Main Dish
    Cuisine South indian Cuisine

    Ingredients
      

    • 6 Perch Steaks
    • 1 large onion
    • 1 large tomato
    • 25 gms dried tamarind seedless
    • 1 heaped tbs coconut ground
    • 1 tsp red hot chilli powder
    • 1/2 tsp turmeric powder
    • *2 tsp roasted cumin fenugreek powder
    • 1 tsp coriander powder
    • 8-10 green chillies small
    • 1/4 cup plus 2 tbs canola oil
    • 1/2 cup fresh curry leaves
    • 1/2 cup fresh cilantro
    Get Instant Help
    InstacartGet Recipe Ingredients

    Instructions
     

    • Dice the onion, cut the coconut into small pieces and grind them separately to make a paste. The magic bullet comes in handy for grinding small quantities like one onion or one or two pieces of fresh coconut. Cut the tomatoes into quarters or dices. Roast the cumin and fenugreek seeds, grind them to a fine powder in a cast iron melting pot and keep it ready. Please check notes on how to make *roasted cumin fenugreek powder.
    • Add to the cooking pot canola oil, fish steaks, onion paste, diced tomato, turmeric, red hot chilli (Deghi Mirch has good flavour and is ideal for this fish curry), coriander powder, *roasted cumin fenugreek powder, curry leaves, chopped cilantro, ground coconut and salt. Mix everything gently with a wooden spatula.
    • Rinse the seedless tamarind and extract juice from it by adding some water. Then strain this into to the pot with the fish and other ingredients.
    • Now put the pot on the stove, close the lid and let it cook on medium heat.
    • After 5 minutes open the lid, lift the pot and give it a shake. Watch the video on how to do it. Extract more tamarind juice till the tamarind has no pulp left and strain it into the pot. Let it simmer for another five minutes.
    • Shake once again and put the pot back on the stove and let it simmer till the sauce thickens and oil rises on top.
    • As a finishing touch, when the sauce starts thickening, add a few more curry leaves and sprinkle 1/2 a tsp roasted cumin fenugreek powder for extra flavour.
    • Garnish with chopped cilantro and serve hot with steamed rice or rice hoppers.

    Notes

    Tips:
    *Roasted cumin fenugreek powder:
    Take two parts of cumin seeds to one part of fenugreek powder and roast them in a cast iron melting pot with a handle. When they cool down grind them in a magic bullet and store in a glass jar. You could use this flavourful magical spice in tangy curries like Lamb Khalia  or sprinkle on sautéed veggies, potatoes etc for extra magical flavour.
    Print Recipe Pin Recipe Share on Twitter Share on Facebook

    Please Note:
    Some of the links on this post and below are affiliate links. We are a participant in the Amazon Services LLC Associates Program, an affiliate advertising program designed to provide a means for us to earn a small commission by linking to Amazon.com and affiliated sites. Should you choose to buy them you could click on these links to go to the respective sites and make your purchase. I would really appreciate if you do that. Thank you.

    You may also like:
    Thai style Trout Fish Curry
    Trout in Flavoured Coconut Milk
    Fish Koftas in Mustard Curry

    Filed Under: Curries., Dinner, Indian Cuisine, Lunch, Main Dishes, Non-Vegetarian, Perch, Perch, Salmon, Sea Food, South Indian Cooking, Traditional Recipes, Trout Tagged With: chennai fish curry, fish curry, Machli ka khatta, south indian fish curry

    Apple Fennel Salad

    December 6, 2018 by Fouzia Husainy 6 Comments

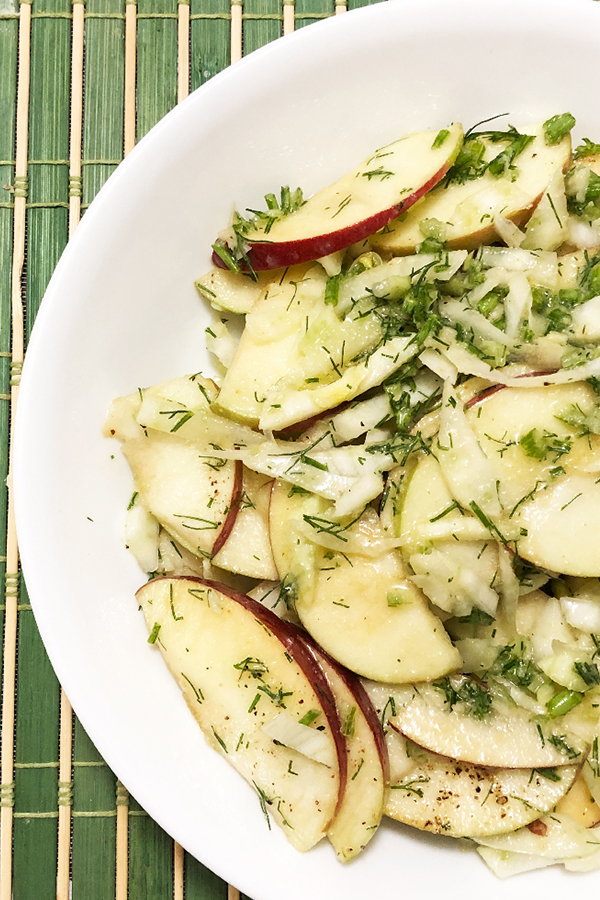
    apple fennel salad

    The subtle anise like flavour of fennel combined with the sweet tart apple flavour is so beautiful, light and refreshing that this salad could make you feel like spring in the midst of winter. Fennel has the power to enhance the flavour of other foods with its mildly perfumed anise like flavour, liquorice taste and crunchy texture. It is more like a fruit than a vegetable and pairs well with apple. And the poppy seed vinaigrette kicks it up a notch!

    Ingredients:
    1 Macintosh apple
    1 fennel bulb
    a few fennel bulb fronds
    Poppy seed vinaigrette:
    1 tsp poppy seed paste
    1 garlic clove chopped or grated
    1 tsp dijon mustard
    juice of half a lime
    1 tbs olive oil
    salt and black pepper
    1 tsp honey

    Instructions:
    1. Wash and towel dry the apple and fennel bulb and thinly slice the them. Finely chop the fennel fronds and toss them in.

    2. Whisk together the poppy seed paste, lime juice, chopped garlic, dijon mustard and honey, then trickle the olive oil little by little while whisking until it emulsifies. Season with salt and pepper.

    3. Drizzle the desired amount of the lemon poppy dressing in the salad and enjoy!

    Notes:
    1. Adding olive oil in a steady stream while whisking thickens the dressing.
    2. You could add walnuts, almonds, pomegranate arils or dried apricots, cranberries etc to this salad. Use your imagination.

    apple fennel salad

    Apple fennel salad

    Recipe

    apple fennel salad

    APPLE FENNEL SALAD

    Author: Fouzia Husainy
    The subtle anise like flavour of fennel combined with the sweet tart apple flavour is so beautiful, light and refreshing that this salad could make you feel like spring in the midst of winter.
    Course Appetizer, Side Dish
    Cuisine American cuisine, Canadian Cuisine

    Ingredients
      

    Ingredients:

    • 1 Macintosh apple
    • 1 fennel bulb
    • a few fennel bulb fronds
    • Poppy seed vinaigrette:
    • 1 tsp poppy seed paste
    • 1 garlic clove chopped or grated
    • 1 tsp dijon mustard
    • juice of half a lime
    • 1 tbs olive oil
    • salt and black pepper
    • 1 tsp honey
    Get Instant Help
    InstacartGet Recipe Ingredients

    Instructions
     

    Instructions:

    • Wash and towel dry the apple and fennel bulb and thinly slice the them. Finely chop the fennel fronds and toss them in.
    • Poppy seed vinaigrette: Whisk together the poppy seed paste, lime juice, chopped garlic, dijon mustard and honey then trickle the olive oil little by little while whisking until it emulsifies. Season with salt and pepper.
    • Drizzle the desired amount of the lemon poppy dressing in the salad and enjoy!

    Notes

    Notes:
    1. Adding olive oil in a steady stream while whisking thickens the dressing.
    2. You could add walnuts, almonds, pomegranate arils or dried apricots, cranberries etc to this salad. Use your imagination.
     
    Print Recipe Pin Recipe Share on Twitter Share on Facebook

    You may also like:

    Spicy Carrot & Green Apple Salad

    Egg Salad

    Pineapple Kachumbar

    Chickpea Sundal Salad

    Apple Mango Ginger Salad

    Filed Under: Appetizers, Canadian Cuisine, Dinner, Gluten Free, Lunch, Quick and easy, Salads, Side Dishes, Vegan, Vegetarian Tagged With: apple fennel salad, healthy salad, quick and easy salad, refreshing salad, salad, Salads

    Moroccan Veal Tagine

    December 5, 2018 by Fouzia Husainy 4 Comments

    This is a delicious veal roast slow cooked in a tagine infused with a fragrant mix of exotic moroccan flavourings. The soft baby veal is marinated with the aromatic spice blend Ras el Hanout and other spices then combined with golden raisins, dried yellow apricots, almonds, lemon zest and saffron, then slow cooked in a tagine in the oven for almost an hour.

    Moroccan veal tagine


    The sweetness of the dry fruits with the subtle heat of the red chilli and harissa, the richness of saffron, citrusy lemon zest……………. all these delicious combination of flavours impart a distinct taste to the veal which makes this dish so unique.  I did not have apricots this time so had to manage without it even though I love adding it to the meats. Once the meat gets tenderized the exotic aroma fills the air and you can wait no more coz the tantalizing flavours are irresistibly delicious!

    The Ras el Hanout is a popular spice blend from North Africa though its name is very much associated with Moroccan Cuisine. Like the Indian Garam masala, the Mediterranean “Baharat spice mix”, Ras el Hanout plays a similar role in Moroccan cuisine. In Arabic it means “head of the shop” or “top shelf” and implies a mixture 30 or more of the merchant’s best spices. But some say it could be a mixture of anywhere from 10 – 100 different spices in different proportions.

    It’s authentic recipe is a well guarded secret with the spice merchants of Morocco but it has so many variations and every one of them has their own secret recipe. No two versions of this spice blend are the same, each one having a different flavour combination. The spice merchants hand mix all the exotic ingredients which include rose petals, saffron, cubeb berries, lavender and grains of paradise and many more.

    The Ras el Hanout has a sweet peppery and floral undertone and an overall curry like flavour. It is used in tagines, soups, stews, roasted vegetables and also as a marinade on chicken, meat dishes. It is also excellent in potatoes, rice and couscous and is ideal for moroccan dishes like bastilla.
    Ingredients:
    1 lb baby veal
    2 large garlic cloves ground
    1 tsp harissa powder
    1/4 tsp turmeric powder
    1/2 tsp hot red chilli powder
    1/2 tsp cumin powder
    1 tsp Ras el Hanout (Moroccan spice blend)
    a pinch of saffron
    1/2 tbs golden raisins
    6 dried apricots
    1 tbs fresh lemon juice
    1 tsp lemon zest
    2 tbs Olive oil
    1 tbs butter

    moroccan veal
    Instructions:
    1. Clean, remove the skin and rinse the baby veal and cut into medium sized pieces. Rub salt and lemon juice and set aside.
    veal marinade
    2. Combine together the ground garlic, lemon zest, turmeric, harissa, cumin, and ras el hanout spices and rub them on the veal well. Drizzle some olive oil on it, mix well and let it marinate for around an hour.
    3. Transfer the marinated veal to a glazed tagine  along with golden raisins, almonds, apricots, saffron and lemon zest, add 1/2 a cup of water, cover with the cap lid and bake in the oven preheated at 350º F for 55 minutes. Check after the first 30 minutes, then again after 15 minutes.
    4. Add some more water if the water has dried up and the meat is still not tender. Mine got tender only after 55 minutes and I had to add some more water after 45 minutes as it had dried up.
    5. Add 1 – 2 tbs of unsalted butter switch off the oven and let it sit there for another 5 minutes. It soaks up all the juices in the tagine and is soft, juicy and tender.
    6. The tantalizing aroma from the ras el hanout spices filled the air which signalled me that the meat is ready. It was soft and juicy and irresistibly flavourful. Serve hot with rice, salad or veggies. Enjoy!
    7. I served it with ghee rice, tomato chutney and sautéed green beans. It was an enjoyable meal!

    meal moroccan

    Please Note:
    Some of the links on this post above are affiliate links. We are a participant in the Amazon Services LLC Associates Program, an affiliate advertising program designed to provide a means for us to earn a small commission by linking to Amazon.com and affiliated sites. Should you choose to buy them you could click on these links to go to the respective sites to make your purchase. I would really appreciate if you do that. Thank you.

    Filed Under: Dinner, Eating Healthy, Lunch, Middle Eastern Cuisine, Moroccan Cuisine, Non-Vegetarian, Party food, saffron, Veal Tagged With: Moroccan Veal, Ras el Hanout spice blend, Tagine, Veal roast, Veal Tagine

    Easy Instant Pot Veal Pepper Phaal

    December 3, 2018 by Fouzia Husainy Leave a Comment

    easy instant pot veal pepper phaal

    easy instant pot veal pepper phaal

    Phaal is a traditional South Indian meat dish which is hot and spicy, used to be served in restaurants in South India and seems to have originated in Bangalore or Chennai. I grew up eating this phaal in Chennai with rotis or steamed rice. Eating it with rotis took me back into memory lane which reminded me of my mom’s mutton phaal. My dad loved to eat it with rotis and so do I.
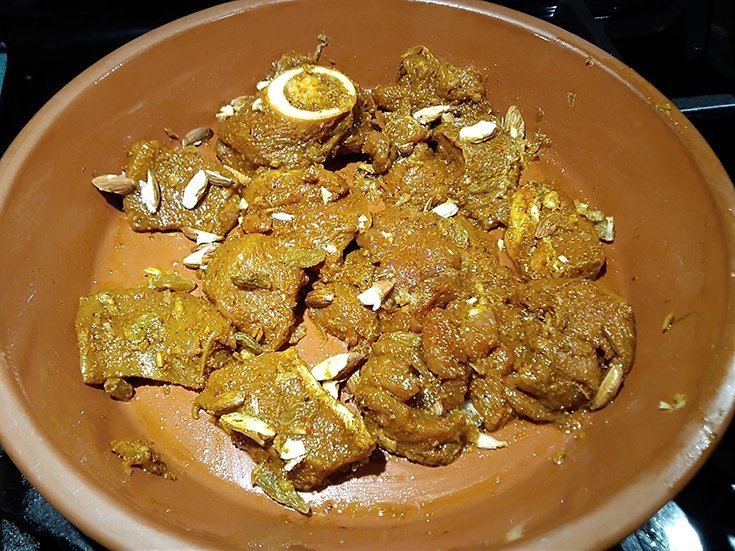
    This is a delicious preparation of baby veal using pepper masala spices in a different combination. It is a variation of the Lamb Pepper Masala which is different in texture and flavour because of the cooking technique even though more or less the same ingredients are used. The meat here is well covered with the ground pepper masala or is rather slathered in the masala as seen in the picture above unlike the Lamb Pepper Masala dish which has light fried masala coating the lamb pieces.

    Ingredients:
    2 lbs baby veal
    4 tbs canola oil
    1/2 tsp turmeric
    1 tsp coriander powder
    1 tsp salt
    For the green masala
    1 medium sized onion or 1/2 cup chopped.
    2 heaped tsp ginger garlic paste
    6 green chillies
    2 sprigs of cilantro (1/2 cup chopped with stems)
    1/2 cup fresh mint leaves
    1 tbs black pepper
    1 tsp cumin seeds
    1 tsp fennel seeds
    4 cloves
    4 green cardamoms
    1×2” cinnamon stick

    Instructions:
    1. To the Instant Pot add the veal, salt, ginger garlic paste, turmeric, coriander powder and 1 cup of water. Close the lid, turn the steam release valve to sealing position. Plug in the Instant Pot, press the “Meat/Stew” button and set the time for 20 minutes.
    2. Meanwhile pulse the dry spices (black pepper, cumin seeds, fennel, cloves, cardamoms and cinnamon stick) in a wet grinder, then add the onion, green chillies, cilantro and fresh mint. Grind everything together to a slightly coarse paste and set aside.
    3. Once the meat is done, allow for NPR (natural pressure release) and open the lid when all the steam is out. Now add the canola oil and the ground green masala to the Instant Pot.
    4. Hit “Cancel” and on sauté mode cook the veal in the green masala till it thickens to the point that it coats the meat well or rather the meat is slathered in the masala.
    5. Switch off the Instant Pot, adjust the salt, sprinkle some ground black pepper and serve hot with steamed rice or rotis (flat bread). It is just so yummy and outrageously delicious!

    Filed Under: Dinner, Holidays, Hot and Spicy, Indian Cuisine, Instant Pot recipes, Main Dishes, Non-Vegetarian, Party food, South Indian Cooking, Traditional Recipes, Veal Tagged With: hara masala goshth, Kali mirch ka goshth, Phaal masala, Veal black Pepper masala phaal, Veal Pepper Phaal

    Instant Pot Lamb Khalia (Tangy Lamb Curry)

    November 30, 2018 by Fouzia Husainy Leave a Comment

    tangy lamb curry

    tangy lamb curry

    This is a hot, spicy and tangy curry deliciously flavoured with aromatic spices and curry leaves. It is a traditional south indian dish originally prepared with mutton (but you could use lamb too) and served with steamed rice and papadums. Though this curry suits warmer climates, still eating it here makes me feel that warmth and reminds me of home. The tangy sweet taste of tamarind with the aromatic whole spices and curry leaves is enough to transport you to a warmer place.

    I used the Instant Pot to make this curry and it was really convenient and easy. You could also use a pressure cooker for stove top if you don’t have the Instant Pot.

    Ingredients:
    2 lbs Lamb with bones
    1/2 large onion sliced
    1 large onion ground
    1 large plum tomato
    1 heaped tsp coriander powder
    1 heaped tsp red chilli powder(deggi mirch)
    1 tsp roasted ground cumin & fenugreek
    25 gm seedless tamarind
    10-15 fresh curry leaves
    1/4 cup chopped cilantro
    1/4 cup canola oil

    Tools I used for this recipe:

    lamb khalia
    Instructions: 
    1. Clean and wash the lamb meat with the bones, drain and set aside.
    2. Switch the Instant Pot on. Heat oil on sauté normal setting and fry the sliced onions to a caramelly brown. Add the onion paste and continue frying till the onion mixture looks evenly browned and not burnt. You can achieve good results by stirring continuously taking care not to let it stick to the bottom of the pot.
    3. Add the ginger garlic paste, deggi mirch, coriander powder and *roasted cumin fenugreek powder (check the notes below on how to make this).
    3. Add the lamb meat, 1 tsp salt and sauté well.
    4. Toss in the deseeded chopped tomatoes and sauté with the lamb. Snip the green chillies with your hands and throw them in too along with some fresh curry leaves and chopped cilantro.
    5. Rinse the tamarind and squeeze it with some water to extract the juice. Repeat the process 2 or 3 times each time adding a little water to extract more juice until nothing is left of the tamarind pulp. Add all the extracted tamarind to the Instant Pot.
    5. Now press the ‘cancel’ button to switch off the sauté setting, then press ‘meat/stew button and set the time for 20 minutes.
    6. When the time is up the IP beeps. Let the pressure release naturally (NPR) which takes another 10 mins at least.
    7. Open the lid and check to see if the meat is tender enough, if not then pressure cook for another 5 minutes(which happens in case of very tough meats.
    8. The sauce may be a little runny. So simmer to reduce the sauce on ‘sauté less’ until the oil comes on top. Throw in a few more fresh curry leaves, 1/4 tsp roasted cumin and some chopped cilantro. Simmer for 2 more minutes and serve hot with some steamed rice and fried Papadums. Enjoy!

    lamb khalia meal

    You may also like:
    Lamb Pepper Masala (in the Instant Pot)
    Red Swiss Chard Curry
    Easy Instant Pot Chicken Korma

    Filed Under: Uncategorized Tagged With: goshth ka khalia, lamb khalia, mutton curry, mutton khalia, tangy lamb curry

    Red Swiss Chard Curry (Indian Style)

    November 27, 2018 by Fouzia Husainy Leave a Comment

    red swiss chard curry
    This is a delicious, tangy aromatic curry made with red swiss chard, yellow lentils and flavourful spices. It is really enjoyable with steamed rice and fried Papadums.

    Ingredients:
    For the curry:
    1 big bunch swiss chard
    1/2 cup yellow lentils (toor dal)
    1/2 tsp cumin seeds
    1/2 tsp turmeric
    1/2 tsp red chilli powder
    1 fat garlic clove
    3- 4 small whole green chillies or as per your spice level
    1 small onion
    1 large tomato
    25 gms tamarind (without seeds)
    salt to taste
    For the tempering:
    2 dried red chillies
    1/2 tsp black mustard seeds
    1/2 tsp cumin seeds
    4 small garlic cloves crushed with the skins
    1/2 a small onion sliced
    6-8 fresh curry leaves
    a pinch of asafoetida
    1 tbs ghee (clarified butter)
    1 tbs canola oil

    Instructions:
    1. Wash the swiss chard thoroughly at least 3 or 4 times to remove all the dirt. Remove the stem from the leaves as it is very fibrous and can be a little bit tough especially at the end. I use the tender part of the stems which are not so fibrous by leaving at least 2-3 inches below the leaves and cut it. Since it is going to be all cooked and blended, it is fine.
    2. To the Instant Pot, add all the ingredients above for the curry except salt and pressure cook on high for 5 minutes. You can do a QPR (quick pressure release) or leave it to NPR (natural pressure release).
    3. When done open the instant pot, let the steam out a bit, remove the green chillies, then using an immersion hand blender, blitz everything to just a little coarse not so smooth mixture.
    4. Add 1 cup of water, add those green chillies back in and let it cook on “sauté less” for 5 – 10 minutes. Taste and adjust the salt as required.
    5. Meanwhile prepare the tempering: 
    a. On medium heat add the ghee and vegetable oil to the tempering pan.
    b. When it is hot enough, throw in the crushed garlic with the skins and as they sizzle in the oil turning golden, drop the mustard seeds and watch them crackle and splutter.
    c. Then immediately toss in the cumin seeds and when they begin to discolour it is time to sizzle the curry leaves (make sure you wipe them dry after washing them).
    d. Add the sliced onions and fry  till they brown (careful not to let them turn black). Then sprinkle the asafoetida and quickly pour everything into the swiss chard curry.
    6. To make it look appealing, you could first pour the curry in the serving bowl and then add the tempering to it just before serving. The aromatic tempering infuses lot of flavour into it making it even more delicious. Enjoy it with steamed plain rice.

    Notes:
    1. For the tempering you could use either ghee or just oil or a both. All the steps should be followed correctly one after the other to get the maximum flavour.
    2. Using garlic with the skins adds more flavour.

    red swiss chard curry

    Recipe

    Red Swiss Chard Curry

    Author: Mamasecretrecipes
    This is a delicious, tangy aromatic curry made with red swiss chard, yellow lentils and flavourful spices. It is really enjoyable with steamed rice and fried Papadums.
    Course curry, Dinner, Eating healthy, Lunch, Quick and Easy
    Cuisine Indian, south indian

    Ingredients
      

    Ingredients:

    For the curry:

    • 1 big bunch swiss chard
    • 1/2 cup yellow lentils toor dal
    • 1/2 tsp cumin seeds
    • 1/2 tsp turmeric
    • 1/2 tsp red chilli powder
    • 1 fat garlic clove
    • 3- 4 small whole green chillies or as per your spice level
    • 1 small onion
    • 1 large tomato
    • 25 gms tamarind without seeds
    • salt to taste

    For the tempering:

    • 2 dried red chillies
    • 1/2 tsp black mustard seeds
    • 1/2 tsp cumin seeds
    • 4 small garlic cloves crushed with the skins
    • 1/2 a small onion sliced
    • 6-8 fresh curry leaves
    • a pinch of asafoetida
    • 1 tbs ghee clarified butter
    • 1 tbs canola oil
    Get Instant Help
    InstacartGet Recipe Ingredients

    Instructions
     

    Instructions:

    • Wash the swiss chard thoroughly at least 3 or 4 times to remove all the dirt. Remove the stem from the leaves as it is very fibrous and can be a little bit tough especially at the end. I use the tender part of the stems which are not so fibrous by leaving at least 2-3 inches below the leaves and cut it. Since it is going to be all cooked and blended, it is fine.
    • To the Instant Pot, add all the ingredients above for the curry except salt and pressure cook on high for 5 minutes. You can do a QPR (quick pressure release) or leave it to NPR (natural pressure release).
    • When done open the instant pot, let the steam out a bit, remove the green chillies, then using an immersion hand blender, blitz everything to just a little coarse not so smooth mixture.
    • Add 1 cup of water, add those green chillies back in and let it cook on "sauté less" for 5 - 10 minutes. Taste and adjust the salt as required.
    • Meanwhile prepare the tempering: 
      a. On medium heat add the ghee and vegetable oil to the tempering pan. 
      b. When it is hot enough, throw in the crushed garlic with the skins and as they sizzle in the oil turning golden, drop the mustard seeds and watch them crackle and splutter.
      c. Then immediately toss in the cumin seeds and when they begin to discolour it is time to sizzle the curry leaves (make sure you wipe them dry after washing them). 
      d. Add the sliced onions and fry  till they brown (careful not to let them turn black). Then sprinkle the asafoetida and quickly pour everything into the swiss chard curry.
    • To make it look appealing, you could first put the curry in the serving bowl as soon as it is ready and add the tempering to it just before serving. The aromatic tempering infuses lot of flavour into it making it even more delicious. Enjoy it with steamed plain rice.
    Print Recipe Pin Recipe Share on Twitter Share on Facebook

    Filed Under: Eating Healthy, Indian Cuisine, Lunch, Side Dishes, South Indian Cooking, Swiss Chard, Vegetarian Tagged With: curry, eating healthy, greens curry, healthy food, Instant Pot Curry, Instant Pot Recipe, quick and easy recipe, red swiss chard, swiss chard curry

    Roasted Butternut Squash Soup

    November 21, 2018 by Fouzia Husainy Leave a Comment

    roasted butternut squash soup

    roasted butternut squash soup
    Such a comforting and hearty soup with a silky smooth texture that you can’t imagine going through fall and winter without eating this soup. The aroma that fills the air when the butternut squash is roasting indulges your appetite with its rich soothing flavours. I cannot stop eating the roasted butternut squash as soon as it comes out of the oven, it is oh, so delicious!

    Butternut Squash – a powerhouse of nutrients!
    That this vegetable is a powerhouse of nutritious goodness is incredibly amazing! Loaded with vitamin A, Vitamin C, potassium, manganese, calcium, beta carotene, etc, it has antioxidant and anti inflammatory properties. It has numerous health benefits because of its rich nutrients such as it helps boost the immune function, improves eyesight, protects the skin, keeps the bones strong, prevents blood pressure, aids in weight loss etc.

    Roasting butternut squash enhances its flavour.
    I prefer to roast the butternut squash to make soup coz the roasting brings out its flavour and enhances the taste. Other than celery and onion I don’t like to add any other vegetable or fruit in the soup coz I want to retain the original flavour and taste of this beautiful delicious vegetable. I have also made minimal use of spices in the soup with just black pepper and red chilli flakes and lightly flavoured it with celery, onion, garlic and chives.

    Another vegetable I love to roast in soups, dips and sauces is the red pepper which gives a unique flavour of its own to whatever it is added to. It pairs well with the tomato and makes the soup taste awesome. This roasted pear pepper soup made with roasted red peppers, tomatoes and pears with a hint of paprika and other spices is an amazing combination of flavours which you should give a try.
    roasted butternut squash soup

    Ingredients
    1 x 2 lbs butternut squash (small size)
    2 tbs unsalted butter
    1 large onion sliced
    2 cloves of garlic
    2 cups of chicken broth
    1 long celery stick
    1/2 red chilli pepper flakes
    1/2 tsp chives fresh or dried
    1/2 cup milk
    1/4 cup whipping cream (35/%)
    1/2 tsp black pepper ground


    Roasted butternut squash

    Instructions:
    1. Wash, dry and cut the butternut squash into two halves, scoop out the seeds and the stringy pulp using a table spoon. Brush the inside with melted butter, place it flat on a cookie sheet and bake in the center of an oven preheated to 400°F for 30 – 35 minutes or till it gets nicely roasted and you get a whiff of the . Remove from the oven and let it cool.
    2. Slice the onion and celery, crush and chop the garlic. Melt the butter in a pot on medium heat, add the sliced onion and celery and fry in the butter till it starts to change colour a bit. Add the chopped garlic, salt, black pepper followed by 1/2 a cup of chicken broth and cook till the onion and celery get softened.
    3. Peel the roasted butternut squash, cut it into dices and toss them in the pot. Add the remaining chicken broth and with an hand held immersion blender, blend everything to a smooth consistency.
    4. Add the milk, whipping cream (keep aside 2 tsp), mix well, turn down the heat and let the soup simmer in the pot for 10 minutes. Meanwhile taste the soup and adjust the salt to your desired taste.
    5. Serve the soup in bowls with a blob of unsalted butter and drizzle the 2 teaspoons of cream on the top in a pattern. Sprinkle the chives and pepper flakes and enjoy with buns or dinner rolls.

    roasted butternut squash soup

    Recipe

    Roasted Butternut Squash Soup

    Author: Mamasecretrecipes
    Such a comforting and hearty soup with a silky smooth texture that you can't imagine going through fall and winter without eating this soup. The aroma that fills the air when the butternut squash is roasting indulges your appetite with its rich soothing flavours. I cannot stop eating the roasted butternut squash as soon as it comes out of the oven, it is oh, so delicious!
    Course Soup, supper, Vegetarian
    Cuisine Canadian Cuisine

    Ingredients
      

    Ingredients:

    • 1 x 2 lbs butternut squash small size
    • 2 tbs unsalted butter
    • 1 large onion sliced
    • 2 cloves of garlic
    • 2 cups of chicken broth
    • 1 long celery stick
    • 1/2 red chilli pepper flakes
    • 1/2 tsp chives fresh or dried
    • 1/2 cup milk
    • 1/4 cup whipping cream 35/%
    • 1/2 tsp black pepper ground
    Get Instant Help
    InstacartGet Recipe Ingredients

    Instructions
     

    Instructions:

    • Wash, dry and cut the butternut squash into two halves, scoop out the seeds and the stringy pulp using a table spoon. Brush the inside with melted butter, place it flat on a cookie sheet and bake in the center of an oven preheated to 400°F for 30 - 35 minutes or till it gets nicely roasted and you get a whiff of the . Remove from the oven and let it cool.
    • Slice the onion and celery, crush and chop the garlic. Melt the butter in a pot on medium heat, add the sliced onion and celery and fry in the butter till it starts to change colour a bit. Add the chopped garlic, salt, black pepper followed by 1/2 a cup of chicken broth and cook till the onion and celery get softened.
    • Peel the roasted butternut squash, cut it into dices and toss them in the pot. Add the remaining chicken broth and with an hand held immersion blender, blend everything to a smooth consistency.
    • Add the milk, whipping cream (keep aside 2 tsp), mix well, turn down the heat and let the soup simmer in the pot for 10 minutes. Meanwhile taste the soup and adjust the salt to your desired taste.
    • Serve the soup in bowls with a blob of unsalted butter and drizzle the 2 teaspoons of cream on the top in a pattern. Sprinkle the chives and pepper flakes and enjoy with buns or dinner rolls.
    Print Recipe Pin Recipe Share on Twitter Share on Facebook

    roasted butternut squash soup

    You may also like:

    creamy potato leek soup

    Creamy Leek and Potato Soup

    croissant buns stuffed with olive tuna harissa filing

    stuffed croissant buns

    eggplant egg sandwich

    Eggplant Egg Sandwich

    braided pastry logs

    Braided Beef Pastry Logs

    Filed Under: Butternut squash, Canadian Cuisine, Lunch, Quick and easy, Side Dishes, Soups Tagged With: butternut squash soup, comforting soup, eating healthy, healthy soup, soup, soups, winter squash soup

    • « Go to Previous Page
    • Page 1
    • Page 2
    • Page 3
    • Page 4
    • Page 5
    • Interim pages omitted …
    • Page 18
    • Go to Next Page »

    Footer

    ↑ back to top

    About

    • Privacy Policy
    • Disclaimer

    Newsletter

    • Sign Up! for emails and updates

    Contact

    • Contact me

    COPYRIGHT © 2021 MAMA'S SECRET RECIPES