
• Skip to primary navigation
  • Skip to main content
Mamas Secret Recipes
  • About Me
    • Food Info
  • Blog
  • Recipes
  • Videos
  • Contact Me
  • Navigation Menu: Social Icons

    • Facebook
    • Instagram
    • Pinterest
    • Twitter
    • YouTube
menu icon
go to homepage
subscribe
search icon
Homepage link
  • About Me
  • Blog
  • Recipes
  • Videos
  • Food Info
  • Contact Me
    • Bloglovin
    • Facebook
    • Instagram
    • Pinterest
    • Twitter
    • YouTube
  • ×

    Easy Moong Dal Lentil Halwa

    February 24, 2020 by Fouzia 5 Comments

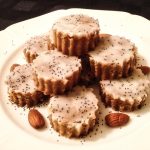
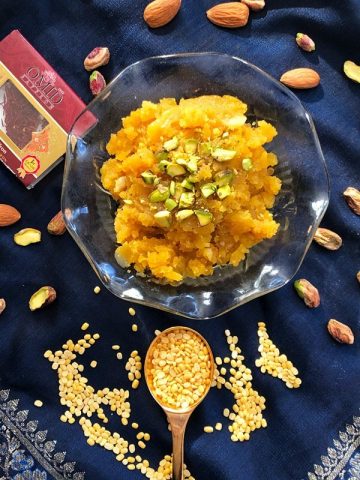
    Moong Halwa

    moong dal halwa poster

    This rich tasting delicious moong dal halwa is a warm Indian dessert or sweet treat that is believed to have originated in the city of Rajasthan in India. It has a golden hue and a shiny glaze of ghee topped with nuts and is mostly enjoyed during the winter months to keep warm against the bitter cold weather.

    It is made with split yellow moong lentils, sugar and ghee. Sometimes milk or khoya is added to make it more rich. The traditional recipe involves a laborious process of cooking the moong lentil paste in ghee on low heat by stirring continuously for long hours till it loses its raw smell and turns aromatic.

    Here I’ve tried to simplify the traditional recipe (to save time and labour) by first roasting the moong lentils in ghee instead of the ground dal paste. Therefore I didn’t have to cook the paste so much after grinding the roasted dal. This quickened the whole process and the halwa was ready in no time and tasting as delicious!

    Moong Halwa


    Ingredients:
    1/2 cup Yellow split moong dal lentils
    1 cup organic sugar
    1/2 cup ghee plus more
    1/2 cup whole milk or evaporated milk
    A pinch of saffron
    1 tbs pistachios
    1 tbs almonds
    1/4 tsp green cardamom powder

    Instructions:

    1. Wash the moong dal 3 or 4 times till the water runs clear. Soak it for at least 1/2 an hour. Drain well in a strainer and set aside.

    2. Add half the ghee to a non stick sauce pan or wok and roast the washed moong dal lentils. At first they would stick to the pan a bit because they are wet. Keep stirring till the raw smell goes away and you get a whiff of the aroma of roasting dal. At this stage when they are lightly golden, switch off the stove remove and set aside to cool.

    3. Grind the lentils in a grinder or Vitamix blender with milk and sugar to a not too coarse or fine paste. It’s nice to have them slightly grainy.

    4. Add the remaining ghee to the wok and cook the ground lentil paste on medium low heat while stirring continuously so it doesn’t brown at the bottom.

    5. Meanwhile take a pinch of saffron threads and dissolve them in milk. You could first crush them using the mortar and pestle before adding milk to get a concentrated saffron extract.

    6. When the lentil paste thickens and starts leaving the sides, lower the heat and add the saffron extract and the cardamom powder. Mix it well and continue stirring. Add some more ghee around the sides and keep cooking till it thickens and starts oozing out the ghee without sticking to the pan anymore. At this stage remove from the stove and leave it to cool.

    7. Blanch the almonds and pistachios. You could either slice them, pound or chop coarsely.

    8. Serve the moong lentil halwa  warm in a bowl or plate garnished with almonds and pistachios. Enjoy as a dessert after meals. It tastes good with roti or flat breads too. So delicious!

    Notes:
    1. It is better to use soaked moong dal as it softens faster.
    2. The halwa has to be cooked on low to medium low heat through out to get an even, smooth and light texture. High heat will burn the halwa quickly and there would be brown spots all over which will give it a burnt taste.
    3. You could adjust the ghee and sugar according to your taste and requirement. But if the bliss point is not reached then it cannot be enjoyed as it is meant to be.

    You may also like:

    Dum ka rote halwa

    Dum Ka Rote Halwa

    Anday ki Mithai

    Shahi Egg Sweet (Andey Ki Mithai)

    banana halwa cake

    Banana Halwa Cake


    Recipe

    Easy Moong Dal Lentil Halwa

    Author: Fouzia
    Course Dessert, indian dessert
    Cuisine indian cuisine, North Indian

    Equipment

    • Equipment:
    • Non Stick sauce pan & Silicon spatula

    Ingredients
      

    • Ingredients:
    • 1/2 cup Yellow split moong dal lentils
    • 1 cup organic sugar
    • 1/2 cup ghee plus more
    • 1/2 cup whole milk or evaporated milk
    • A pinch of saffron
    • 1 tbs pistachios
    • 1 tbs almonds
    • 1/4 tsp green cardamom powder
    Get Instant Help
    InstacartGet Recipe Ingredients

    Instructions
     

    • Instructions:
    • Wash the moong dal 3 or 4 times till the water runs clear. Soak it for at least 1/2 an hour. Drain well in a strainer and set aside.
    • Add half the ghee to a non stick sauce pan or wok and roast the washed moon dal lentils. At first they would stick to the pan a bit because they are wet. Keep stirring till the raw smell goes away and you get a whiff of the aroma of roasting dal. At this stage when they are lightly golden, switch off the stove remove and set aside to cool.
    • Grind the lentils in a grinder or Vitamix blender with milk and sugar to a not too coarse or fine paste. It's nice to have them slightly grainy.
    • Add the remaining ghee to the wok and cook the ground lentil paste on medium low heat while stirring continuously so it doesn't brown at the bottom.
    • Meanwhile take a pinch of saffron threads and dissolve them in milk. You could first crush them using the mortar and pestle before adding milk to get a concentrated saffron extract.
    • When the lentil paste thickens and starts leaving the sides, lower the heat and add the saffron extract and cardamom powder. Mix it well and continue stirring. Add some more ghee around the sides and keep cooking till it thickens and starts oozing out the ghee without sticking to the pan anymore. At this stage remove from the stove and leave it to cool.7. Blanch the almonds and pistachios, pound or chop coarsely.
    • Serve the moong lentil halwa  warm in a bowl or plate garnished with almonds and pistachios. Enjoy as a dessert after meals. It tastes good with roti or flat breads too.

    Notes

    Notes:
    1. It is better to use soaked moong dal as it softens faster.
    2. The halwa has to be cooked on low to medium low heat through out to get an even, smooth and light texture. High heat will burn the halwa quickly and there would be brown spots all over which will give it a burnt taste.
    Print Recipe Pin Recipe Share on Twitter Share on Facebook

    Amazon affiliate links:
    We are a participant in the Amazon Services LLC Associates Program, an affiliate advertising program designed to provide a means for sites to earn advertising fees by advertising and linking to Amazon.com. And as an amazon associate I earn from the qualifying purchases.

    Some of the products displayed on this page above may have trackable links to the amazon website.These are affiliate links and if you click on them and purchase something, I may receive a small commission from the sale, but at no additional charges to you. This income helps us in maintaining and keeping our blog up to date. Thanks so much for your support.

    Filed Under: Almonds, Desserts, Holidays, Indian Cuisine, Middle Eastern Cuisine, North Indian Cooking, Party food, Pistachios, Ramadan meals, Traditional Recipes, Vegetarian Tagged With: golden halwa, Lentil halwa, moong dal halwa, yellow lentil halwa

    Tuna Cutlets, Easy and Kid Friendly!

    February 17, 2020 by Fouzia Leave a Comment

    tuna cutlets

    tuna cutlets poster

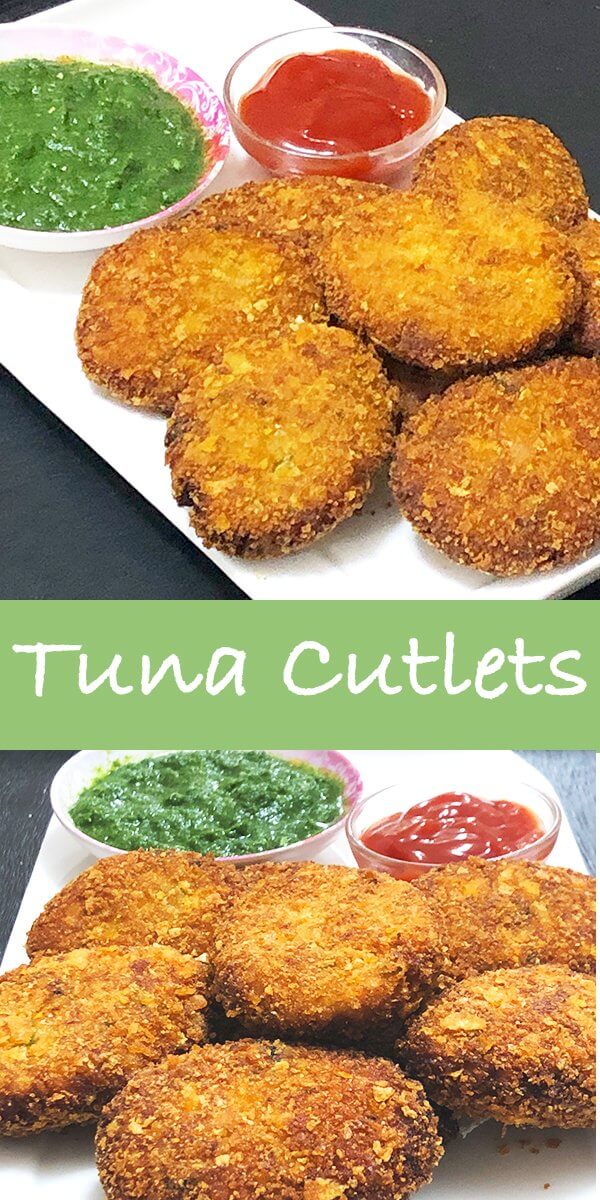
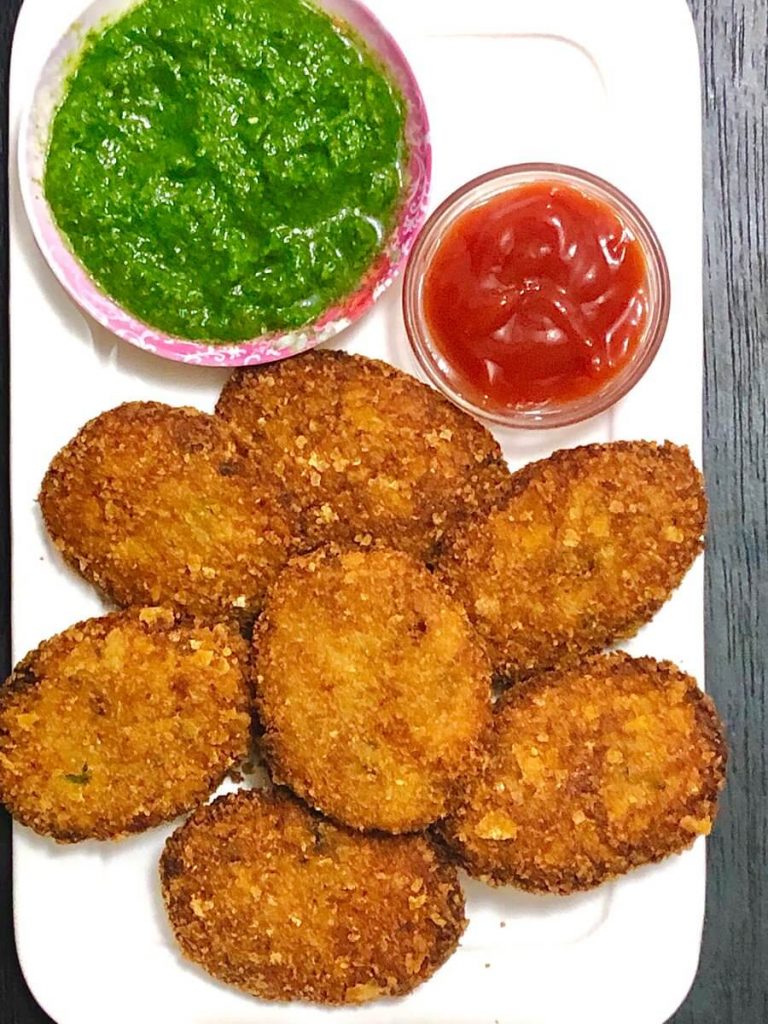
    So crispy, tasty and delicious, these Tuna Cutlets make a great evening snack with tea!  They are mildly spiced but full of flavour and taste, therefore kids love them.  You could even have them as a side for lunch or dinner.

    They are a lifesaver on days when you run out of groceries or don’t know what to cook. As a meal with some salad and rice or as a snack with mint chutney or ketchup, they disappear from the table just like that!

    This is a quick and easy, gluten free and kid friendly recipe ideal for family gatherings, parties and events like Super Bowl, Grey Cup etc.

    In the spicy version lightly fried onions mixed with spices are added to the rest of the ingredients.  These are also very tasty and flavourful though a little spicy.

    Watch the complete video below for complete step by step instructions:

    Ingredients:
    4 cans of tuna in water
    4 medium large potatoes boiled and cooled
    4 medium large onions
    6 tbs yellow corn flour
    4-6 green chillies
    1 cup chopped cilantro
    1 tsp black pepper
    pink himalayan salt as required
    2 eggs beaten
    1 cup white bread crumbs
    1 cup Panko crumbs
    1 cup + canola oil

    tuna cutlets

    Instructions:
    1. Grate the boiled and cooled potatoes and keep them ready.
    2. Finely chop the onions, green chillies and cilantro.
    3. Open the tuna cans, drain the water and set aside
    4. Take a bowl add all the above ingredients to it (tuna, boiled grated chopped onions, green chillies, cilantro, salt, black pepper and corn flour). Crush the onions with the salt and green chillies, then slowly combine the rest of the ingredients and mix well.
    5. Make the cutlets in your desired shape and size. I usually make them in ovals and medium size.
    6. Keep the bread crumbs and the beaten egg ready in two separate bowls.
    7. Dip the cutlets one at a time first in the beaten egg and then coat them with the bread crumbs. Repeat the process for all of them and set aside.
    8. Meanwhile heat the oil enough to deep fry them in a Stainless Steel Skillet
    9. Deep fry them on medium heat until golden brown by turning them over from time to time so they don’t get burnt.
    10. Drain them completely on the side of the pan and place on paper towels. Serve them hot with mint chutney and tomato ketchup and enjoy with tea or as a side with your meals.

    Notes:
    You can use either Japanese Panko Bread Crumbs or regular bread crumbs. Sometimes I mix crushed cornflakes and bread crumbs to make them more crunchy as you can see in the pictures above.

    Amazon affiliate links:
    We are a participant in the Amazon Services LLC Associates Program, an affiliate advertising program designed to provide a means for sites to earn advertising fees by advertising and linking to Amazon.com. And as an amazon associate I earn from the qualifying purchases.

    Some of the products displayed on this page above may have trackable links to the amazon website.These are affiliate links and if you click on them and purchase something, I may receive a small commission from the sale, but at no additional charges to you. This income helps us in maintaining and keeping our blog up to date. Thanks so much for your support.

    Recipe

    Tuna Cutlets, Easy and Kid Friendly!

    Author: Fouzia
    These Tuna Cutlets are yummy and delicious! A great evening snack with tea - crispy, tasty and Kid friendly - Kids love them as they are mildly spiced but full of flavour and taste.
    Course Appetizer, Non Vegetarian side dish, Side Dish, Snack
    Cuisine Indian

    Equipment

    • stainless steel or cast iron skillet, bowl, spatula, paper towels
    • Dutch oven
    • Stainless steel Skillet
    • Heat proof mitts or gloves

    Ingredients
      

    • Ingredients:
    • 4 cans of tuna in water
    • 4 medium large potatoes boiled and cooled
    • 4 medium large onions
    • 6 tbs yellow corn flour
    • 4-6 green chillies
    • 1 cup chopped cilantro
    • 1 tsp black pepper
    • pink himalayan salt as required
    • 2 eggs beaten
    • 1 cup white bread crumbs
    • 1 cup Panko crumbs / regular breadcrumbs
    • 1 cup + canola oil
    Get Instant Help
    InstacartGet Recipe Ingredients

    Instructions
     

    • Instructions:
    • Grate the boiled and cooled potatoes and keep them ready.
    • Finely chop the onions, green chillies and cilantro.
    • Open the tuna cans, drain the water and set aside
    • Take a bowl add all the above ingredients to it (tuna, boiled grated potatoes, chopped onions, green chillies, cilantro, salt, black pepper and corn flour). Crush the onions with the salt and green chillies, then slowly combine the rest of the ingredients and mix well.
    • Make the cutlets in your desired shape and size. I usually make them in ovals and medium size.
    • Keep the bread crumbs and the beaten egg ready in two separate bowls.
    • Dip the cutlets one at a time first in the beaten egg and then coat them with the bread crumbs. Repeat the process for all of them and set aside.
    • Meanwhile heat the oil enough to deep fry them in a stainless steel skillet.
    • Deep fry them on medium heat until golden brown by turning them over from time to time so they don't get burnt.
    • Drain them completely on the side of the pan and place on paper towels. Serve them hot with mint chutney and tomato ketchup and enjoy with tea or as a side with your meals.

    Notes

    Notes:
    You can use either panko crumbs or regular bread crumbs. Sometimes I mix crushed cornflakes and bread crumbs to make them more crunchy as you can see in the pictures above.
    Print Recipe Pin Recipe Share on Twitter Share on Facebook

    You may also like:

    paneer croquettes

    stuffed paneer croquettes

    Baked Nipattu

    fried shrimp kofte

    Fried shrimp kofte

    stuffed chilli bhajji


    Filed Under: Appetizers, Gluten Free, Indian Cuisine, Non-Vegetarian, Quick and easy, Side Dishes, South Indian Cooking, Super Bowl Snacks, Traditional Recipes, Tuna Tagged With: Fish cutlets, tuna croquettes, tuna cutlets, tuna patties

    Chana Masala, Restaurant style

    February 13, 2020 by Fouzia Leave a Comment

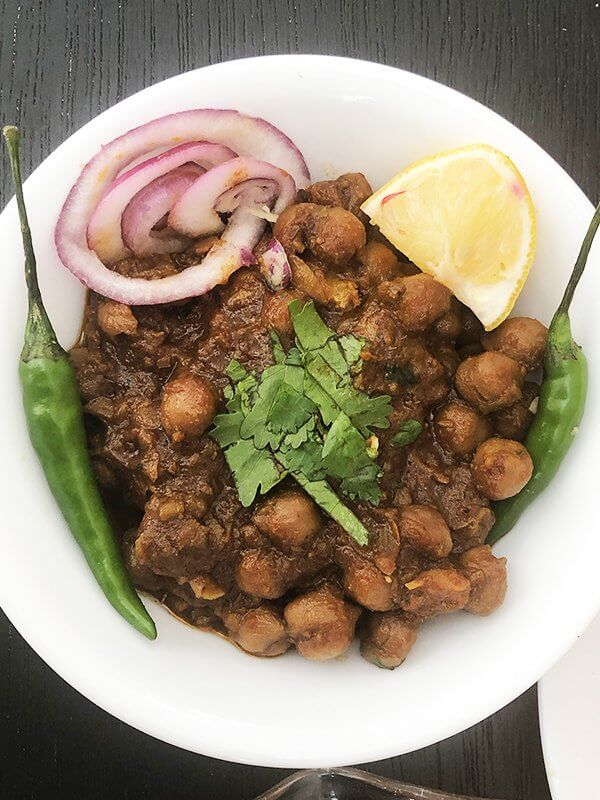
    chana masala

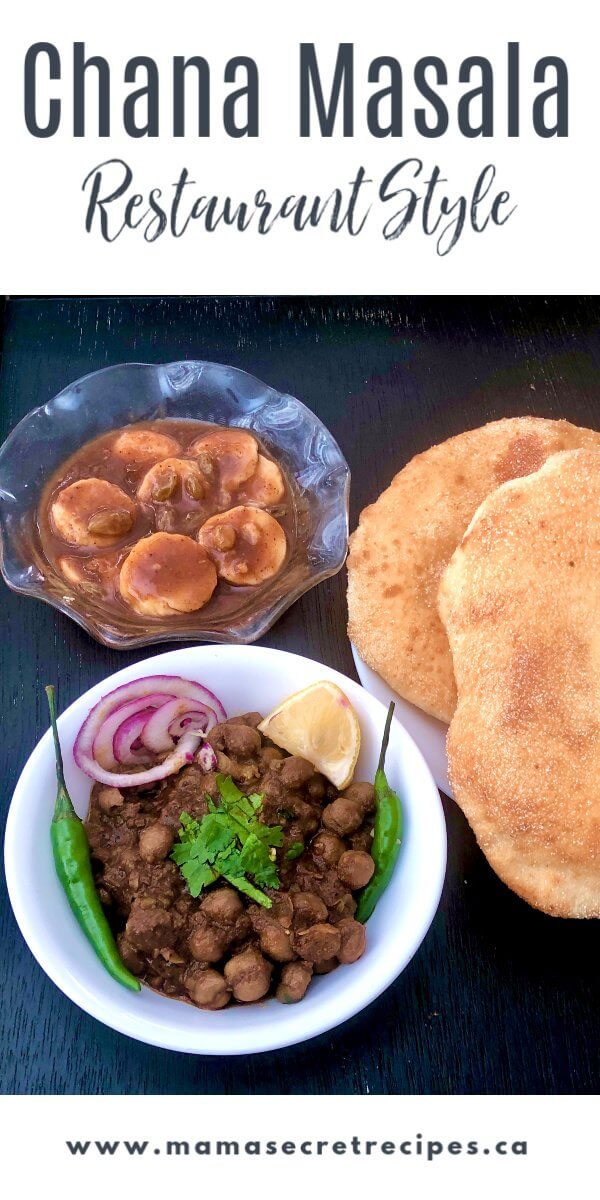
    This chana masala is one of the best chana masalas I have made so far. The aromatic flavour, the soft & juicy texture of the chanas and the delicious taste pushed it up to the next level.

    chana masala

    I have been making chana masala for so many years, but have not been actually satisfied with its taste, texture and flavour which kept me wondering why doesn’t it taste like it does at some of the restaurants in India? I tried different recipes even some using store bought chana masala powders but it didn’t help at all.

    Finally after so many trials and some tips from Chef Ranveer Brar and my own cooking experience helped me get that taste, flavour and texture at last. Isn’t that true that trial always makes things perfect?

    The sweet and sour banana chutney paired well with the chana masala and both together with the bhaturas made a tantalizing mouth watering meal! I could not wait to take pictures, it was so tempting that we had to sit down to eat it first. What you see in the pictures are the left overs.

    banana chutney

    Here’s the recipe:

    Ingredients:
    1/2 cup white chick peas
    1 black tea bag
    1 medium size onion sliced
    2 medium size ripe plum tomatoes chopped
    2 green chillies slit and deseeded
    1 inch ginger, 1 large garlic clove
    1 big black cardamom
    3-4 green cardamoms
    3-4 cloves
    1/2 inch cinnamon
    2 small bay leaves
    1/2 tsp mace
    1/4 tsp nutmeg
    1 tsp cumin seeds
    1/2 tsp red chilli powder
    1/2 tsp turmeric powder
    1 tsp coriander powder
    1/4 cup canola oil
    1 tbs mustard oil
    1 tsp pomegranate molasses or dried pomegranate seeds finely ground.
    fresh cilantro to garnish

    For the bouquet garni:
    1 bay leaf
    1 black cardamom
    1 dried red chilli
    1/2 tsp cumin
    1/2″ cinnamon stick

    Onion Kachumbar salad
    1 red onion finely chopped
    1/2″ ginger finely chopped
    2 tbs lemon juice or white vinegar
    1 small green chilli chopped

    chana masala

    Instructions:
    1. Soak the chick peas overnight. Do not throw the water. Slice the onion, chop the tomatoes, crush the ginger and garlic in a mortar and pestle.
    2. Place the soaked chick peas with the soaked water and the “bouquet garni” in the Instant Pot and cook till soft but not mushy. You could slow cook the chick peas for up to 4 hours in the Instant pot or pressure cook in it for 15 – 20 minutes.
    3. Meanwhile add the whole garam masala spices (black cardamom, green cardamoms, cloves, mace, nutmeg, bay leaves and cumin seeds) to medium hot oil in a sauce pan. After 10 seconds remove them with the help of a tea strainer. Grind them in a mortar and pestle and set aside.
    4. Now throw in the crushed ginger garlic and once it starts leaving an aroma toss in the sliced onion. Fry till translucent, then add the turmeric, red chilli, coriander powders and 3/4th of the ground garam masala. Retain the 1/4 part to flavour in the end. Turn over on medium heat till you get a toasty aroma of the spice blend. Immediately add the chopped tomatoes and cilantro.
    5. Add the slit green chillies, cilantro leave on simmer till the tomatoes become soft and mushy. Add a little water if too thick.
    6. Once the chick peas are done, do a NPR, open the lid and transfer the prepared masala to the Instant Pot with the cooked chick peas. Mix together and let it simmer till the water gets absorbed and the oil from the bottom rises on top.
    7. As a finishing touch sprinkle the remaining fresh ground garam masala on top, drizzle 1 tbs mustard oil and lastly the pomegranate molasses. Taste and adjust the salt to bliss point. Serve hot garnished with chopped fresh cilantro with onion kachumbar, banana chutney and fried Bhaturas.
    8. Finely chop the red onion, ginger and green chillies. Mix them together with salt and lemon juice. Serve a ladle of chana masala, top it with onion kachumbar and enjoy this delectable meal with deep fried bhaturas or oven baked kulchas.

    Tips to remember when you make chana masala:

    1. Soak the chick peas overnight. Do not throw away the soaked water.
    2. Slow cook the chick peas with a tea bag for up to 4 hours or till they are just soft (neither too mushy that they are falling apart, nor so hard that you can’t press them without resistance.
    3. Using crushed ginger and garlic instead of a paste enhances the flavours
    4. Adding freshly ground garam masala as a finishing touch also adds more flavour.

    Recipe

    Perfect Chana Masala (Restaurant Style)

    Author: Fouzia
    This chana masala is one of the best chana masalas I have made so far. It's aromatic flavour, soft and juicy texture of the Chanas (chick peas) which were perfectly boiled but not mushy, and the delicious taste pushed it up to the next level.
    Course Dinner, Lunch, Main Dish, Traditional, Vegetarian
    Cuisine indian cuisine

    Equipment

    • Instant Pot
    • Dutch oven
    • Sauce pan

    Ingredients
      

    Ingredients:

    • 1/2 cup white chick peas
    • 1 black tea bag
    • 1 medium size onion sliced
    • 2 medium size ripe plum tomatoes chopped
    • 2 green chillies slit and deseeded
    • 1 inch ginger 1 large garlic clove
    • 3-4 cloves
    • 3-4 green cardamoms
    • 1/2 inch cinnamon
    • 1 big black cardamom
    • 2 small bay leaves
    • 1/2 tsp mace
    • 1/4 tsp nutmeg
    • 1 tsp cumin seeds
    • 1/2 tsp red chilli powder
    • 1/2 tsp turmeric powder
    • 1 tsp coriander powder
    • 1/4 cup canola oil
    • 1 tbs mustard oil
    • 1 tsp pomegranate molasses or dried pomegranate seeds finely ground.
    • fresh cilantro to garnish

    For the bouquet garni:

    • 1 bay leaf
    • 1 black cardamom
    • 1 dried red chilli
    • 1/2 tsp cumin
    • 1/2 " cinnamon stick

    Onion Kachumbar Salad

    • 1 red onion finely chopped
    • 1/2 " ginger finely chopped
    • 2 tbs lemon juice or white vinegar
    • 1 small green chilli chopped
    Get Instant Help
    InstacartGet Recipe Ingredients

    Instructions
     

    • Soak the chick peas overnight. Do not throw the water. Slice the onion, chop the tomatoes, crush the ginger and garlic in a mortar and pestle.
    • Place the soaked chick peas with the soaked water and the "bouquet garni" in the Instant Pot and cook till soft but not mushy. You could slow cook the chick peas for up to 4 hours in the Instant pot or pressure cook in it for 15 - 20 minutes.
    • Meanwhile add the whole garam masala spices (black cardamom, green cardamoms, cloves, mace, nutmeg and cumin seeds) to medium hot oil in a sauce pan. After 10 seconds remove them with the help of a tea strainer. Grind them in a mortar and pestle and set aside.
    • Now throw in the crushed ginger garlic and once it starts leaving an aroma toss in the sliced onion. Fry till translucent, then add the turmeric, red chilli, coriander powders and 3/4th of the ground garam masala. Retain the 1/4 part to flavour in the end. Turn over on medium heat till you get a toasty aroma of the spice blend. Immediately add the chopped tomatoes and cilantro.
    • Add the slit green chillies, cilantro leave on simmer till the tomatoes become soft and mushy. Add a little water if too thick.
    • Once the chick peas are done, do a NPR, open the lid and transfer the prepared masala to the Instant Pot with the cooked chick peas. Mix together and let it simmer till the water gets absorbed and the oil from the bottom rises on top.
    • As a finishing touch sprinkle the remaining fresh ground garam masala on top, drizzle 1 tbs mustard oil and lastly the pomegranate molasses. Taste and adjust the salt to bliss point. Serve hot garnished with chopped fresh cilantro with onion kachumbar, banana chutney and fried Bhaturas.
    • Finely chop the red onion, ginger and green chillies. Crush them together using your fingers with salt and lemon juice. Serve a ladle of chana masala, top it with the prepared onion kachumbar another spoonful of the banana chutney and enjoy this delectable meal with deep fried bhaturas or oven baked kulchas. This combination is sure to tantalize your taste buds and you cannot stop eating mouthful after mouthful and relishing its taste. So heavenly!

    Notes

    Tips to remember when you make chana masala:
    1. Soak the chick peas overnight. Do not throw away the soaked water.
    2. Slow cook the chick peas with a tea bag for up to 4 hours or till they are just soft (neither too mushy that they are falling apart, nor so hard that you can't press them without resistance.
    3. Using crushed ginger and garlic instead of a paste enhances the flavours
    4. Adding freshly ground garam masala as a finishing touch also adds more flavour.
    Print Recipe Pin Recipe Share on Twitter Share on Facebook

    You may also like:

    Crispy Appam

    egg tomato curry

    Filed Under: Brunch, Chickpeas, Indian Cuisine, Lunch, North Indian Cooking Tagged With: amristsari chana, chana batura, chana masala, chickpea masala, choley masaledar, kele ki chutney, pindi choley, restaurant style chole

    Easy Shrimp Biryani, Nawabi Style!

    December 10, 2019 by Fouzia Leave a Comment

    shrimp biryani

    This delicious shrimp biryani prepared in the traditional South Indian Nawabi style, is a a quick one pot dish full of flavour and taste that is unique and loved by everyone.

    Biryani, a one pot dish
    Biryani is not a complicated dish with a whole array of innumerable spices and other ingredients put together and an elaborate process as some people may tend to think. . But it is a one pot dish which involves a special technique, a specific proportion and some specific spices which enhance the flavours rather than overpower the main ingredient of the dish.

    How is Biryani made?
    Biryani is a rice dish that is prepared with meat, chicken, shrimp/prawns or vegetables. The Biryani cooked in Chennai/Madras among the South Indian muslim community is well known for its great, unique flavour and taste. It is the city that lies in the southern most part of India, the city where the Nawabs once lived and ruled and were famous for their lavish eating habits and their royal kitchens where many delicious dishes were created……. therefore it is from here it mush have originated.

    Biryani’s unique flavour and subtle taste
    It has this unique flavour and subtle taste because it is not overpowered with spices and minimal ingredients are used but in their right proportions in order to retain and preserve the taste of meat, whether it is chicken, lamb, veal, fish or shrimp or vegetables.

    Why is Chennai Biryani so unique and delicious?
    We do not mix up flavours like adding chicken stock to shrimp or vegetable biryani etc. The idea is to retain the taste of the meat you are cooking with and letting the rice cook in its juices so it absorbs the flavour of the meat. It is this concept underlying the cooking technique that imparts a remarkable flavour and taste to our biryani. We keep it simple but great tasting!

    How is Shrimp biryani made in Chennai Style?
    In this Shrimp Biryani we let the shrimp simmer in the curry for a few minutes enough for it to release all the shrimp flavour. There is no need to marinate the shrimp before hand or to sauté and remove them only to add them in the end before serving because it would take away all the flavour. Therefore the shrimp should be left to cook in the curry in their own juices. When the rice is layered on top of the shrimp curry it absorbs all the shrimp flavour and tastes divine. And one more important thing is a big “No” to adding chicken stock to the shrimp curry. It does not help at all in any way and only wrecks the flavour and taste. Watch the video below and try the following recipe step by step exactly and let me know in the comments below what you think.

    Ingredients: 
    25 Raw Jumbo Shrimps
    1 1/2 cups of Tilda Basmati Rice
    1 x 2″ cinnamon stick
    6 cloves
    6 cardamoms
    1/2 tsp turmeric
    1/2 tsp red chilli powder
    1 1/2 large onions sliced
    6-8 green chillies
    1 tbs ginger garlic paste
    2 medium sized ripe plum tomatoes
    1/4 cup yoghurt
    1/4 cup olive or canola oil
    a pinch of saffron
    1 sprig of cilantro
    a few fresh mint leaves
    salt as per requirement

    Instructions:

    1. Devein, clean and wash the shrimp 3 or 4 times in clean water. Set them aside. Wash Basmati rice lightly 4 or 5 times till the water runs clear and let it soak for at least 20 minutes. Do not break the rice while washing.
    2. Heat oil in a pot. Throw in the whole spices followed by the sliced onions. Fry the onions till golden brown.
    3. Add ginger garlic paste and turmeric powder. Stir fry lightly to let the raw smell go. Add tomatoes and salt. Cover and cook to soften them a bit for 2 minutes.
    4. Moisten the the onion tomato masala with a little water if it is too dry. Then toss in yogurt followed by green chillies, shrimp, salt, a few fresh mint leaves & chopped cilantro. Stir gently to mix everything well.
    5. Cover and let it simmer. After 2 minutes stir again gently so the masala doesn’t stick to the bottom of the pot. Then cover and simmer again for 4 more minutes till the oil has risen to the top.
    6. Meanwhile bring the water to boil in another po. Add the soaked basmati rice, salt and stir to mix well.
    7. Check the rice after one or two boils. When it is 75% cooked, switch off the stove and drain the rice in a strainer or colander.
    8. Immediately put the rice over the shrimp curry in the pot. Top the rice with some fresh mint leaves, chopped cilantro. Drizzle some *saffron water all over the rice.
    9. Then cover the pot and place it in the oven preheated at 400ºF for 10 minutes.
    10. When done, rest the biryani pot for 5 minutes on the counter to let all the juices get absorbed by the rice. Then mix the rice gently by sliding in the flat spatula from the sides and turning it over so that the curry at the bottom gets mixed up with the rice.
    11. You could also place it in the hot oven (which is switched off) for 5 minutes just to keep it hot before serving.
    12. Enjoy the shrimp biryani with yogurt and mint chutney.

    *saffron water – Crush a few strands of saffron in a mortar and pestle. Pour 1 tbs of hot water over it, then crush the saffron more with the pestle and mix it with the water well. This will give you a beautiful orange coloured saffron solution to use in the biryani.

    Notes:

    1. Following all the steps exactly will give you the best results.
    2. Using fresh ginger garlic paste and ripe plum tomatoes gives the best flavour.
    3. You could also steam it on the stove, but using a thick bottommed pan is recommended.
    4. Do not add water after adding shrimp. This will make the curry runny and cooking the shrimp for a long time in order to reduce the curry will actually toughen them up.
    5. Using fresh and big size shrimp enhances the flavour of the biryani.

    Recipe

    shrimp biryani

    Easy Shrimp Biryani, Nawabi Style!

    Author: Fouzia
    This delicious shrimp biryani prepared in the traditional south indian nawabi style is a a quick one pot dish full of flavour and taste that is unique and loved by everyone.
    Course Dinner
    Cuisine Indian Cooking, indian cuisine, South Indian muslim Cuisine

    Equipment

    • Cooking Pot and Roaster

    Ingredients
      

    • 25 Raw Jumbo Shrimps
    • 1 1/2 cups of Tilda Basmati Rice
    • 1 x 2" cinnamon stick
    • 6 cloves
    • 6 cardamoms
    • 1/2 tsp turmeric
    • 1/2 tsp red chilli powder
    • 1 1/2 large onions sliced
    • 6-8 green chillies
    • 1 tbs ginger garlic paste
    • 2 medium sized ripe plum tomatoes
    • 1/4 cup yoghurt
    • 1/4 cup olive or canola oil
    • a pinch of saffron
    • 1 sprig of cilantro
    • a few fresh mint leaves
    • salt as per requirement
    Get Instant Help
    InstacartGet Recipe Ingredients

    Instructions
     

    • Devein, clean and wash the shrimp 3 or 4 times in clean water. Set them aside. Wash Basmati rice 4 or 5 times till the water runs clear and let it soak for at least 20 minutes.
    • Heat oil in a pot. Throw in the whole spices followed by the sliced onions. Fry the onions till golden brown.
    • Add ginger garlic paste and turmeric powder. Stir fry lightly to let the raw smell go. Add tomatoes and salt. Cover and cook to soften them a bit for 2 minutes.
    • Moisten the the onion tomato masala with a little water if it is too dry. Then toss in yogurt followed by green chillies, shrimp, salt, a few fresh mint leaves & chopped cilantro. Stir gently to mix everything well.
    • Cover and let it simmer. After 2 minutes stir again gently so the masala doesn't stick to the bottom of the pot. Then cover and simmer again for 4 more minutes till the oil has risen to the top.
    • Meanwhile bring the water to boil in another pot  . Add the soaked basmati rice, salt and stir to mix well.
    • Check the rice after one or two boils. When it is 75% cooked, switch off the stove and drain the rice in a strainer or colander.
    • Immediately put the rice over the shrimp curry in the pot. Top the rice with some fresh mint leaves, chopped cilantro. Drizzle some *saffron water all over the rice.
    • Then cover the pot and place it in the oven preheated at 400ºF for 10 minutes.
    • When done, rest the biryani pot for 5 minutes on the counter to let all the juices get absorbed by the rice. Then mix the rice gently by sliding in the flat spatula from the sides and turning it over so that the curry at the bottom gets mixed up with the rice.
    • You could also place it in the hot oven (which is switched off) for 5 minutes just to keep it hot before serving.
    • Enjoy the shrimp biryani with yogurt and mint chutney.
    • *saffron water - Crush a few strands of saffron in a mortar and pestle. Pour 1 tbs of hot water over it, then crush the saffron more with the pestle and mix it with the water well. This will give you a beautiful orange coloured saffron solution to use in the biryani.

    Notes

    1. Following all the steps exactly will give you the best results.
    2. Using fresh ginger garlic paste and ripe plum tomatoes gives the best flavour.
    3. You could also steam it on the stove, but using a thick bottommed pan is recommended.
    4. Do not add water after adding shrimp. This will make the curry runny and cooking the shrimp for a long time in order to reduce the curry will actually toughen them up.
    5. Using fresh and big size shrimp enhances the flavour of the biryani.
    Print Recipe Pin Recipe Share on Twitter Share on Facebook

    Filed Under: Biryani, Dinner, Indian Cuisine, Main Dishes, Non-Vegetarian, Popular Recipes, Prawns, Quick and easy, Shrimp, South Indian Cooking, Traditional Recipes Tagged With: Delicious Shrimp Pulao, Jhinga Pulao, Nawabi Biryani delicacy, Prawn Pulao, shrimp biryani, South Indian muslim shrimp biryani

    Masala Lamb (in the Instant Pot)

    December 10, 2019 by Fouzia 2 Comments

    masala goshth lamb

    masala goshth lamb
    This is a delicious preparation of lamb using whole spices and a yogurt based seasoning without any onions or tomatoes. A quick and easy dish packed with flavour and goes well with naan, roti or basmati rice. You’d love this dish because it is full of flavour and taste. It is more or less like a curry but thick in consistency so goes very well with naan as well as ghee rice or pulao.

    Ingredients:
    1 lb Lamb with bones
    1 tsp ginger garlic paste
    1 tsp lemon juice
    1/2 cup yogurt
    1/2 tsp turmeric powder
    1/2 tsp Kashmiri chilli powder
    1/2 tsp cumin powder
    1/2 tsp coriander powder
    1/2 tsp each black pepper & garam masala powder
    1/2 tsp coarsely ground or pounded fennel
    1 – 2 tbs coconut oil
    4 cloves
    4 green cardamoms
    2 black cardamoms
    1 x 2 inch cinnamon stick
    3 – 4 small bay leaves
    1 tsp pink salt or as required
    1 sprig of cilantro to garnish

    Instructions:
    1. Clean the lamb by trimming the skin and fat and wash well. Drain and set aside.
    2. Sprinkle lemon juice and salt. Add ginger garlic paste and mix well
    3. Whisk the yogurt well with a whisk or spoon so there are no lumps and is smooth.
    4. Add all the spice powders (turmeric, red chilli, black pepper & garam masala to the yogurt, mix well and set aside.
    5. Melt 1 – 2 tbs coconut oil in the Instant pot on sauté setting then toss in the whole garam masala spices (bay leaf, cloves, green and black cardamoms & cinnamon stick).
    6. Now sauté the marinated lamb in the Instant Pot with the whole spices and 1 tsp of pounded fennel till it gets nicely roasted.
    7. The pour in the whisked yogurt spice mixture over the lamb, turn them over and mix so it coats all the lamb pieces well.
    8. Close the lid and pressure cook for 22 minutes or until they are tender & soft.
    9. When done, do a NPR, then open the lid and switch back to sauté setting on low. Cook till the gravy thickens a bit and the oil rises on top. This is a dish with minimal gravy so sprinkle a little water if the gravy is too thick and cook on low heat till it is of the right consistency.
    10. As a finishing touch and just to tone down the tanginess of the yogurt, add a small piece of jaggery or 1/2 tsp brown sugar. Adjust the salt, garnish with cilantro and serve it hot with basmati rice and salad. Enjoy!

    Notes:
    1. You can use pressure cooker if you don’t have the Instant pot to tenderize the meat.
    2. Using freshly ground ginger garlic paste enhances the flavours.

    Recipe

    masala goshth lamb

    Masala Lamb

    Author: Fouzia
    This is a delicious preparation of lamb using whole spices and a yogurt based seasoning without any onions or tomatoes. A quick and easy dish packed with flavour and goes well with naan, roti or basmati rice.
    Course Dinner, Lunch, Main Course, Non Vegetarian, Quick and Easy
    Cuisine Indian, North Indian Cuisine

    Equipment

    • Instant Pot or Pressure Cooker

    Ingredients
      

    • 1 lb Lamb with bones
    • 1 tsp ginger garlic paste
    • 1 tsp lemon juice
    • 1/2 cup yogurt
    • 1/2 tsp turmeric powder
    • 1/2 tsp Kashmiri chilli powder
    • 1/2 tsp cumin powder
    • 1/2 tsp coriander powder
    • 1/2 tsp each black pepper & garam masala powder
    • 1/2 tsp coarsely ground or pounded fennel
    • 1 - 2 tbs coconut oil
    • 4 cloves
    • 4 green cardamoms
    • 2 black cardamoms
    • 1 x 2 inch cinnamon stick
    • 3 - 4 small bay leaves
    • 1 tsp pink salt or as required
    • 1 sprig of cilantro to garnish
    Get Instant Help
    InstacartGet Recipe Ingredients

    Instructions
     

    • Clean the lamb by trimming the skin and fat and wash well. Drain and set aside.
    • Sprinkle lemon juice and salt. Add ginger garlic paste and mix well
    • Whisk the yogurt well with a whisk or spoon so there are no lumps and is smooth.
    • Add all the spice powders (turmeric, red chilli, black pepper & garam masala to the yogurt, mix well and set aside.
    • Melt 1 - 2 tbs coconut oil in the Instant pot on sauté setting then toss in the whole garam masala spices (bay leaf, cloves, green and black cardamoms & cinnamon stick).
    • Now sauté the marinated lamb in the Instant Pot with the whole spices and 1 tsp of pounded fennel till it gets nicely roasted.
    • The pour in the whisked yogurt spice mixture over the lamb, turn them over and mix so it coats all the lamb pieces well.
    • Close the lid and pressure cook for 22 minutes or until they are tender & soft.
    • When done, do a NPR, then open the lid and switch back to sauté setting on low. Cook till the gravy thickens a bit and the oil rises on top. This is a dish with minimal gravy so sprinkle a little water if the gravy is too thick and cook on low heat till it is of the right consistency.
    • As a finishing touch and just to tone down the tanginess of the yogurt, add a small piece of jaggery or 1/2 tsp brown sugar. Adjust the salt, garnish with cilantro and serve it hot with basmati rice and salad. Enjoy!

    Notes

    1. You can use pressure cooker if you don't have the Instant pot to tenderize the meat.
    2. Using freshly ground ginger garlic paste enhances the flavours.
    Print Recipe Pin Recipe Share on Twitter Share on Facebook

    You may also like:

    veal braised in red masalaInstant Pot Lamb Curry

    Filed Under: Curries., Dinner, Holidays, Hot and Spicy, Indian Cuisine, Instant Pot recipes, Main Dishes, Non-Vegetarian, North Indian Cooking, Quick and easy, Spicy, Traditional Recipes Tagged With: dahi wala goshth, goat curry, goshth ka salan, Gosth ka masala, lal maas, lamb curry, lamb masala, mutton curry

    Ginger Flavoured Sautéed Carrots

    November 28, 2019 by Fouzia Leave a Comment

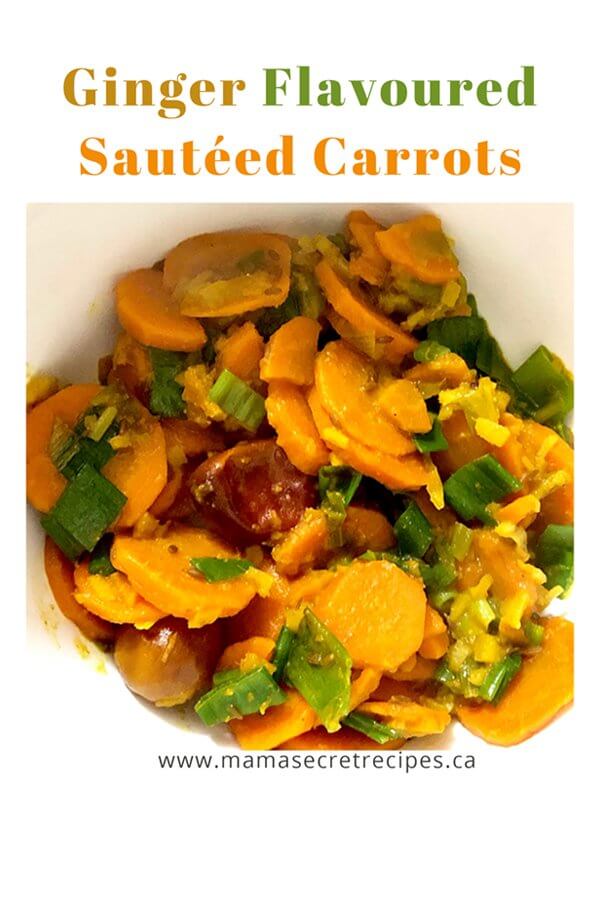
    carrot ginger sabzi

    carrot ginger sabzi

    This is a simple side dish for lunch or dinner so full of flavour, a light vegetable dish appealing to the taste buds, healthy to eat and so quick and easy to prepare. The carrots are sautéed with chopped ginger and steamed till done. Then chopped spring onions are added as a finishing touch. It can be enjoyed with rice, naan or flat bread. (rotis, parantas, chappatis etc.)

    Ingredients:
    1 carrot (big size)
    1 sprig of green onion
    1 tsp chopped ginger
    2 dried red chillies
    1/4 tsp cumin seeds
    1/4 tsp turmeric powder
    1/4 tsp red chilli powder
    1/2 tsp coriander powder
    1 tbs olive/canola oil

    Instructions:
    1. Peel and cut the carrot into slices. Peel and chop the ginger. Cut the green onion into 1/4″ even slices and set everything aside.
    2. Take a sauce pan or a small cooking pot, add the oil to it and when hot, sizzle the cumin seeds. Then drop in the carrot slices and chopped ginger. Sauté well.
    3. Add the turmeric, red chilli, coriander powders and salt. Sauté well again.
    4. Pour 1/2 a cup of water, cover with a lid and let it simmer on low flame for a while till the carrots get steamed and the water gets absorbed. If the carrots are not done, add some more water till they become tender.
    5. Once the carrots are done toss in the sliced green onions. Then cover and simmer for 2-3 minutes. Taste and adjust the salt, then as a finishing touch sprinkle some chopped ginger before serving.
    6. Serve hot with rice, Paronta or Chapatis. (flat breads). Enjoy!

    Recipe

    carrot ginger sabzi

    Ginger Flavoured Sautéed Carrots

    Author: Fouzia
    This is a simple side dish for lunch or dinner which is tasty and full of flavour. A light vegetable dish appealing to the taste buds, healthy to eat and so quick and easy to prepare.The carrots are sautéed with chopped ginger and steamed till done. Then chopped spring onions are added as a finishing touch. It can be enjoyed with rice, naan or flat bread. (rotis, parantas, chappatis etc.)
    Course Dinner, Lunch
    Cuisine South indian Cuisine

    Ingredients
      

    • 1 carrot big size
    • 1 sprig of green onion
    • 1 tsp chopped ginger
    • 2 dried red chillies
    • 1/4 tsp cumin seeds
    • 1/4 tsp turmeric powder
    • 1/4 tsp red chilli powder
    • 1/2 tsp coriander powder
    • 1 tbs olive/canola oil
    Get Instant Help
    InstacartGet Recipe Ingredients

    Instructions
     

    • Peel and cut the carrot into slices. Peel and chop the ginger. Cut the green onion into 1/4" even slices and set everything aside.
    • Take a sauce pan or a small cooking pot, add the oil to it and when hot, sizzle the cumin seeds. Then drop in the carrot slices and chopped ginger. Sauté well.
    • Add the turmeric, red chilli, coriander powders and salt. Sauté well again.
    • Pour 1/2 a cup of water, cover with a lid and let it simmer on low flame for a while till the carrots get steamed and the water gets absorbed. If the carrots are not done, add some more water till they become tender.
    • Once the carrots are done toss in the sliced green onions. Then cover and simmer for 2-3 minutes. Taste and adjust the salt, then as a finishing touch sprinkle some chopped ginger before serving.
    • Serve hot with rice, Paronta or Chapatis. (flat breads). Enjoy!
    Print Recipe Pin Recipe Share on Twitter Share on Facebook

    You may also like:

    cauliflower pepper frymethi lentil subzi

    Filed Under: Carrots, Curries., Ginger, Lunch, Main Dishes, Quick and easy, Side Dishes, South Indian Cooking, Traditional Recipes, Vegan, Vegetarian Tagged With: adraki gajar ki sabzi, carrots, gajar ki sabzi, healthy vegetable dish, light vegetable dish, sautéed carrots

    Appams (Rice Hoppers)

    November 10, 2019 by Fouzia 8 Comments

    crispy appam

    “Appam” as it is called in Tamil is a breakfast delicacy which is very popular in South India and Sri Lanka. Hopper is the anglicized version of the name. The “Appam”is basically a fermented bowl shaped rice flour pancake with a soft, spongy, fluffy centre and a thin crispy, lace like network of fine bubbles towards the circumference. …

    Read More

    Filed Under: Breakfast, Gluten Free, Indian Cuisine, Rice Hoppers, South Indian Cooking, Traditional Recipes Tagged With: Appam with coconut milk, Appam without Yeast, Appams, crispy appam, Kerala Appam, Palappam, Rice Hoppers, south indian breakfast

    Sweet Coconut Shrimp Curry (Jhinge ka meetha salan)

    August 26, 2019 by Fouzia 3 Comments

    It all begins with taste – a great recipe for a great tasting dish. Taste is first imagination, then creating a dish accordingly which involves a work of labour to get a particular texture, a tantalizing aroma and an intense captivating taste! This shrimp curry with a subtle taste is a work of labour and love. It is bursting with flavour and at the same time light and delicious….

    Read More

    Filed Under: Curries., Dinner, Indian Cuisine, Lunch, Non-Vegetarian, Prawns, Quick and easy, Shrimp, South Indian Cooking, Traditional Recipes Tagged With: coconut shrimp curry, jhinge ka meetha, Prawn masala, shrimp curry, south indian prawn curry

    Chicken Shammi Kebabs Afghani Style!

    June 17, 2019 by Fouzia Leave a Comment

    chicken shammi kebab

    chicken shammi kebabs

    These kind of chicken kebabs can be found only at an Afghani restaurant, in fact that’s where I got to taste them for the first time and have been so much in love with them ever since …

    Read More

    Filed Under: Afghani, Appetizers, Chicken, Dinner, Indian Cuisine, Kebabs, Lunch, Non-Vegetarian, North Indian Cooking, Party food, Quick and easy, Ramadan meals, Side Dishes, Street food, Traditional Recipes Tagged With: Afghani chicken shammi, Afghani kebabs, chicken kebabs, chicken seekh kebabs, chicken shammi kebabs, ground chicken kebab

    Tomato Trout Curry – Chutney Style!

    May 20, 2019 by Fouzia 6 Comments

    tomato trout curry

    tomato trout curry poster
    The coastal regions of India where sea-food is fresh and abundant, revel for their wide variety of fish curries and each is one of a kind. With the use of fresh ground coconut, fragrant curry leaves, cumin, fenugreek and other spices in various combinations, different types of curries are made and each community has its own special curry to offer.
    This is an easy version of fish curry that I created as I was feeling lazy and wanted to eat fish but something quick without using onions. So made this in tomato chutney style et voilà it was sensational!

    tomato trout curry
    Ingredients:
    1 whole trout fish 1 lb
    2 large tomatoes chopped
    2-4 small green chillies
    1/4 tsp turmeric powder
    1 tsp red chilli powder
    1 tsp roasted cumin & fenugreek powder
    1/2 tsp mustard seeds
    2 dried red chillies
    2 garlic cloves
    1/4 cup chopped cilantro
    A few fresh curry leaves
    4 tbs olive/canola oil

    Instructions:
    1. To clean descale the fish, rub salt on the skin to remove the slime and rinse under running water well. Then scrape the shiny white and black skin with a paring knife and rinse again till all the slime is off and the scales are removed.
    2. Cut into steaks or fillets, drain and keep aside.
    3. Add oil to the pot on medium heat. When hot enough throw in the dried red chillies and mustard seeds. As they begin to crackle, toss in the crushed garlic cloves, slit green chillies and curry leaves.
    4. Immediately add the chopped tomatoes, salt, turmeric, roasted cumin fenugreek and red chilli powder and mix well. Cook till the tomatoes soften and blend well in the masala. Sprinkle a little water from the sides, and simmer for 2 minutes.
    5.Now gently drop the trout pieces one by one into the curry leaving enough space between them. Pour in half a cup of water from the sides, give the pot a gentle shake by holding it with kitchen mitts or gloves then Let it cook on medium heat till the curry starts bubbling.
    6. Turn down the heat, cover the pot with a lid and let it simmer for 5 minutes or until the oil rises on top and the curry aroma hits your nose making your mouth water.
    7. The trout curry is now ready to enjoy with steamed rice or rice hoppers or rice paashtis (soft rice tacos)

    Recipe

    Tomato Trout Curry - Chutney Style!

    Author: Fouzia
    The coastal regions of India where sea-food is fresh and abundant, revel for their wide variety of fish curries and each is one of a kind. With the use of fresh ground coconut, fragrant curry leaves, cumin, fenugreek and other spices in various combinations, different types of curries are made and each community has its own special curry to offer. This is an easy version of fish curry that I created as I was feeling lazy and wanted to eat fish but something quick without using onions. So made this in tomato chutney style et voila it was sensational!
    Course Dinner, Lunch, Main Course
    Cuisine South indian Cuisine

    Ingredients
      

    • 1 whole trout fish 1 lb
    • 2 large tomatoes chopped
    • 2-4 small green chillies
    • 1/4 tsp turmeric powder
    • 1 tsp red chilli powder
    • 1 tsp roasted cumin & fenugreek powder
    • 1/2 tsp mustard seeds
    • 2 dried red chillies
    • 2 garlic cloves
    • 1/4 cup chopped cilantro
    • A few fresh curry leaves
    • 4 tbs olive/canola oil
    Get Instant Help
    InstacartGet Recipe Ingredients

    Instructions
     

    • To clean descale the fish, rub salt on the skin to remove the slime and rinse under running water well. Then scrape the shiny white and black skin with a paring knife and rinse again till all the slime is off and the scales are removed.
    • Cut into steaks or fillets, drain and keep aside.
    • Add oil to the pot on medium heat. When hot enough throw in the dried red chillies and mustard seeds. As they begin to crackle, toss in the crushed garlic cloves, slit green chillies and curry leaves.
    • Immediately add the chopped tomatoes, salt, turmeric, roasted cumin fenugreek and red chilli powder and mix well. Cook till the tomatoes soften and blend well in the masala. Sprinkle a little water from the sides, and simmer for 2 minutes.
    • Now gently drop the trout pieces one by one into the curry leaving enough space between them. Pour in half a cup of water from the sides, give the pot a gentle shake by holding it with kitchen mitts or gloves then Let it cook on medium heat till the curry starts bubbling.
    • Turn down the heat, cover the pot with a lid and let it simmer for 5 minutes or until the oil rises on top and the curry aroma hits your nose making your mouth water.
    • The trout curry is now ready to enjoy with steamed rice or rice hoppers or rice paashtis (soft rice tacos)
    Print Recipe Pin Recipe Share on Twitter Share on Facebook

    You may also like:

    tangy fish curryeasy shrimp curry

    Filed Under: Curries., Fish, Fusion, Hot and Spicy, Sea Food, South Indian Cooking, Trout Tagged With: hot and spicy fish curry, Red fish curry, south indian fish curry, tomato fish curry, trout curry

    Chickpea ‘Sundal’ Salad

    March 27, 2019 by Fouzia 4 Comments

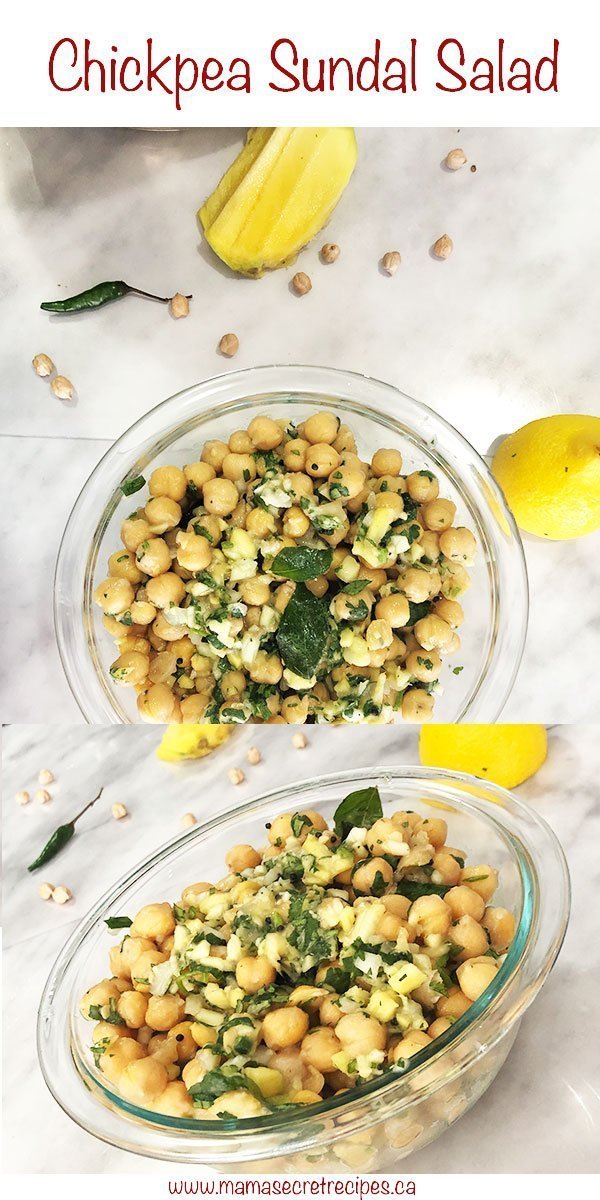
    chickpea mango sundal salad

    “Sundal” a south indian delicacy is a delicious salad which is mostly enjoyed as a snack especially at the beach.
    Strolling along the shore at the Marina Beach (Chennai, India) on a hot summer evening, all you would crave for is this “sundal”. It is a tongue tingling melange of boiled dried yellow peas tossed with chopped pink onions, grated fresh coconut, green chillies, green mango, ginger, cilantro, salt and drizzled with freshly squeezed lemon juice, then infused with flavour by tempering with mustard seeds, dried red chillies, curry leaves and asafoetida. Such a popular street snack to enjoy at the beach and so yummy!

    This ‘sundal’ is usually made with dried whole yellow peas called ‘battani’ in tamil. If you don’t find it in the stores the best alternative is chickpeas. I prefer using the dried chickpeas to the canned ones even though it is more time saving and convenient. Canned food has always been my last priority for most of the food items as you know it not only contains preservatives but most of its nutrients are lost during the canning process, therefore are not as flavourful and tasty as well. It probably takes the same time to dump the dried chickpeas into the instant pot, add water and close the lid as it takes to open a can of chickpeas and rinse before using them. Why not make good choices and reap the health benefits by incorporating wholesome foods in our diet and avoiding canned foods?

    It is best to hydrate the chickpeas prior to cooking. If they are soaked all the way through, then they not only swell up and soften evenly but also in less amount of time. It is much easier cooking them in the Instant Pot as it not only saves time but is so convenient. You could also pressure cook them in the Instant pot without soaking them but it would take longer – between 45 minutes to an hour, while pre soaked chickpeas are al dente tender in 35 minutes. Slow cooking them in the Instant Pot retains all their water soluble nutrients such as vitamins, minerals and antioxidants. Pre soaking them and draining away the water does break down the complex sugars that produce gas but very slightly (upto 25%). I prefer not to drain out the soaking water to prevent the loss of the valuable nutrients.

    With this ‘sundal’ are tagged so many memories too. Here is one …..
    I remember, I still remember
    the taste, the flavour
    the whiff of the aroma
    that hit our olfactory nerves
    as we sat watching the waves
    dancing in glee
    bouncing on the shore
    as if they were enjoying
    our company!
    Yes, I still remember
    those little vendors
    scooping out the ‘sundal’
    with their little hands
    while we sat waiting,
    drooling with impatience
    over this sensational concoction,
    this melange of flavours
    that stimulates your brain
    and leaves you craving for it
    over and over again!
    But in all this ecstatic endeavour
    little did we realize how hard
    those little hands worked
    to combat their dire needs
    to help, support and provide
    for their poverty stricken families.
    They were little kids indeed
    but burdened down
    by so many responsibilities!!

    chickpea sundal salad

    Here’s the recipe:

    Ingredients:
    1 cup chickpeas
    1/2 a medium onion
    1-2 green chillies
    1/4 cup cilantro chopped
    1/4 cup coconut grated
    1/3 cup green mango chopped or grated
    1 inch piece of ginger julienned and chopped.
    Juice of half a lemon
    a pinch of asafoetida
    a few curry leaves
    1/4 tsp mustard seeds
    1 tsp ghee(clarified butter)
    1 – 2 dried red chilies


    Instructions:
    1. Soak the chickpeas overnight or at least for 8+ hours to hydrate them to the core.
    2. Place the soaked chickpeas in the Instant Pot and Pressure cook on manual for 30 – 35 minutes till they are soft but al dente.  It is up to you to use the same water to cook or discard it. I prefer not to lose the valuable nutrients in the water so I use the same. Sauté till the chickpeas absorb all the water left in the Instant pot. If you forgot to soak them, just cover them up with boiling water and simmer on the stove till they are soft and tender. Or slow cook in the Instant pot.
    3. Add to the boiled chickpeas, chopped onions, green chilli, ginger, cilantro, grated coconut, squeeze in the lemon juice and toss them we till they get mixed well.
    4. Heat the ghee in a tadka (tempering) pan. When hot, crackle the mustard seeds, then add dried red chillies followed by curry leaves and asafoetida. Immediately pour the tempering over the chickpeas. Toss once more to mix well. Enjoy!

    You may also like:

    Spicy Carrot & Green Apple Salad

    Egg Salad

    Pineapple Kachumbar

    Chickpea Sundal Salad

    Filed Under: Chickpeas, Indian Cuisine, Instant Pot recipes, Popular Recipes, Quick and easy, Salads, Side Dishes, Snacks, South Indian Cooking, Street food, Traditional Recipes, Vegan, Vegetarian Tagged With: battani sundal, beach snack, chickpeas salad, street food snack, sundal

    Easy Shrimp Curry

    March 25, 2019 by Fouzia Leave a Comment

    easy shrimp curry


    Eating this juicy delectable coconut shrimp curry with the rice hoppers was such a delightful experience for dinner tonight.The instant frozen boxed shrimps I got from TNT were just like fresh ones caught from the sea as they were bursting with flavour. This spicy curry though so simple to make was so delicious.
    All I did was sauté the shrimps (marinated with ginger garlic paste, salt, red chilli powder & turmeric) in oil tempered with mustard seeds, dried red chillies and fresh curry leaves. Then I added tomato paste and coconut milk and let it simmer for 5 minutes. That’s all!! Loved it! So delicious!

    easy shrimp curry

    Ingredients:
    25-30 jumbo shrimps
    1 tsp ginger garlic paste
    1/4 tsp mustard seeds
    2 dried red chillies
    a few curry leaves
    1 tsp red chilli powder
    1/2 tsp turmeric
    1 tbs tomato paste
    1/2 a can of coconut milk (Aroy D)
    4 tbs canola/vegetable oil
    a sprig of fresh cilantro
    salt to taste


    Instructions:
    1. Peel (do not remove the tails), devein and rinse the shrimps in running water. Set aside.
    2. Marinate them for 15 minutes with salt, ginger garlic paste, turmeric and red chilli powder.
    3. To a saucepan on medium heat add oil and when hot add the dried red chillies, mustard seeds and curry leaves, then toss in the marinated shrimp and sauté in the tempered oil lightly.
    4.Mix in the tomato paste followed by 1/2 a can of coconut milk. Shake the can well before opening it.
    5. When it comes to a boil, taste and adjust the salt, turn down the heat and simmer for 5 minutes.
    6. Garnish with chopped cilantro and serve hot with hot steamed/boiled rice or rice hoppers.Enjoy!

    easy shrimp curry


    Please Note:
    Some of the links on this post above are affiliate links. We are a participant in the Amazon Services LLC Associates Program, an affiliate advertising program designed to provide a means for us to earn a small commission by linking to Amazon.com and affiliated sites. Should you choose to buy them you could click on these links to go to the respective sites and make your purchase. I would really appreciate if you do that. Thank you.

    Filed Under: Curries., Indian Cuisine, Main Dishes, Non-Vegetarian, North Indian Cooking, Prawns, Quick and easy, Sea Food, Shrimp, Side Dishes, South Indian Cooking Tagged With: easyshrimpcurry, shrimp curry, shrimpcurrywithricehoppers, southindiancuisine, tomatoshrimp

    • « Go to Previous Page
    • Page 1
    • Page 2
    • Page 3
    • Page 4
    • Interim pages omitted …
    • Page 18
    • Go to Next Page »

    Footer

    ↑ back to top

    About

    • Privacy Policy
    • Disclaimer

    Newsletter

    • Sign Up! for emails and updates

    Contact

    • Contact me

    COPYRIGHT © 2021 MAMA'S SECRET RECIPES