
• Skip to primary navigation
  • Skip to main content
Mamas Secret Recipes
  • About Me
    • Food Info
  • Blog
  • Recipes
  • Videos
  • Contact Me
  • Navigation Menu: Social Icons

    • Facebook
    • Instagram
    • Pinterest
    • Twitter
    • YouTube
menu icon
go to homepage
subscribe
search icon
Homepage link
  • About Me
  • Blog
  • Recipes
  • Videos
  • Food Info
  • Contact Me
    • Bloglovin
    • Facebook
    • Instagram
    • Pinterest
    • Twitter
    • YouTube
  • ×

    Salmon Cutlets

    February 15, 2014 by Fouzia Husainy Leave a Comment

    salmon cutlets

    salmon cutlets

    These salmon cutlets go so well with a bowl of hearty butternut squash soup and some freshly baked bread. Who would say no to this kind of meal especially when it is that time of the year that makes you slow down and pause to appreciate the changing colours around you, a time when you just feel like snuggling under your blanket covers and hibernating. Or when you are relaxing with a cup of hot tea, grab one of these and enjoy them as a snack You could prepare them ahead of time and warm them up in the oven just before dinner.

    Ingredients:
    1 lb fresh salmon/trout ( de-boned and minced)
    1 medium size potato boiled and mashed
    1 small onion chopped
    1 small green chilli or jalapeño
    1 small garlic clove
    salt and pepper as required
    1 tsp turmeric
    a sprig of parsley chopped
    1 tbs channa flour or corn flour
    1 tbs olive oil
    a dash of lemon juice.

    Instructions:
    1.Mix together minced salmon, chopped onion, fresh green chilli or jalapeño, parsley, salt and pepper and a dash of lemon juice.
    2. Add corn flour, turmeric, salt and pepper to mashed potato, blend everything together with your hand and add it to the salmon.
    3. Mix well and make small round balls, then flatten them on the palm of your hand and set aside. You can make 8 cutlets altogether.
    4. Shallow fry all of them in one tbs olive oil on medium heat in a non-stick or cast iron skillet. Drain on paper towels.
    5. Serve them hot with ketchup, chutney or hot sauce. Enjoy!

    Recipe

    Salmon Cutlets

    Author: Fouzia Husainy
    Course Appetizer
    Cuisine Canadian

    Ingredients
      

    • 1 lb fresh salmon/trout de-boned and minced
    • 1 medium size potato boiled and mashed
    • 1 small onion chopped
    • 1 small green chilli or jalapeño
    • 1 small garlic clove
    • salt and pepper as required
    • 1 tsp turmeric
    • a sprig of parsley chopped
    • 1 tbs corn flour
    • 1 tbs olive oil
    • a dash of lemon juice.
    Get Instant Help
    InstacartGet Recipe Ingredients

    Instructions
     

    • 1.Mix together minced salmon, chopped onion, fresh green chilli or jalepeno, parsley, salt and pepper and a dash of lemon juice.
    • Add corn flour, turmeric, salt and pepper to mashed potato, blend everything together with your hand and add it to the salmon.
    • Mix well and make small round balls, then flatten them on the palm of your hand and set aside. You can make 8 cutlets altogether.
    • Shallow fry all of them in one tbs olive oil on medium heat in a non-stick or cast iron skillet. Drain on paper towels.
    • Serve them hot with ketchup, chutney or hot sauce. Enjoy!
    Print Recipe Pin Recipe Share on Twitter Share on Facebook

    Filed Under: American, Appetizers, Canadian Cuisine, Fusion cooking, Indian Cuisine, Non-Vegetarian, Ramadan meals, Sea Food, Side Dishes, Super Bowl Snacks, Trout Tagged With: Cutlets, fish, Fish cutlets, Salmon, sea food, trout

    Zaffrani (Saffron) Falooda

    February 10, 2014 by Fouzia Husainy 2 Comments

    zaffrani falooda

    Zaffrani Falooda
    Zafran (Saffron) Falooda is a delicious traditional dessert made with agar agar, condensed milk, half and half and served at family gatherings, parties or social events. It is rich and royal with the lavish use of saffron and nuts and its smooth texture is so appealing to the taste buds. You could give it diamond shapes or serve in earthen bowls the traditional way or make it even more attractive by giving it different shapes using cookie cutters. It’s actually so much fun making this falooda.
    Pistachio falooda

    Ingredients:
    1.5 litres whole Milk (3.2%)
    1 cup whipping cream or half and half
    1 can condensed milk
    1/2 of a 425gm pack of agar agar strands (aka china glass)*
    1/4 cup sugar
    a pinch of saffron
    2 tbs blanched and slivered almonds
    2 tbs blanched and sliced pistachios

    *check notes below

    zaffrani falooda

    1. Dissolve the saffron in 1 tbs of milk after crushing the strands in a mortar and pestle. If you want a deeper color then you could use water instead. Some varieties of saffron are not so fragrant and colorful, then you should add a little more than a pinch using your own judgement by testing one or two strands and checking to see if it leaves color. Blanch the almonds, sliver them, slice the pistachios after blanching them as well and keep aside. Keep a dry 10 – 12 inch stainless steel walled plate or a pie plate ready.

    2. Boil the whole milk in a big pot. Add the condensed milk, sugar and whipping cream or half and half and let it simmer for sometime. I prefer adding whipping cream for a smooth texture. Once the milk comes to a rolling boil, lower the heat and let it simmer. Health watchers can use skimmed milk and 10% cream, but have to compromise on the taste as it will not be as rich and smooth as this one.

    3. Cut half of the agar agar from the pack. Rinse then soak it in water for sometime to soften. Meanwhile boil 1/2 a cup of  water in a saucepan, squeeze out the water from the agar agar and add it to the boiling water, lower the heat and let it dissolve in the water. Keep it on simmer even after it dissolves in the water completely coz it will solidify at room temperature. The whole process should take around 10 – 15 minutes. But if you are using powder it should take upto 5 minutes to dissolve completely.

    4. You have both the agar agar solution and the milk mixture on simmer. Now pour the dissolved agar agar mixture into the pot through a strainer while stirring continuously. This is to avoid lumps.

    5. After adding do not raise the temperature as it will curdle the milk. You have to be really careful at this stage. The temperature should be constant. Sometimes lowering and then raising the temperature again and again also affects the texture and all the effort goes down the drain with the curdling of the milk and you can do nothing about it.

    6. Use a wooden spatula and do not scrape the bottom of the pan as we do not want the any browned milk shavings from the bottom swimming in the milk. This gives a bad appearance to the falooda.

    7. Allow the milk to boil just once after adding the agar agar for one or two mins on medium heat. Test for right consistency by drizzling a few drops on a clean plate. If it sets in a minute then it is done. If it doesn’t then leave it on simmer for 2 more minutes. Pour it immediately into the reserved clean pie plate. After a couple of minutes when you see a film of layer on the surface it is time to sprinkle the slivered almonds on top so that they don’t sink to the bottom of the plate. Let the falooda set at room temperature in a cool place away from the heat source.

    8. Once it is set, dip a toothpick in the saffron solution and make a design on the falooda or just dab the surface with a brush or the back of a spoon here and there as I have done to give it some color. To make a marbled pattern, you could drizzle the saffron milk (you could use 2 tbs of saffron milk) here and there and just swirl it around quickly with a skewer or fork. This will give some color to the falooda even inside which makes it look beautiful.

    9. Chill it in the fridge for a couple of hours or over night.

    10. Cut into desirable shapes or serve in earthen bowls in traditional style and enjoy.

    pistachio falooda

    Notes:
    Agar Agar “also known as kanten, Japanese gelatin, vegetable gelatin, Chinese isinglass, China glass, and dai choy goh–is a vegan gelling agent derived from seaweed. It has many uses but is used primarily in cooking. Agar agar is odorless, tasteless, and has only 3 calories per gram”. It is available in any asian or indian grocery store. You could also use agar agar powder.

    1 tsp of powdered agar = 1 tbsp agar flakes = 1/3 cup agar strands (cut into 1 inch pieces) will set 350ml (1 1/3 cup of liquid) into a firm jelly. For a softer jelly or when using thick fruit pureé, use lesser agar.

    So half of a 425 gm pack of agar agar strands is equivalent to 2 cups of strands.


    Recipe

    Zaffrani (Saffron )Falooda

    Author: Mamasecretrecipes
    Zafrani Falooda is a delicious traditional dessert made with agar agar, condensed milk, half and half and served at family gatherings, parties or social events. It is rich and royal with the lavish use of saffron and nuts and its smooth texture is so appealing to the taste buds.
    Course Dessert
    Cuisine indian cuisine, south indian

    Ingredients
      

    Ingredients:

    • 1.5 litres whole Milk 3.2%
    • 1 cup half and half or whipping cream
    • 1 can condensed milk
    • 1/2 of a 425gm pack of agar agar or 3 tsp agar agar powder
    • 1/4 cup sugar
    • a pinch of saffron
    • 2 tbs blanched and slivered almonds
    • 2 tbs blanched and sliced pistachios
    Get Instant Help
    InstacartGet Recipe Ingredients

    Instructions
     

    • Dissolve the saffron in 1 tbs of milk after crushing the strands in a mortar and pestle. If you want a deeper color then you could use water instead. Some varieties of saffron are not so fragrant and colorful, then you should add a little more than a pinch using your own judgement by testing one or two strands and checking to see if it leaves color. Blanch the almonds, sliver them, slice the pistachios after blanching them as well and keep aside. Keep a dry 10 - 12 inch stainless steel walled plate or a pie plate ready.
    • Boil the whole milk in a big pot. Add the condensed milk, sugar and whipping cream or half and half and let it simmer for sometime. I prefer adding whipping cream for a smooth texture. Once the milk comes to a rolling boil, lower the heat and let it simmer. Health watchers can use skimmed milk and 10% cream, but have to compromise on the taste as it will not be as rich and smooth as this one.
    • Cut half of the agar agar from the pack. Rinse then soak it in water for sometime to soften it. Meanwhile boil 1/2 a cup of  water in a saucepan, squeeze out the water from the agar agar and add it to the boiling water, lower the heat and let it dissolve in the water. Keep it on simmer even after it dissolves in the water completely coz it will solidify at room temperature. The whole process should take around 10 - 15 minutes. But if you are using powder it should take upto 5 minutes to dissolve completely.
    • You have both the agar agar solution and the milk mixture on simmer. Now pour the dissolved agar agar mixture into the pot through a strainer while stirring continuously. This is to avoid lumps.
    • After adding do not raise the temperature as it will curdle the milk. You have to be really careful at this stage. The temperature should be constant. Sometimes lowering and then raising the temperature again and again also affects the texture and all the effort goes down the drain with the curdling of the milk and you can do nothing about it.
    • Use a wooden spatula and do not scrape the bottom of the pan as we do not want the any browned milk shavings from the bottom swimming in the milk. This gives a bad appearance to the falooda.
    • Allow the milk to boil just once after adding the agar agar for one or two mins on medium heat. Test for right consistency by drizzling a few drops on a clean plate. If it sets in a minute then it is done. If it doesn't then leave it on simmer for 2 more minutes. Pour it immediately into the reserved clean pie plate. After a couple of minutes when you see a film of layer on the surface it is time to sprinkle the slivered almonds on top so that they don't sink to the bottom of the plate. Let the falooda set at room temperature in a cool place away from the heat source.
    • Once it is set, dip a toothpick in the saffron solution and make a design on the falooda or just dab the surface with a brush or the back of a spoon here and there as I have done to give it some color. To make a marbled pattern, you could drizzle the saffron milk (you could use 2 tbs of saffron milk) here and there and just swirl it around quickly with a skewer or fork. This will give some color to the falooda even inside which makes it look beautiful.
    • Chill it in the fridge for a couple of hours or over night.
    • Cut into desirable shapes or serve in earthen bowls in traditional style and enjoy.

    Notes

    Notes:
    Agar Agar (china glass strands) in a pack is available in any health food store or an asian or indian grocery store. You could also use agar agar powder.
    Print Recipe Pin Recipe Share on Twitter Share on Facebook

    Filed Under: Desserts, Fusion sweets, Indian Cuisine, Indian sweets., Ramadan meals Tagged With: agar agar dessert, kadal paachi, saffron flavoured agar agar dessert, zaffrani agar agar sweet

    My mama’s fried chicken

    December 1, 2013 by Fouzia Husainy 6 Comments

    fried chicken

    fried chicken

    My kids still have a vivid memory of their visits to their grandma’s house in India where they feasted on her mouth watering fried chicken that she always made for them. And now whenever they visit me they want to eat their Nani’s (grandma’s) special chicken. Therefore I carry her tradition. It is a simple recipe, but I believe her magic potion was love which she poured into it that made all the difference and kicked it up a notch.

    Here’s the recipe!

    Ingredients:
    1 whole chicken –
    2 tbs ginger garlic paste –
    1/2 tsp Turmeric powder
    2 tsp red chilly powder (MDH brand deghi/kashmiri chilli)
    1 tsp garam masala powder (haan’s garam masala)
    2 cups vegetable oil  to fry
    lemon juice
    salt as required

    fried chicken

    Crispy fried chicken

    Instructions:
    1. Remove the skin, cut the whole chicken into 12 pieces, clean, wash and drain them.
    2. Rub the chicken pieces with salt and lemon/lime juice and leave aside for 15 minutes.
    3. Mix together freshly ground ginger garlic paste, turmeric and red chilly powder (kashmiri chilli powder)and rub the chicken with it.
    4. Steam it on medium heat for a few minutes till it sweats a bit and turns opaque or is half cooked. It will be a bit soupy at the bottom. Do not throw away this soup. Remove from the stove and leave aside to cool.
    5. Heat the vegetable oil in a frying pan or dutch oven and on medium high heat fry all the chicken pieces in small batches till golden brown and crisp. Do not over fry as they would become hard and dry like charcoal.  Drain on paper towels.
    6. Now add some kashmiri chilli and some powdered garam masala spices to the left over soup that we reserved after steaming the chicken. Spoon in a tablespoon of hot oil from the dutch oven into it,  stir to thicken a bit, then toss into the sauce all the fried chicken pieces,  turn over to coat them evenly and serve them immediately.
    7. Alternatively you could thicken the sauce with a tsp of corn starch mixed with water and instead of tossing the chicken pieces in it, serve it as a dipping sauce with the crispy fried chicken pieces.  They taste delicious! Enjoy with rice and salad.

    fried chicken

    fried chicken coated with the sauce

    Notes:
    1. The steamed chicken pieces fry quickly, are crispy and well cooked inside.
    2. The chicken loses its crispness a bit when coated with the sauce but still delicious. It is personal preference whether to eat them crispy fried or coated with the sauce. Both are equally delicious though the texture is different.
    3. Kashmiri chilli powder gives a beautiful red crimson colour to the chicken, is mildly hot and flavourful.
    4. Deghi mirch has a higher heat level than kashmiri chilli. It is processed from special varieties of  Indian red chillies and imparts a unique flavour to the dish it is added.
    5.  Putting the chicken pieces in fuming hot oil will scald them and they would turn out dry and tasteless. You could increase the heat to medium high when the oil stops bubbling after adding the chicken pieces.
    6. Fry the chicken pieces in small batches, crowding them will make them absorb the oil and become oily.

    Recipe

    My Mama's Fried Chicken

    Author: Fouzia Husainy
    My kids still have a vivid memory of their visits to their grandma's house in India where they feasted on her mouth watering fried chicken that she always made for them. And now whenever they visit me they want to eat their Nani's (grandma's) special chicken. Therefore I carry her tradition. It is a simple recipe, but I believe her magic potion was love which she poured into it that made all the difference and kicked it up a notch.
    Course Main Course, Non Vegetarian
    Cuisine Indian

    Ingredients
      

    • 1 whole chicken -
    • 2 tbs ginger garlic paste -
    • 1/2 tsp Turmeric powder
    • 2 tsp red chilly powder MDH brand deghi/kashmiri chilli
    • 1 tsp garam masala powder haan's garam masala
    • 2 cups vegetable oil  to fry
    • lemon juice
    • salt as required
    Get Instant Help
    InstacartGet Recipe Ingredients

    Instructions
     

    • Remove the skin, cut the whole chicken into 12 pieces, clean, wash and drain them.
    • Rub the chicken pieces with salt and lemon/lime juice and leave aside for 15 minutes.
    • Mix together freshly ground ginger garlic paste, turmeric and red chilly powder (kashmiri chilli powder)and rub the chicken with it.
    • Steam it on medium heat for a few minutes till it sweats a bit and turns opaque or is half cooked. It will be a bit soupy at the bottom. Do not throw away this soup. Remove from the stove and leave aside to cool.
    • Heat the vegetable oil in a frying pan or dutch oven and on medium high heat fry all the chicken pieces in small batches till golden brown and crisp. Do not over fry as they would become hard and dry like charcoal.  Drain on paper towels.
    • Now add some kashmiri chilli and some powdered garam masala spices to the left over soup that we reserved after steaming the chicken. Spoon in a tablespoon of hot oil from the dutch oven into it,  stir to thicken a bit, then toss into the sauce all the fried chicken pieces,  turn over to coat them evenly and serve them immediately.
    • Alternatively you could thicken the sauce with a tsp of corn starch mixed with water and instead of tossing the chicken pieces in it, serve it as a dipping sauce with the crispy fried chicken pieces.  They taste delicious! Enjoy with rice and salad.

    Notes

    1. The steamed chicken pieces fry quickly, are crispy and well cooked inside.
    2. The chicken loses its crispness a bit when coated with the sauce but still delicious. It is personal preference whether to eat them crispy fried or coated with the sauce. Both are equally delicious though the texture is different.
    3. Kashmiri chilli powder gives a beautiful red crimson colour to the chicken, is mildly hot and flavourful.
    4. Deghi mirch has a higher heat level than kashmiri chilli. It is processed from special varieties of  Indian red chillies and imparts a unique flavour to the dish it is added.
    5. Putting the chicken pieces in fuming hot oil will scald them and they would turn out dry and tasteless. You could increase the heat to medium high when the oil stops bubbling after adding the chicken pieces.
    6. Fry the chicken pieces in small batches, crowding them will make them absorb the oil and become oily.
    Print Recipe Pin Recipe Share on Twitter Share on Facebook

    Filed Under: Chicken, Dinner, Lunch, Party food, Ramadan meals, Traditional Recipes Tagged With: fried chicken, red chilli chicken fry

    Ma’amoul fillings

    December 1, 2013 by Fouzia Husainy Leave a Comment

     maamoul fillings
    The filling inside the ma’amoul is what breathes life into it. The outer soft and delicate texture of the cookie combined with the crunchy, nutty, sweet and fragrant filling inside is utter bliss and so sensational! I love the fillings with nuts – be they almonds or walnuts or pistachios or mixed nuts.
    As for the fillings with dates, I would recommend using finely chopped dates or home made date paste, made with good quality dates instead of the store bought one which is mostly stale and also gritty. One more important ingredient is the orange blossom water which enhances the taste of the ma’amoul with its fragrance. Some use rose water, but I prefer to use orange blossom water as its fragrance is so appealing. Using honey and icing sugar with the nuts gives the filling a crunchy texture.

    Ingredients: 
    Nut filling:
    1 cup Nuts (pistachios or almonds or walnuts or mixed nuts)
    1/4 cup icing sugar
    2 tbs honey
    1 tbs orange blossom water

    Date filling:
    1 cup dates chopped or 1 cup date paste
    1 tsp cinnamon
    1 tsp cardamom
    1 tbs orange blossom water

    Instructions:
    1. Put the nuts in a zip lock bag. Take a pestle or a hammer and pound them coarsely.

    2. Transfer them to a bowl. Add a major portion of the icing sugar, saving just a little to dust later.

    3. Add orange blossom water. Mix well with a fork.

    4. Drizzle the honey and mix well again.

    5. Dust a little more icing sugar from what you saved earlier.

    6. Make small rounds of them and keep them ready for stuffing the ma’amouls.

    maamoul fillings

    7. For the dates filling, chop finely or grind the dates or use good quality dates paste. Add the cinnamon, cardamom and orange blossom water, mix well and use this for stuffing the maamouls.

    8. You can make different variations using chocolate chips, sweetened dried coconut etc and make different fillings with pistachios, walnuts, almonds or with a combination of all nuts together. You can also be creative and do something out of the box using dried apricots, figs or plums or any other dried fruit. In the image below is the filling with chopped walnuts, dates, chocolate chips and orange blossom water. You could make your own combinations in this way. For the complete ma’amoul recipe please click here

    Recipe

    Ma'amoul Fillings

    Author: Mamasecretrecipes
    The filling inside the ma'amoul is what breathes life into it. The outer soft and delicate texture of the cookie combined with the crunchy, nutty, sweet and fragrant filling inside is utter bliss and so sensational! I love the fillings with nuts - be they almonds or walnuts or pistachios or mixed nuts.
    Course Dessert
    Cuisine Middle Eastern

    Ingredients
      

    Nut filling:

    • 1 cup Nuts pistachios or almonds or walnuts or mixed nuts
    • 1/4 cup icing sugar
    • 2 tbs honey
    • 1 tbs orange blossom water

    Date filling:

    • 1 cup dates chopped or 1 cup date paste
    • 1 tsp cinnamon
    • 1 tsp cardamom
    • 1 tbs orange blossom water
    Get Instant Help
    InstacartGet Recipe Ingredients

    Instructions
     

    • Put the nuts in a zip lock bag. Take a pestle or a hammer and pound them coarsely.
    • Transfer them to a bowl. Add a major portion of the icing sugar, saving just a little to dust later.
    • Add orange blossom water. Mix well with a fork.
    • Drizzle the honey and mix well again.
    • Dust a little more icing sugar from what you saved earlier.
    • Make small rounds of them and keep them ready for stuffing the maamouls.
    • For the dates filling, chop finely or grind the dates or use good quality dates paste. Add the cinnamon, cardamom and orange blossom water, mix well and use this for stuffing the maamouls.
    • You can make different variations using chocolate chips, sweetened dried coconut etc and make different fillings with pistachios, walnuts, almonds or with a combination of all nuts together. You can also be creative and do something out of the box using dried apricots, figs or plums or any other dried fruit. For the complete maamoul recipe please click here
    Print Recipe Pin Recipe Share on Twitter Share on Facebook

    Filed Under: Almonds, Apple, Baked Treats, Cakes and pastries, Cookies, Dates, Desserts, Energy Snacks, Middle Eastern Cuisine, Nuts, Pistachios, Ramadan meals, Short bread cookies, Sweet fillings, Sweet Treats, Traditional Recipes, walnuts Tagged With: cookies, fillings for maamouls, middle eastern cookies, nut and date fillings, stuffed cookies

    White Methi Chicken

    November 4, 2013 by Fouzia Husainy Leave a Comment

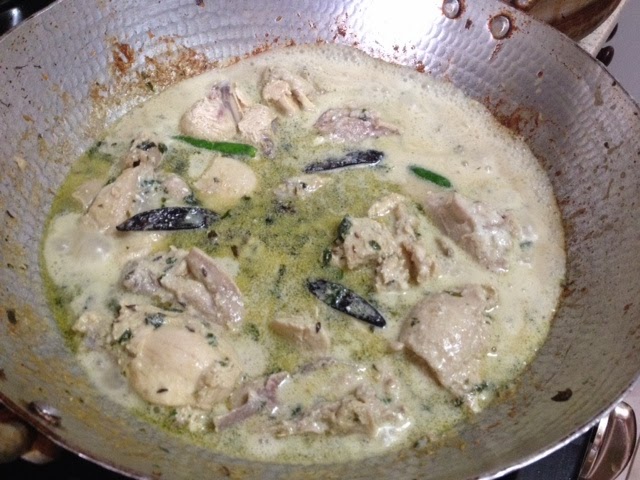
    The aroma that emanates when fresh methi (fenugreek) leaves are sautéed in ghee or oil is tantalazing! Methi added to any vegetable or meat gives a very good flavour to the dish. I wanted to make white chicken with yoghurt and no onions and flavour it with methi. The result was amazing.

    Here’s the recipe!

    Ingredients:
    Chicken whole – 1
    Methi (fenugreek) leaves – 1/4 cup
    Cumin seeds – 1 tsp
    Dried red chillies – 2-4
    Green chillies whole – 2 – 4
    White chilli powder – 1/2 tsp
    Dhania powder – 1 tsp
    Yoghurt – 1 cup
    Garlic paste – 2 tsp
    Salt to taste
    Lemon juice – juice of 1/2 a lime
    Corn flour – 1 tsp
    Half and half – 1/4 cup or use Coconut milk
    Ghee – 1 tbs
    Vegetable oil – 1 tbsp.

    Method:
    1. Clean, wash and cut the chicken into 12 pieces at the joints. Drain, towel dry the chicken pieces and keep them aside. Wash and dry the methi leaves and keep them aside.

    2. Mix together 1/2 cup yoghurt, garlic paste, dhania powder, white chilli powder and vegetable oil. Rub the chicken with salt and lemon juice and leave for 10 mins. Then marinate the chicken with this marinade for about 2 hours.

    3. Heat the ghee in a sauce pan. Add the dried red chillies and cumin seeds.

    4. As soon as the cumin seeds crackle add the methi leaves and roast them on medium heat. This releases an aroma and the methi leaves turn dark green and crispy.

    5. Add the marinated chicken to the pan. Roast the chicken well in the ghee till it is golden.

    6. Whisk the remaining yoghurt well to dissolve any lumps and then add it to the chicken. Add the green chillies and mix well.

    7. Add a glass of water, adjust the flavouring, add salt if necessary. Lower the heat and simmer till the chicken is tender and juicy.

    8. Whisk the corn flour in one tbsp. water and add it to the chicken to thicken the gravy slightly.

    9. Add half and half or coconut milk. I added half and half. I will try with coconut milk next time. It   should be good too.

    10. Simmer for 2 – 4 minutes. Remove from the stove and serve hot with boiled or fried rice. Enjoy!


    Food & Drink


    hotell London

    Filed Under: Chicken, Non-Vegetarian

    Sagudana kheer (Porridge)

    November 3, 2013 by Fouzia Husainy Leave a Comment

    This is a quick dessert I made after watching the Junior master chef India  (06th October, 2013 episode). Master chef Vikas Khanna makes this kheer (porridge) with sugar cane juice and flavours it with mint and rose petals. But I gave a twist to the recipe by making this kheer with coconut milk scented with fresh rose petals and sweetened with cane sugar.
    The kheer was just delicious! The coconut flavour combined with the scent of fresh roses was heavenly. We couldn’t stop eating.

    Here’s the recipe!

    Ingredients: 
    Sagodana pearls- 1/2 cup
    Cane sugar cubes – 2 inch square or sweeten as per taste
    Coconut Milk – 1 cup
    Rose petals – Fresh petals from one rose
    Nuts – Almonds, pistachios etc (optional)

    Method:
    1. Soak the Sagodana in 1 cup of water for at least an hour.
    2. Dissolve the cane sugar cubes in the coconut milk and bring it to a boil.
    3. Drain the soaked Sagodana and add to the boiling milk.
    4. Add a few rose petals.
    5. Keep stirring till the Sagodana pearls turn transparent and the milk is absorbed.
    6. Turn down the heat and serve warm.
    7. You may garnish with some strands of saffron and chopped nuts.

    Tips:
    1. Add honey or maple syrup instead of .cane sugar for a different flavour.
    2. Add the Sagudana to the coconut milk only after it boils.
    3. Use a large saucepan instead of a small one, otherwise the Sagudana would turn soggy.

    Filed Under: Desserts, Indian Cuisine, Indian sweets., Ramadan meals Tagged With: Kheer, porridge, rose petals, sagudana, Sagudana kheer, special kheer, Sweet Kheer, sweet porrdige, Tapioca porrdige

    Bottle gourd (Kaddu/Lauki) Barfi

    September 23, 2013 by Fouzia Husainy Leave a Comment

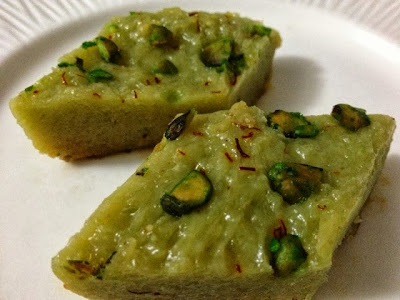
    As a child I loved the kaddu (bottle gourd) ki mithai (as we called it) that my mom used to make. She would first cook it in the pan on the stove and then bake it in a huge silver plated brass pie plate with a heavy lid. As we had no gas or electric oven she used her primitive baking technique of placing it over a layer of burning coals and then adding another layer of burning coals on the lid. It was amazing to watch her bake using this technique whenever she made traditional sweets or indian pies and cookies like baked halwa pooris, nan khatai etc.

    I made this recipe based on estimates by tasting as my mom used to do, but I kept a tab on what and how much I was adding each time. My mom would dissolve the saffron in milk and add it to the mixture while cooking. But I decided to use it more as a garnish. I also added pistachios to complement the green color of the bottle gourd. The result was fabulous!  The intense sweet milky taste combined with the juicy and chewy texture of the gourd kicked up a notch. Indeed, it did taste like my mom’s kaddu ki mithai that I used to enjoy.

    Here’s the recipe:

    Ingredients:
    1 cup bottle gourd ( after squeezing out the water)
    350 gm khoya  (dried milk)
    2 tbs ghee
    1 1/2 – 2 cups sugar
    2 tbs milk
    a pinch saffron
    2 tbs pistachios
    a few drops of green liquid food coloring

    Instructions:
    1. Peel the bottle gourd cut off the stem, trim the bottom and cut it into two halves vertically.
    2. Scoop out the pulp and seeds in the center with a teaspoon and discard them.
    3. Grate the gourd finely, squeeze out the juice by hanging it in a cheese cloth overnight or for a few hours.
    4. Melt 2 tbs ghee in a non-stick sauce pan on medium heat and lightly fry the grated gourd till it turns translucent.
    5. Add 1 1/2 cups sugar, stir and mix well.
    6. Grind the khoya to a fine powder and add to the pan. Add 2 tbs milk, green food coloring and mix well. Add more sugar if needed according to how much sweeter you want it.
    7. Cook on low or medium low heat only while stirring continuously.
    8. Allow the gourd mixture to thicken and when it starts leaving the sides of the pan, remove and put it in a baking dish greased with ghee at the bottom as well as on all the sides.
    9. Sprinkle the saffron threads and halved pistachios on top, cover with tin foil and bake in an oven pre-heated to 350º F for 20-25 mins or till lightly golden at the bottom.
    10. Remove from the oven, allow it to cool down, then chill it in the refrigerator, cut into diamond shapes and serve chilled. The bottle gourd burfi is ready to enjoy.

    Tips:
    1. Cook very gently with patience on low and medium low heat only.

    2. Take care not to over brown or burn the grated gourd shreds while cooking or baking.

    9. Sprinkle the saffron threads and halved pistachios on top, cover with tin foil and bake in an oven pre-heated to 350º F for 20-25 mins or till lightly golden at the bottom.
    10. Remove from the oven, allow it to cool down, then chill it in the refrigerator, cut into diamond shapes and serve chilled. The bottle gourd burfi is ready to enjoy.
    Tips: 
    1. Cook very gently with patience on low and medium low heat only.

    2. Take care not to over brown or burn the grated gourd shreds while cooking or baking.

    You may also like:

    Panna Cotta

    Anday ki Mithai

    Andey ki Mithai

    Mango Shrikand

    Mango Shrikand

    Filed Under: Desserts, Fusion sweets, Indian Cuisine, Indian sweets., Ramadan meals Tagged With: Bottle gourd burfi, Bottle gourd sweet, kaddu ki mithai, Lauki ka halwa

    Paneer Pepper Melange

    September 13, 2013 by Fouzia Husainy Leave a Comment

    This is a quick and simple paneer dish very easy to make but so tasty to eat! 
    Ingredients: 
    Paneer – cut into small cubes (1/2 of 340gm pack)
    Red bell pepper – 1
    Green bell peppers – 1
    Tomato – 1 medium size
    Green chillies – 2 small 
    Cilantro for garnish
    Cumin seeds – 1/2 tsp
    Dried red chillies – 2 medium size
    Fresh garlic clove – 1 chopped
    Coriander powder – 1 tsp
    Cumin powder – 1/2 tsp
    Turmeric powder – 1/2 tsp
    Red chilly powder – 1/2 tsp
    Garam masala powder – 1/2 tsp
    Black Pepper – 1/4 tsp
    Vegetable oil – 2 tbs
    Salt to taste
    Method: 
    1. Heat 2 tablespoons of vegetable oil in a non-stick saucepan. 
    2. Add dried red chillies, cumin seeds, followed by chopped garlic. 
    3. Stir in diced green and red bell peppers and fry them for 2 mins. 
    4. Throw in the diced tomato, give it a good stir and quickly add the paneer cubes and green chillies.
    5. Sprinkle salt, pepper and blend in all the masalas (coriander, cumin, turmeric and red chilly powders) with the paneer.
    6. Turn over gently and cook till the paneer pieces are well coated with the masala and are soft and golden. 
    7. Sprinkle garam masala powder, mix well, garnish with chopped cilantro and serve hot with chappatis, paranatas or puris. 


    Food & Drink


    hotell London

    Filed Under: Side Dishes, Vegetarian

    Minty Beef Kebabs

    September 10, 2013 by Fouzia Husainy Leave a Comment

    My failed attempts to make kebabs like the ones we used to enjoy at the Kareem’s restaurant in Old Delhi left me frustrated. I still dream about their taste – so flavourful, juicy and spicy too.

    My kebabs were always dry no matter what I did and when I tried to make them moist they would crumble and fall while they were being grilled. I always used extra lean meat to keep them healthy. But my husband would argue and justify saying: “It is the fat that keeps the kebabs moist. All the restaurants use some fat in their kebabs and all that fat drips off when you grill them”, which took me a while to digest. Anyway, I decided to try them out with medium beef at his request, thinking, I am not going to make them often. Well I have an alternative for healthy eaters: you could try my Koubideh which are made with extra lean ground beef.

    The medium ground beef did do the trick and my kebabs did turn out well this time and did not fall off when I grilled them. Not only this, the Shaan’s Chapli Kebab spices combined with fresh mint and cilantro enhanced their flavour. I rarely use store bought spice mixes in my cooking except for a few selected dishes like Haleem, Nihari and Chapli kebabs as these are actually good also it turns out easy instead of an elaborate preparation. The Chapli kebab spices have whole coriander, cumin and garam masala spices in them with white flour. So I decided to grind them fine. Then I added the fresh mint and cilantro. And I was very happy with the end result. They turned out not only juicy and flavourful but were very close to the ones we ate at Kareem’s restaurant in Old Delhi. My family loved them so much. I forgot all about the fat and enjoyed every bite of them.

    Here’s the recipe:

    Ingredients:
    350gm medium ground beef
    Shaan’s chapli kebab masala
    1/2 cup cilantro
    1/4 cup mint
    1tbs vegetable oil
    1tbs veg oil for basting
    4 flat metal skewers

    Instructions:
    1. Quickly rinse the ground beef lightly in running water in a strainer without making it soggy. Leave it to drain in the strainer as it has to be dry and not at all watery. You don’t need to rinse it if the beef was washed before grinding.
    2. Add half the pack of the Shaan’s chapli kebab masala to a dry grinder and grind it fine.
    3. Wash the fresh mint and cilantro and towel dry them, then add to the grinder and grind them all together.
    4. Mix together the ground beef, the dry ground masala and one teaspoon of vegetable oil.
    5. Brush the skewers with oil, then dust them with flour as this makes kebab mix stick to them. And also the oil makes it easier to slide off the kebab when it is done.
    6. With clean wet hands take a golf size ball of the prepared ground beef and wrap it around the skewer till it holds together. Clean and wet your hands again and shape it into a nice, long, smooth and round sausage then with your index and middle finger mimicking scissors pinch the kebab from one end to the other alongside to form ridges. Smoothen the edges.
    7. Repeat the steps for all of them. Leave enough room on either side of the skewers so as to rest them on the grill.
    8. Set your oven to broil on high (550ºF). Take an old cookie sheet and cover it with tin foil. Place the skewers on the cookie sheet. Then place it under the grill in the top position of the oven.
    9. Broil for 3 mins on each side. Do not over cook as they would harden. When you see them turning golden brown turn over and cook for another 3 mins till they are just done. Keep some tin foil ready. Remove them from the oven. Discard the fat/oil drippings. Wait for sometime till they cool off a bit.
    10. Slide them off with your hands (wearing clean oven proof gloves) into the tin foil and wrap them up immediately. This helps in retaining the moisture and heat till you serve them. You have to be very careful and use oven gloves while handling the skewers as they are very hot.
    11. Serve them hot with rumali roti (thin flat bread like a hand kerchief) or naan and yoghurt mint chutney.
    12. You can make the chutney by grinding together 1/2cup each of fresh mint and cilantro, 1 small green chilly, 1/2 an inch ginger, salt and pepper. Then add this mixture to 1/2 a cup of whisked sour yogurt. You could either use this chutney as a dipping sauce for the kebabs or spread it on the Naan or rumali roti, place a long kebab inside, top with sliced red onions sprinkled with lemon juice and chaat masala, roll it into a wrap and enjoy!

    Notes:

    1. The ground beef for the kebabs should be dry for shaping them, if wet and soggy the kebabs would fall off the skewer and it will be hard to shape them.
    2. Please make sure to dry the cilantro, and mint well and the ground mixture should be powdery.

    Recipe

    Minty Beef Kebabs

    Author: Fouzia Husainy
    Delicious minty beef kebabs, so flavourful and juicy!
    Course Main Dish, Side Dish
    Cuisine Afghani Cuisine, North Indian Cuisine

    Equipment

    • Metal Skewers

    Ingredients
      

    • 350 g medium ground beef
    • 1/2 pack Shaan's chapli kebab masala
    • 1/2 cup cilantro
    • 1/4 cup mint
    • 1 tbs vegetable oil
    • 1 tbs veg oil for basting
    • 4 flat metal skewers
    Get Instant Help
    InstacartGet Recipe Ingredients

    Instructions
     

    • Quickly rinse the ground beef lightly in running water in a strainer without making it soggy. Leave it to drain in the strainer as it has to be dry and not at all watery. You don't need to rinse it if the beef was washed before grinding.
    • Add half the pack of the Shaan's chapli kebab masala to a dry grinder and grind it fine.
    • Wash the fresh mint and cilantro and towel dry them, then add to the grinder and grind them all together.
    • Mix together the ground beef, the dry ground masala and one teaspoon of vegetable oil.
    • Brush the skewers with oil, then dust them with flour as this makes kebab mix stick to them. And also the oil makes it easier to slide off the kebab when it is done.
    • With clean wet hands take a golf size ball of the prepared ground beef and wrap it around the skewer till it holds together. Clean and wet your hands again and shape it into a nice, long, smooth and round sausage then with your index and middle finger mimicking scissors pinch the kebab from one end to the other alongside to form ridges. Smoothen the edges.
    • Repeat the steps for all of them. Leave enough room on either side of the skewers so as to rest them on the grill.
    • Set your oven to broil on high (550ºF). Take an old cookie sheet and cover it with tin foil. Place the skewers on the cookie sheet. Then place it under the grill in the top position of the oven.
    • Broil for 3 mins on each side. Do not over cook as they would harden. When you see them turning golden brown turn over and cook for another 3 mins till they are just done. Keep some tin foil ready. Remove them from the oven. Discard the fat/oil drippings. Wait for sometime till they cool off a bit.
    • Slide them off with your hands (wearing clean oven proof gloves) into the tin foil and wrap them up immediately. This helps in retaining the moisture and heat till you serve them. You have to be very careful and use oven gloves while handling the skewers as they are very hot.
    • Serve them hot with rumali roti (thin flat bread like a hand kerchief) or naan and yoghurt mint chutney.
    • You can make the chutney by grinding together 1/2cup each of fresh mint and cilantro, 1 small green chilly, 1/2 an inch ginger, salt and pepper. Then add this mixture to 1/2 a cup of whisked sour yogurt. You could either use this chutney as a dipping sauce for the kebabs or spread it on the Naan or rumali roti, place a long kebab inside, top with sliced red onions sprinkled with lemon juice and chaat masala, roll it into a wrap and enjoy!

    Notes

    1. The ground beef for the kebabs should be dry for shaping them, if wet and soggy the kebabs would fall off the skewer and it will be hard to shape them.
    2. Please make sure to dry the cilantro, and mint well and the ground mixture should be powdery.
    Print Recipe Pin Recipe Share on Twitter Share on Facebook

    Filed Under: Appetizers, Beef, Kebabs, Non-Vegetarian, Party food, Ramadan meals, Side Dishes

    Maamoul (Stuffed Buttery Cookies)

    September 8, 2013 by Fouzia Husainy 8 Comments

    mamoul cookies

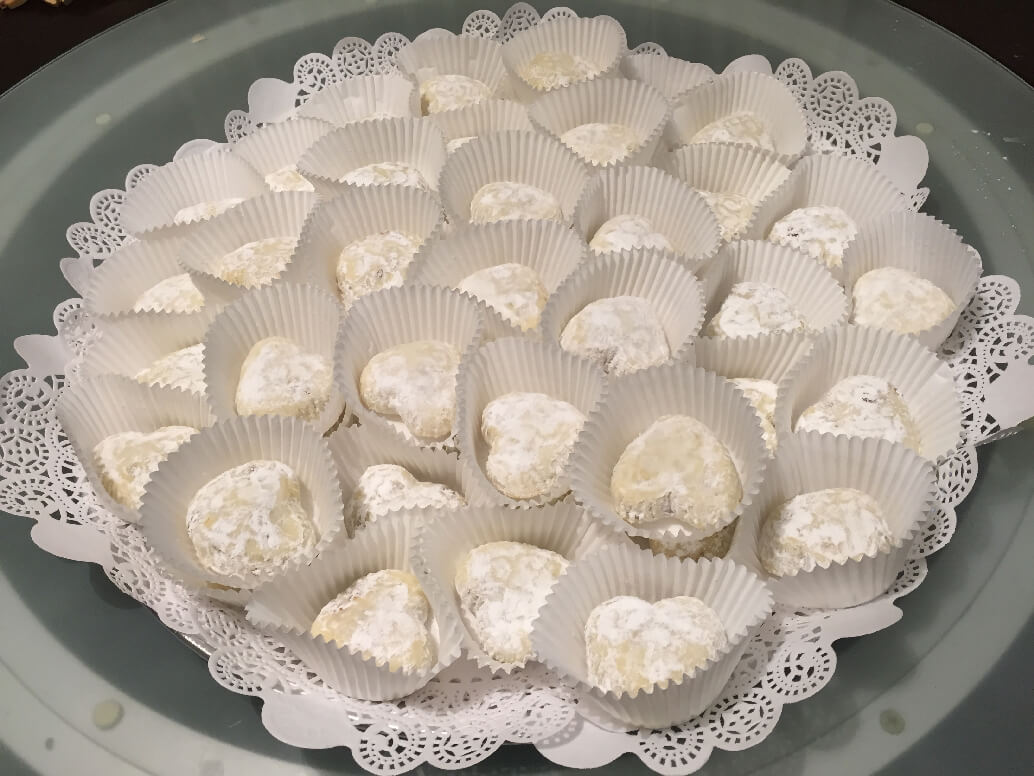
    heart shaped mamoul cookies

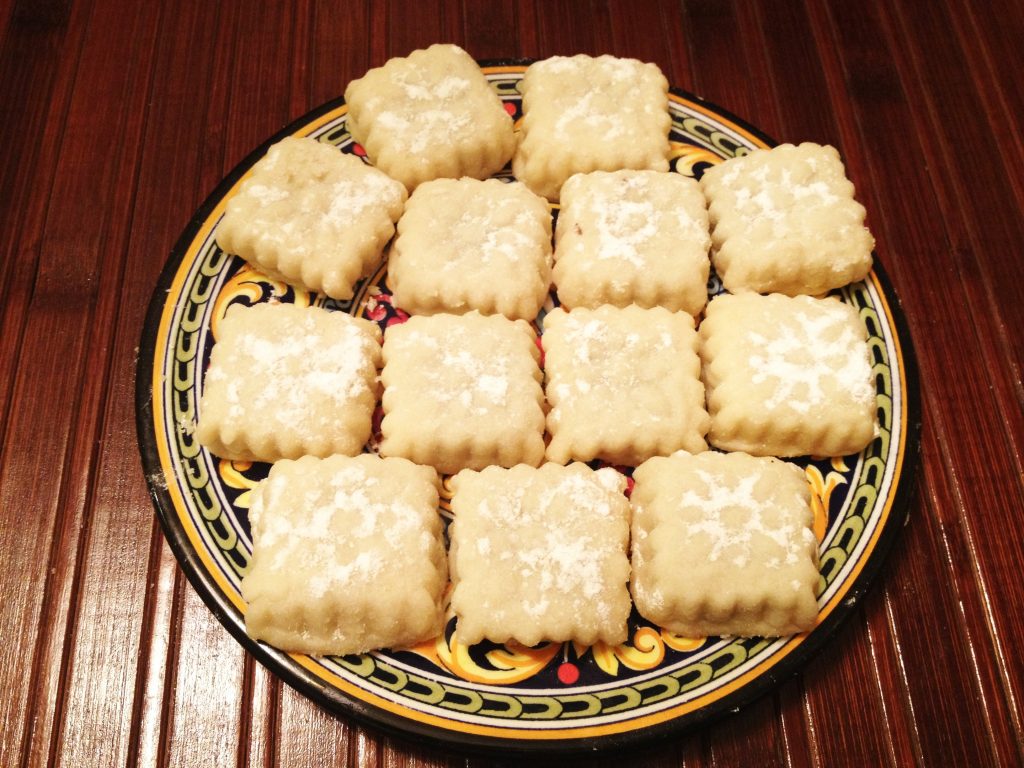
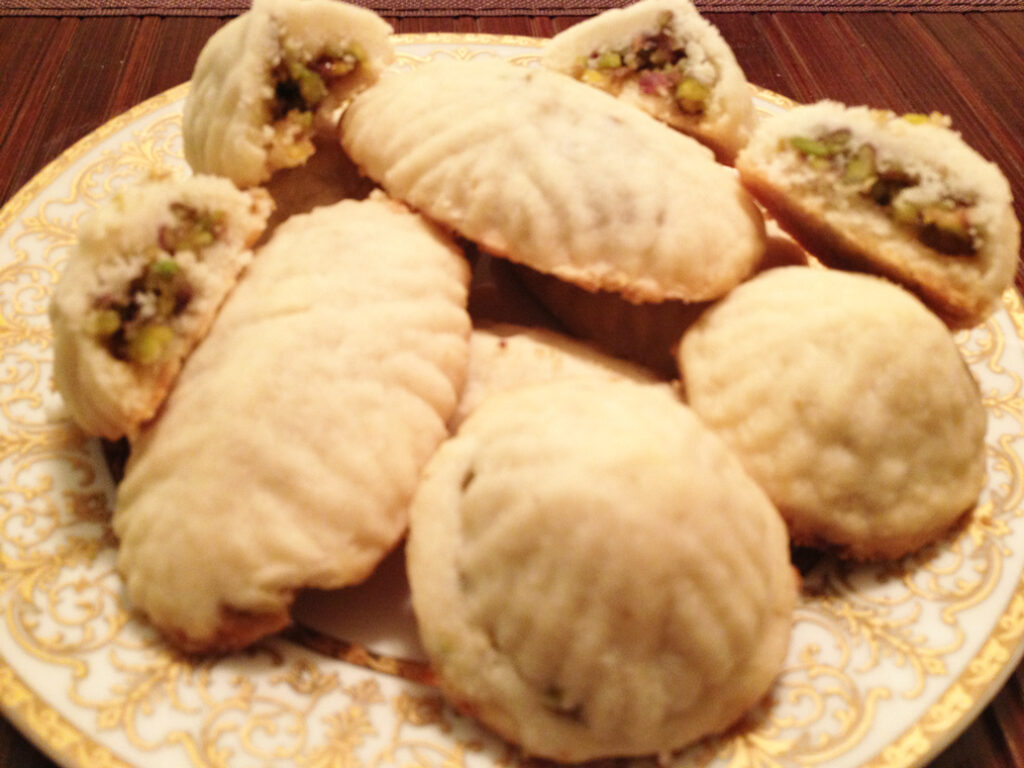
    Maamoul are what I would call, cookies from Heaven!! They melt in the mouth and make you feel so happy. Filled with ground almonds, walnuts, pistachios or dates, scented with orange blossom water and dusted with icing sugar they are just utter bliss and so irresistibly delicious! These delicate stuffed pastries are so addicting that once you try them you are sure not going to stop with one. I love the ones with pistachio filling the best.

    Maamoul – the most popular Holiday Cookies
    No holidays or festivals are complete without these stuffed buttery short bread cookies in the middle eastern countries from where they originated. These cookies are a must in every household whether it is Eid, Christmas, Easter or Hanukkah and the preparations begin a few days earlier with families and friends gathering together to make these cookies.

    How are they made?
    They are usually made by hand using a wooden mold in different shapes. There is not much sugar added to the buttery dough because of the naturally sweet dates filling or nut and honey filling inside. They are also made with semolina but after many trials I personally prefer making them with only flour as it blends in with the butter better to give a smooth and crunchy texture.

    Popular in the Middle Eastern regions
    “They are very popular in Jordan, Palestine, Syria, Lebanon, and other Levantine countries and are baked in Ramadan and on the Eid al-Fitr and Eid al-Adha holidays. Arab Christians eat them in the days before Lent, on Easter Sunday and on the feast of Epiphany. In the Greek and Arab Christian traditions, the cookies are shaped into rings to symbolize the crown of Jesus.

    They are also popular among Syrian, Lebanese and Egyptian Jewish communities, where maamoul with nut fillings are eaten on Purim, and maamoul with date fillings are eaten on Rosh Hashanah and Hanukkah.

    The Levantine Jewish version of maamoul differs from the Levantine or Turkish versions by being made with pure white flour and no semolina, today this variation is eaten in Israel and by Syrian and Egyptian Jewish communities in the Diaspora.” (source: wikipedia)

    I am so fond of these cookies that I always make them in big batches for special occasions. I have not only made them for Eid, for kids home comings, for social gatherings or events but also gifted them at weddings. It gives me a great pleasure to see my guests enjoy them and these cookies disappearing from the table in no time.

    This recipe has been featured on Twinkl as part of their Ramadan Recipes Around the World blog series.

    maamoul cookies

    pistachio mamool
    Here’s the recipe.

    Ingredients:
    4 cups white all purpose flour
    1 pound unsalted butter (at room temperature)
    1/2 cup sugar
    1/4 tsp salt
    1/4 cup chilled water
    2 tbs orange blossom water
    1/2 tsp cardamom ground (optional)
    Maamoul molds

    Instructions:
    1. Pulse the soft butter (at room temperature) in a food processor with the orange blossom water.

    2. Add the chilled water to the butter and pulse again to a smooth consistency.

    3. Combine the flour, salt and sugar together in a separate bowl.

    4. As the processor is running start adding the flour mixture through the spout stopping at intervals so as not to heat up the processor just until all the flour is incorporated. If the dough you get is too moist and sticky add a little more flour and if too dry then a little more butter. But for me, with 4 cups and a little more it turns out just right. Remove and set aside in a bowl. Do not knead the dough by running the processor more. This makes the dough more glutinous which we do not want. It should be like short bread dough easily tearable and not elastic.

    5. Meanwhile pound the nuts coarsely. You can use different fillings with mixed nuts (almonds, pistachios and walnuts) or just any nut of your choice (pistachios, walnuts or almonds) in combination with honey, icing sugar and orange blossom water. You can also use just date paste mixed with orange blossom water. Or dates and mixed nuts with orange blossom water. You can be as creative as you want with your fillings. For the maamoul fillings recipe click here.

    6. Make small round balls of the dough. Make slightly bigger balls of the filling and set them aside. Keep the flour duster and tea towels ready. If you are using more than one filling you can use different molds just to differentiate them from the shape.

    7. Make a depression in the small rounds of the dough, shape them like a bowl by swirling around and pinching the edge/rim with your fingers and thumb. Place the filling in the bowl, close the dough over the filling, pinch to seal and smoothen it like a ball. Please note that there should be a considerably thin layer of dough around the filling (not so thin that the filling comes out on baking and not so thick that there’s very little filling inside). Wipe your hands with the tea towel each time you touch the filling to avoid discolouring the dough.

    8. Roll the filled rounds in the flour, dust the mold too with a little flour then overturn it and tap to shake off the excess flour. This helps the maamoul from easily falling off the mold.

    9. Place the filled maamoul in the selected shape in the maamoul mold and press it with your palm. Do not overdo it as it would rupture the dough and the filling would come out.

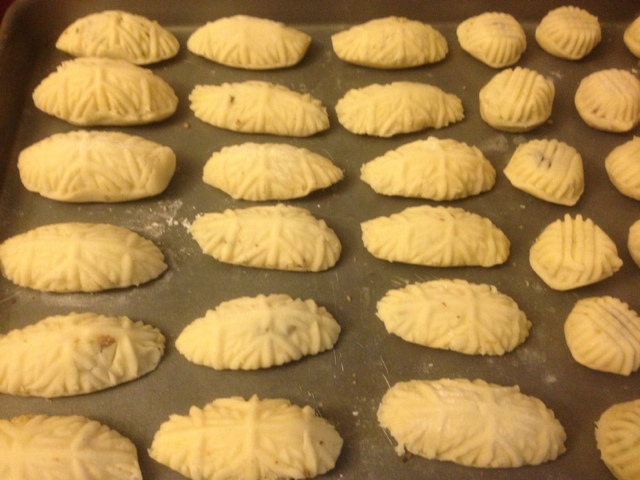
    10. Line a cookie sheet with parchment paper.

    mamoulcookies

    11. Now tap the mold on the edge of the cookie sheet to get the maamoul fall off.  Or you could keep a separate tray to tap the maamouls from the mold. Repeat with the rest of the maamouls.

    12. Pre-heat the oven to 350ºF. Bake the maamouls for around 10 -12 minutes till the base of the maamoul is lightly golden brown. After 12 mins take a flat thin spatula and lift the base of a maamoul to see if it is done. Remove when they look firm but still white at the top and lightly golden at the base.

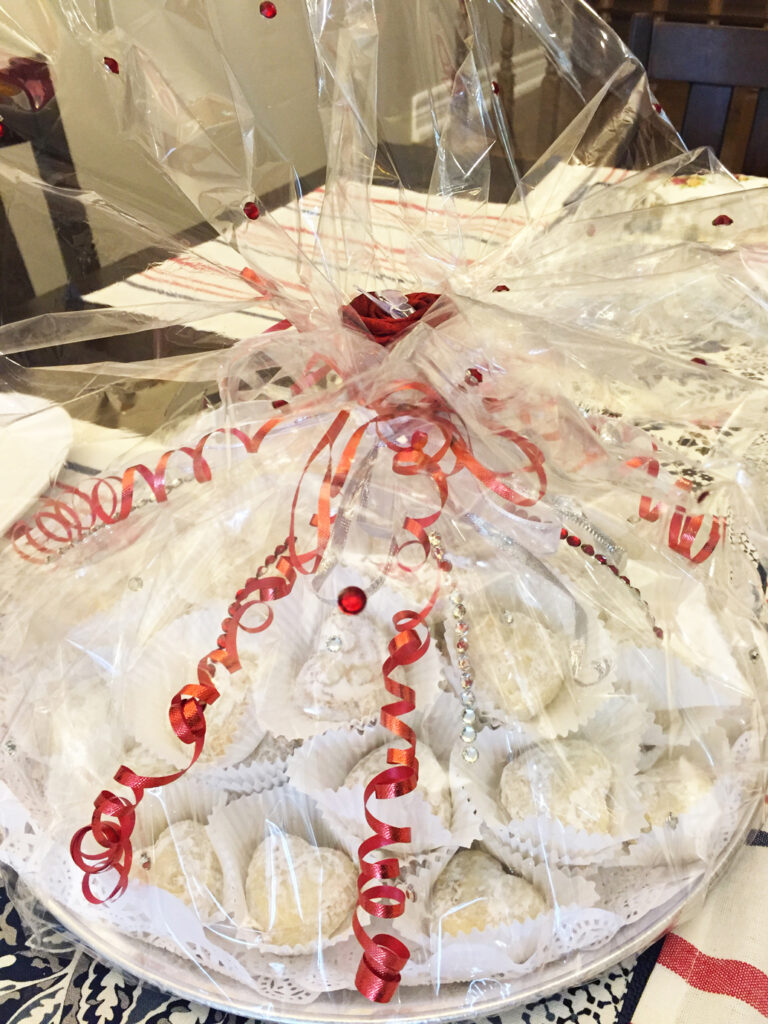
    13. Cool on wire wrack for one hour. Dust them with icing sugar after they cool down completely and enjoy. Below is the picture of maamouls in a gift wrap for a wedding.

    mamouls for wedding

    Tips:
    Do not store these cookies in the fridge. Store them in a cool dry place in an air tight container or cookie jar. They stay fresh outside for 2 – 4 weeks. You may freeze them if you want to store for longer periods of time. But bring them to room temperature before serving them.

    This recipe has been featured on Twinkl as part of their Ramadan Recipes Around the World blog series.

    Recipe

    Maamoul (Stuffed Buttery Cookies)

    Author: Mamasecretrecipes
    Maamouls are what I would call, cookies from Heaven!! They melt in the mouth and make you feel so happy. These little goodies, packed with rich nuts, scented with orange blossom water and sweetened with honey are so addicting that you would never want to stop eating them. I love the ones with pistachio filling the best.
    Course Baked goodies, Dessert
    Cuisine Middle Eastern

    Ingredients
      

    • 4 cups white all purpose flour
    • 1 pound unsalted butter at room temperature
    • 1/2 cup sugar
    • 1/4 tsp salt
    • 1/4 cup water chilled
    • 2 tbs orange blossom water
    • Maamoul molds
    Get Instant Help
    InstacartGet Recipe Ingredients

    Instructions
     

    • Pulse the soft butter (at room temperature) in a food processor with the orange blossom water.
    • Add the chilled water to the butter and pulse again to a smooth consistency.
    • Combine the flour, salt and sugar together in a separate bowl.
    • As the processor is running start adding the flour mixture through the spout stopping at intervals so as not to heat up the processor just until all the flour is incorporated. If the dough you get is too moist and sticky add a little more flour and if too dry then a little more butter. But for me, with 4 cups and a little more it turns out just right. Remove and set aside in a bowl. Do not knead the dough by running the processor more. This makes the dough more glutinous which we do not want. It should be like short bread dough easily tearable and not elastic.
    • Meanwhile pound the nuts coarsely. You can use different fillings with mixed nuts (almonds, pistachios and walnuts) or just any nut of your choice (pistachios, walnuts or almonds) in combination with honey, icing sugar and orange blossom water. You can also use just date paste mixed with orange blossom water. Or dates and mixed nuts with orange blossom water. You can be as creative as you want with your fillings. For the maamoul fillings recipe here
    • Make small round balls of the dough. Make slightly bigger balls of the filling and set them aside. Keep the flour duster and tea towels ready. If you are using more than one filling you can use different molds just to differentiate them from the shape.
    • Make a depression in the small rounds of the dough, shape them like a bowl by swirling around and pinching the edge/rim with your fingers and thumb. Place the filling in the bowl, close the dough over the filling, pinch to seal and smoothen it like a ball. Please note that there should be a considerably thin layer of dough around the filling (not so thin that the filling comes out on baking and not so thick that there's very little filling inside). Wipe your hands with the tea towel each time you touch the filling to avoid discolouring the dough.
    • Roll the filled rounds in the flour, dust the mold too with a little flour then overturn it and tap to shake off the excess flour. This helps the ma'amoul from easily falling off the mold.
    • Place the filled ma'amoul in the selected shape in the ma'amoul mold and press it with your palm. Do not overdo it as it would rupture the dough and the filling would come out.
    • Line a cookie sheet with parchment paper.
    • Now tap the mold on the edge of the cookie sheet to get the ma'amoul fall off.  Or you could keep a separate tray to tap the mamouls from the mold. Repeat with the rest of the ma'amouls.
    • Pre-heat the oven to 350º F. Bake the maamouls for around 10 -12 minutes till the base of the maamoul is lightly golden brown. After 12 mins take a flat thin spatula and lift the base of a maamoul to see if it is done. Remove when they look firm but still white at the top and lightly golden at the base.
    • Cool on wire wrack for one hour. Dust them with icing sugar after they cool down completely and enjoy. 

    Notes

    Tips:
    Do not store these cookies in the fridge. Store them in a cool dry place in an air tight container or cookie jar. They stay fresh outside for 2 - 4 weeks. You may freeze them if you want to store for longer periods of time. But bring them to room temperature before serving them.
    Print Recipe Pin Recipe Share on Twitter Share on Facebook

    Filed Under: Baked Treats, Cakes and pastries, Cookies, Desserts, Middle Eastern Cuisine, Ramadan meals, Traditional Recipes Tagged With: buttery cookies, cookies, delicate pastries, ma'amoul, mahmoul, mamoul, middle eastern cookies, short bread cookies, stuffed cookies

    Murmuree Bhindi

    August 21, 2013 by Fouzia Husainy Leave a Comment

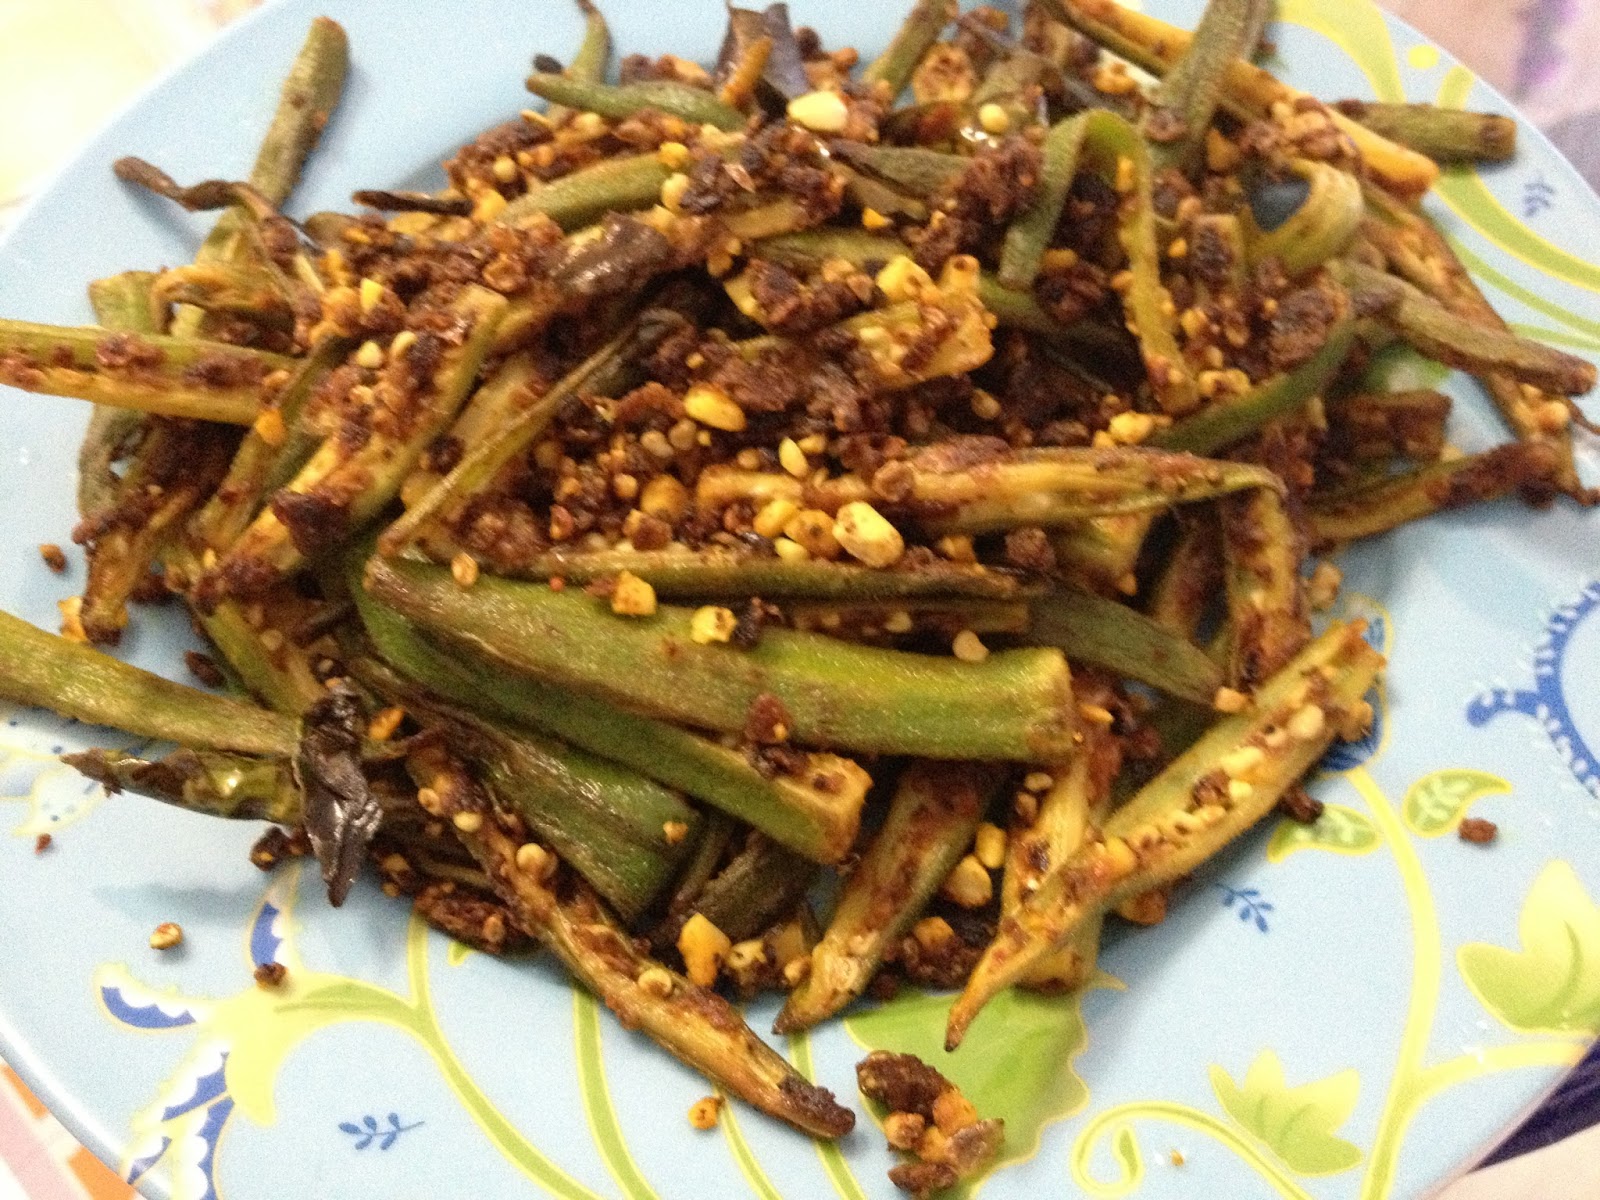
    I was kind of inspired by Master Chef India when I made this dish. I wanted to make it healthy so instead of deep frying the bhindi as they do, I stir fried it using besan flour to keep it crispy and it turned out well as I had anticipated it.
    Ingredients:

    Ladies fingers or Okra – 1lb
    Peanuts crushed – 2 tbs
    Curry leaves – a few
    Dried red chillies – 2
    Garlic finely chopped – 2 medium sized cloves
    Onions sliced – 1 medium
    Dhania powder – 1 tsp
    Cumin powder – 1/2 tsp
    Garam masala powder – 1/2 tsp
    Red chilly powder – 1/2 tsp
    Turmeric powder – 1/4 tsp
    Besan powder (chickpea flour) – 1 tbs
    Salt to taste
    Lemon juice – 1 tsp to sprinkle.
    Vegetable oil – 2 tbs

    Method:
    1 Cut the Bhindi/Okra  lengthwise into thin slivers after rinsing and wiping it dry,
    2. Heat the vegetable oil in a sauce pan on medium heat, Add dried red chillies, mustard seeds and when they begin to crackle add the fried onions, chopped green chillies(optional) and curry leaves.
    3. When the onions start sweating a little add the cut up bhindi, stir fry a bit with the onions, then add the besan powder and all the spice powders listed in the ingredients including the fresh chopped garlic.
    4. Stir fry the bhindi in the masala on medium heat till it turns nice and crisy.  Sprinkle some lemon juice, then add the crushed or pounded peanuts, adjust the salt, give it a stir, then add chopped cilantro and serve with rice or chappatis. Enjoy


    Food & Drink


    hotell London

    Filed Under: Side Dishes, Vegetarian

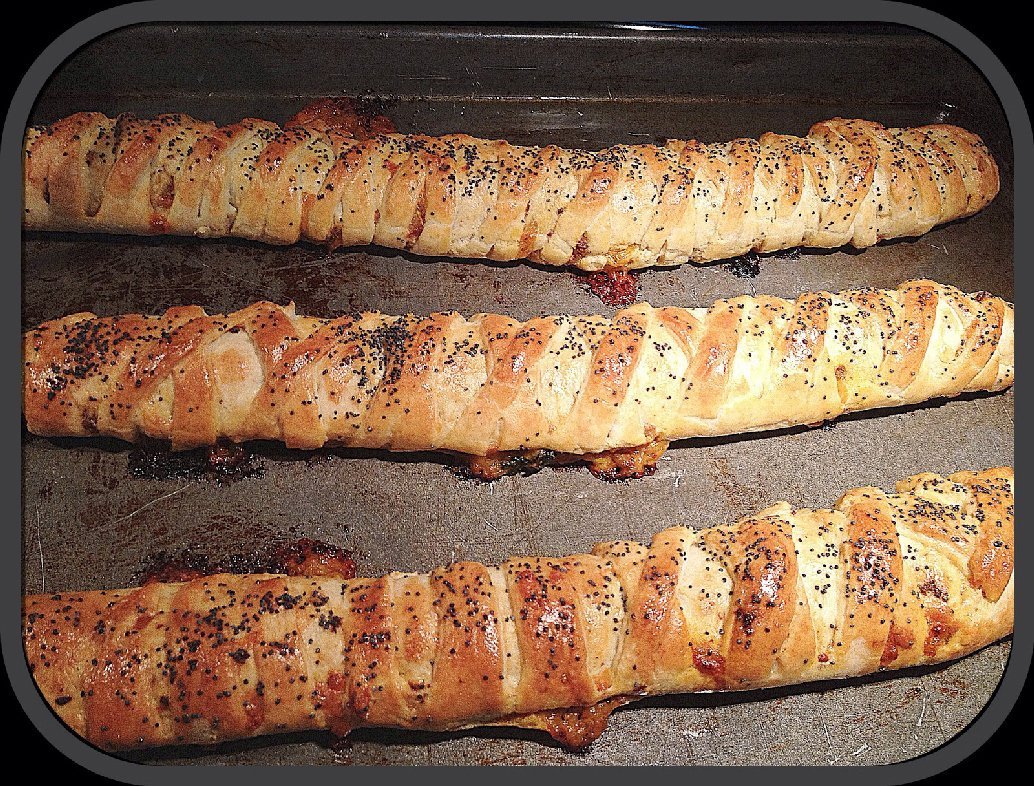
    Braided beef pastry logs

    July 13, 2013 by Fouzia Husainy 6 Comments

    braided pastry logs

    braided pastry logs

    This is an appetizer I make for all parties, family gatherings and events and is much enjoyed and cherished by all. The guests come in for seconds and thirds and it disappears from the table so fast. I happened to learn this recipe from my sister-in-law who was a great cook. It is sad that she is no more with us and we miss her so much. Earlier during one of my visits to Montreal to see her, I got to taste her pastry puffs. She made them into squares with ground beef and red pepper filling. They were so delicious that I enjoyed every bite of them!  I loved the texture of the pastry dough so much that I got this recipe from her to share with you all.

    I gave a twist to this recipe by shaping the puffs in the form of a braided log. This not only gave a unique look but also kept the filling moist. I use different kinds of fillings in combination with potatoes, cheese,  red peppers etc. This time I used my own indian style filling with beef and flavourful spices. You can use any filling of your choice. And shape the pastry in your own way. You could make the filling ahead of time and refrigerate or freeze it, then use it in the pastry as per your convenience. The pastry dough can be frozen as well. It keeps well in the refrigerator for 3 days and in the freezer for 3 months.

    As it is holiday time now, I am going to be making lots of it to enjoy with my family and friends. These stuffed braided pastries bring a cheer and a smile on everyone’s face and just so perfect for holiday entertainment.

    Here’s the recipe!

    Ingredients: 
    For the Pastry Dough:
    3 cups all purpose flour –
    1 egg
    1/2 cup unsalted butter (chilled)
    3/4 cup sour cream
    1 tsp baking powder
    1/2 tsp salt
    1 tbs sugar
    For the beef filling:
    1 lb ground beef (preferably coarsely ground)
    2 onions  (medium size)
    1 tsp ginger garlic paste
    1 tsp red chilli powder
    1 tsp coriander powder
    1/2 tsp turmeric powder
    1 tbs tomato paste
    2 small green chillies
    1/4 cup cilantro chopped
    4 cloves
    4 green cardamoms
    2 tbs vegetable oil

    Egg wash
    1 egg beaten with one tbs milk

    Pastry dough:
    1. Process the chilled butter in the food processor with the egg and sour cream and pulse to blend well.

    2. Combine together the flour, baking powder, sugar and salt by straining through a sieve.

    3.Add the flour mixture to the wet ingredients in the processor little by little to form a moist dough

    4. Remove dough and knead it with a little flour if it is too moist. If too dry add a tsp of sour cream. Make into 2
    rounds/balls, cover with a damp towel and set aside.

    Ground Beef Filling:

    1. Quickly rinse the ground beef in a strainer under the faucet. Drain and set aside.

    2. Fry half the sliced onions in a saucepan on medium heat till soft and slightly golden.

    3. Add ginger garlic paste, salt, turmeric, red chilli and coriander powders. Mix well.

    4. Add the ground beef to the pan and sauté well in the masala till the water drains and it leaves an aroma. This will take 4-5 mins. Add the tomato paste, adjust the salt and mix well.

    5. Chop the green chillies with the remaining onions after sprinkling a little bit of salt. Crush the onions with the green chillies and salt and incorporate everything together with the knife. This makes  the onions sweat a little and also infuses flavour into the filling.

    6. Layer this onion mixture on the ground beef in the saucepan. Keep the cloves and cardamoms on one side of the pan. Top the onion mixture with chopped cilantro. Cover the pan and simmer for 5 minutes till the water is absorbed and the filling is moist. Remove from stove.

    7. Now remove the cloves and cardamoms from the saucepan and discard them. Mix the beef filling well and leave it to cool.

    Instructions:

    1. Roll and shape each pastry round/ball into a rectangle around 4″x9″.

    2. Mix grated cheddar cheese with the ground beef filling and spread it horizontally on one side of the pastry sheet as seen in the picture.

    braided pastry logs

    3.   Gently roll the pastry over half way while tucking the filling inside like a log. Cut long slits in the dough to make strips 1/2 -3/4 inches wide from the inside to the edge on the side towards you as in the picture. Brush the edges of the strips with egg white.

    braided pastry

    4. Brush the edges of the strips with egg wash.

    5. Now criss-cross the strips on the log and stick them on the opposite side with the help of the egg white. Braid in the same fashion till the end of the log.

    6. Brush with egg wash and finally to decorate sprinkle with black poppy seeds, sesame or black seeds. Make sure the bottom of the logs is dry. So dust the pastry board with flour before working on the logs.

    7. Transfer the logs to a cookie sheet, greased and dusted with flour.

    8. Bake the logs in an oven preheated at 350 degrees fahrenheit for 20 – 25 mins till golden brown. Cut the braided pastry logs into 3 inch pieces and enjoy!

    braided pastry logs

    Recipe

    braided pastry logs

    Braided Stuffed Pastry logs

    Author: Mamasecretrecipes
    This is an appetizer I make for all parties, family gatherings and events and is much enjoyed and cherished by all. The guests come in for seconds and thirds and it disappears from the table so fast.

    Ingredients
      

    Ingredients:

    For the Pastry Dough:

    • 3 cups all purpose flour -
    • 1 egg
    • 1/2 cup unsalted butter chilled
    • 3/4 cup sour cream
    • 1 tsp baking powder
    • 1/2 tsp salt
    • 1 tbs sugar

    For the beef filling:

    • 1 lb ground beef preferably coarsely ground
    • 2 onions  medium size
    • 1 tsp ginger garlic paste
    • 1 tsp red chilli powder
    • 1 tsp coriander powder
    • 1/2 tsp turmeric powder
    • 1 tbs tomato paste
    • 2 small green chillies
    • 1/4 cup cilantro chopped
    • 4 cloves
    • 4 green cardamoms
    • 2 tbs vegetable oil

    Egg wash

    • 1 egg beaten with one tbs milk
    Get Instant Help
    InstacartGet Recipe Ingredients

    Instructions
     

    Pastry dough:

    • Process the chilled butter in the food processor with the egg and sour cream and pulse to blend well.
    • Combine together the flour, baking powder, sugar and salt by straining through a sieve.
    • Add the flour mixture to the wet ingredients in the processor little by little to form a moist dough
    • Remove dough and knead it with a little flour if it is too moist. If too dry add a tsp of sour cream. Make into 2 rounds/balls, cover with a damp towel and set aside.

    Ground Beef Filling:

    • Quickly rinse the ground beef in a strainer under the faucet. Drain and set aside.
    • Fry half the sliced onions in a saucepan on medium heat till soft and slightly golden.
    • Add ginger garlic paste, salt, turmeric, red chilli and coriander powders. Mix well.
    • Add the ground beef to the pan and sauté well in the masala till the water drains and it leaves an aroma. This will take 4-5 mins. Add the tomato paste, adjust the salt and mix well.
    • Chop the green chillies with the remaining onions after sprinkling a little bit of salt. Crush the onions with the green chillies and salt and incorporate everything together with the knife. This makes  the onions sweat a little and also infuses flavour into the filling.
    • Layer this onion mixture on the ground beef in the saucepan. Keep the cloves and cardamoms on one side of the pan. Top the onion mixture with chopped cilantro. Cover the pan and simmer for 5 minutes till the water is absorbed and the filling is moist. Remove from stove.
    • Now remove the cloves and cardamoms from the saucepan and discard them. Mix the beef filling well and leave it to cool.
    • Roll and shape each pastry round/ball into a rectangle around 4"x9".
    • Mix grated cheddar cheese with the ground beef filling and spread it horizontally on one side of the pastry sheet as seen in the picture.
    • Gently roll the pastry over half way while tucking the filling inside like a log. Cut long slits in the dough to make strips 1/2 -3/4 inches wide from the inside to the edge on the side towards you as in the picture. Brush the edges of the strips with egg white.
    • Now criss-cross the strips on the log and stick them on the opposite side with the help of the egg white. Braid in the same fashion till the end of the log.
    • Brush with egg wash and finally to decorate sprinkle with blue poppy seeds, sesame or black seeds. Make sure the bottom of the logs is dry. So dust the pastry board with flour before working on the logs.
    • Transfer the logs to a cookie sheet, greased and dusted with flour. Bake the logs in an oven preheated at 350 degrees fahrenheit for 20 - 25 mins till golden brown. Cut the braided pastry logs int 3 inch pieces and enjoy!
    Print Recipe Pin Recipe Share on Twitter Share on Facebook

    Filed Under: Appetizers, Non-Vegetarian, Ramadan meals, Sandwiches, Snacks

    • « Go to Previous Page
    • Page 1
    • Interim pages omitted …
    • Page 12
    • Page 13
    • Page 14
    • Page 15
    • Page 16
    • Interim pages omitted …
    • Page 18
    • Go to Next Page »

    Footer

    ↑ back to top

    About

    • Privacy Policy
    • Disclaimer

    Newsletter

    • Sign Up! for emails and updates

    Contact

    • Contact me

    COPYRIGHT © 2021 MAMA'S SECRET RECIPES