
• Skip to primary navigation
  • Skip to main content
Mamas Secret Recipes
  • About Me
    • Food Info
  • Blog
  • Recipes
  • Videos
  • Contact Me
  • Navigation Menu: Social Icons

    • Facebook
    • Instagram
    • Pinterest
    • Twitter
    • YouTube
menu icon
go to homepage
subscribe
search icon
Homepage link
  • About Me
  • Blog
  • Recipes
  • Videos
  • Food Info
  • Contact Me
    • Bloglovin
    • Facebook
    • Instagram
    • Pinterest
    • Twitter
    • YouTube
  • ×

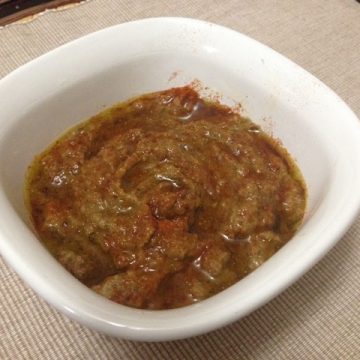
    Egg Plant Tapenade

    November 13, 2015 by Fouzia Husainy Leave a Comment

    egg plant tapenade

    This is a mediterranean recipe that I modified to suit my taste. I flame grilled the egg plant to give it smoky flavour and substituted pine nuts for walnuts and sun dried tomatoes for fresh ones. The smoky egg plant combined with the slightly tangy and nutty flavours turned out really delicious. We should not forget that the egg plant is the king in this dish, so care should be taken not to over power it with other flavours. Therefore adding just the right proportions of everything makes it not only enhanced in flavour but also in taste.

    Ingredients:
    1 large dark purple egg plant 
    1 tbs sun dried tomatoes            
    2tbs walnuts (lightly toasted)        
    2tbs extra virgin olive oil             
    20 pitted kalamata olives         
    1 tsp lemon juice                         
    1 small onion(finely chopped  
    1 garlic clove                          

    To garnish:
    1/2 tsp ground Cumin                   
    1/4 tsp cayenne pepper/paprika   
    2 tbs extra virgin olive oil           
    1 tbs cilantro finely chopped     

    Instructions: 
    1. Flame grill the egg plant on the gas stove till it is charred all over and becomes soft. Leave it to cool.
    2. Toast the walnuts with a little olive oil. Soak the sun-dried tomatoes in just a little water.
    3. Remove the charred skin from the cooled egg plant, clean well so that no charred remnants are sticking to the egg plant, cut it open without loosing its juices, scrape out the seeds if they are too big and hard, otherwise you can leave them.
    4. Heat 2 tbs of olive oil in a sauce pan and fry the chopped onion, once it is translucent add the chopped garlic clove, walnuts, give it a quick stir and remove from stove.
    5. In a dry grinder, grind together the chopped onion and walnut mixture (pour it with the olive oil in the pan into the grinder) along with the sun-dried tomatoes, salt and pepper to make a smooth paste. You can add a green chilly if you want some heat. For me without the green chilli it tasted better.
    6. Now mash the egg plant with a hand blender and incorporate the ground mixture into it to make a slightly smooth but still a little coarse paste. The roasted egg plant should be well blended with the ground paste.
    7. Transfer the contents to a serving bowl. Add chopped cilantro, a dash of  lemon juice, adjust the salt and mix well.  Sprinkle cumin and cayenne or paprika on top, drizzle olive oil and enjoy!

    Recipe
    egg plant tapenade

    EGG PLANT TAPENADE

    Author: Fouzia Husainy
    This is an interesting flavourful mediterranean recipe made with flame grilled egg plant with combined flavours of the slightly tangy sun dried tomatoes and coarsely ground toasted walnuts turned out really delicious.
    Course Appetizer, Side Dish
    Cuisine Mediterranean Cuisine

    Equipment

    • gas cook top; tongs

    Ingredients
      

    • 1 large dark purple egg plant
    • 1 tbs sun dried tomatoes
    • 2 tbs walnuts lightly toasted
    • 2 tbs extra virgin olive oil
    • 20 pitted Kalamata olives
    • 1 tsp lemon juice
    • 1 small onion(finely chopped 1 garlic clove

    To garnish:

    • 1/2 tsp ground Cumin
    • 1/4 tsp cayenne pepper/paprika
    • 2 tbs extra virgin olive oil
    • 1 tbs cilantro finely chopped
    Get Instant Help
    InstacartGet Recipe Ingredients

    Instructions
     

    • Flame grill the egg plant on the gas stove till it is charred all over and becomes soft. Leave it to cool.
    • Toast the walnuts with a little olive oil. Soak the sun-dried tomatoes in just a little water.
    • Remove the charred skin from the cooled egg plant, clean well so that no charred remnants are sticking to the egg plant, cut it open without loosing its juices, scrape out the seeds if they are too big and hard, otherwise you can leave them.
    • Heat 2 tbs of olive oil in a sauce pan and fry the chopped onion, once it is translucent add the chopped garlic clove, walnuts, give it a quick stir and remove from stove.
    • In a dry grinder, grind together the chopped onion and walnut mixture (pour it with the olive oil in the pan into the grinder) along with the sun-dried tomatoes, salt and pepper to make a smooth paste. You can add a green chilly if you want some heat. For me without the green chilli it tasted better.
    • Now mash the egg plant with a hand blender and incorporate the ground mixture into it to make a slightly smooth but still a little coarse paste. The roasted egg plant should be well blended with the ground paste.
    • Transfer the contents to a serving bowl. Add chopped cilantro, a dash of  lemon juice, adjust the salt and mix well.  Sprinkle cumin and cayenne or paprika on top, drizzle olive oil and enjoy!
    Print Recipe Pin Recipe Share on Twitter Share on Facebook

    Filed Under: Eating Healthy, Mediterranean, Ramadan meals, Side Dishes, Vegetarian

    Zucchini Papaya Salad

    November 11, 2015 by Fouzia Husainy Leave a Comment

    Ingredients: 
    1 Cup Light green zucchini
    1 Cup Papaya (not so ripe)
    4 Tbs Peanuts crushed
    1 Tbs Sesame seeds

    Lemon dressing:
    1 Tbs Lemon juice
    1 Tbs Olive oil
    1/4 Tsp Sesame oil
    1/2 Tsp Dijon mustard
    Salt and Pepper as required

    Method:
    1. Peel the Zucchini and Papaya. Wash and towel dry. Grate into thin long strips or julienes.

    2. Dry roast the peanuts and sesame seeds.

    3. Mix all the dressing ingredients and whisk well till it emulsifies and thickens.

    4. Pour the dressing over the grated zucchini and papaya.

    5. Top with roasted peanuts and sesame seeds.

    6. Enjoy.

    Filed Under: Dinner, Eating Healthy, Lunch, Party food, Quick and easy, Ramadan meals, Salads, Side Dishes, Vegetarian Tagged With: healthy saad, refreshing salad, salad

    Spicy Carrot and Green Apple Salad (South Indian Style)

    August 22, 2015 by Fouzia Husainy 1 Comment

    spicy carrot and green apple salad

    This is a very healthy refreshing South Indian style salad made with shredded carrot and green apple and a dash of lemon juice, ginger and sugar. The best part of this recipe is the unique way the flavouring is infused into it with the help of tempering with mustard seeds that makes it aromatic and delicious.

    This recipe is adapted from the traditional south indian carrot salad recipes. I tweaked the recipe by adding shredded tart green apple, cilantro and ginger for extra flavour.

    Ingredients: 
    2 carrots shredded
    1 green apple Shredded
    Fresh Cilantro – 1 tbs
    1tbs fresh lemon juice
    1/2 tsp ginger grated
    salt to taste
    1 tsp sugar
    1 tsp mustard seeds
    a few fresh curry leaves
    1 small green chilli (optional)
    1/2 tsp vegetable oil

    Instructions:
    1. Mix together the shredded carrots and apple. Add chopped cilantro.
    2. Heat 1/2 tsp vegetable oil in a small sauce pan. Add the mustard seeds when the oil is just hot to make them splutter. Add the chopped curry leaves and remove immediately and pour it on the shredded salad mix.
    3. Add lemon juice, salt and sugar, toss well and serve. Enjoy!

    Recipe

    Spicy Carrot and Green Apple Salad

    Author: Fouzia Husainy
    This spicy carrot and green apple salad is a very refreshing salad with a combination of grated apples and carrots, then tempered with mustard seeds.
    Cuisine American cuisine, Canadian Cuisine

    Ingredients
      

    • 2 carrots shredded
    • 1 green apple Shredded
    • Fresh Cilantro - 1 tbs
    • 1 tbs fresh lemon juice
    • 1/2 tsp ginger grated
    • 1 tsp sugar
    • 1 tsp mustard seeds
    • a few fresh curry leaves
    • 1 small green chilli optional
    • 1/2 tsp vegetable oil
    • salt to taste
    Get Instant Help
    InstacartGet Recipe Ingredients

    Instructions
     

    • Mix together the shredded carrots and apple. Add chopped cilantro.
    • Heat 1/2 tsp vegetable oil in a small sauce pan. Add the mustard seeds when the oil is just hot to make them splutter. Add the chopped curry leaves and remove immediately and pour it on the shredded salad mix.
    • Add lemon juice, salt and sugar, toss well and serve. Enjoy!
    Print Recipe Pin Recipe Share on Twitter Share on Facebook

    You may also like:

    Egg Salad

    Egg Salad

    pineapple kachumbar salad

    Pineapple Kachumbar

    chickepea sundal salad

    Chickpea Sundal Salad

    apple mango ginger salad

    Filed Under: Eating Healthy, Quick and easy, Ramadan meals, Salads, Side Dishes, Vegetarian Tagged With: apple, carrots, flavourful salad, healthy salad, Indian style salad, quick and easy, refreshing salad, salad, south indian carrot salad, south indian style salad, spicy salad

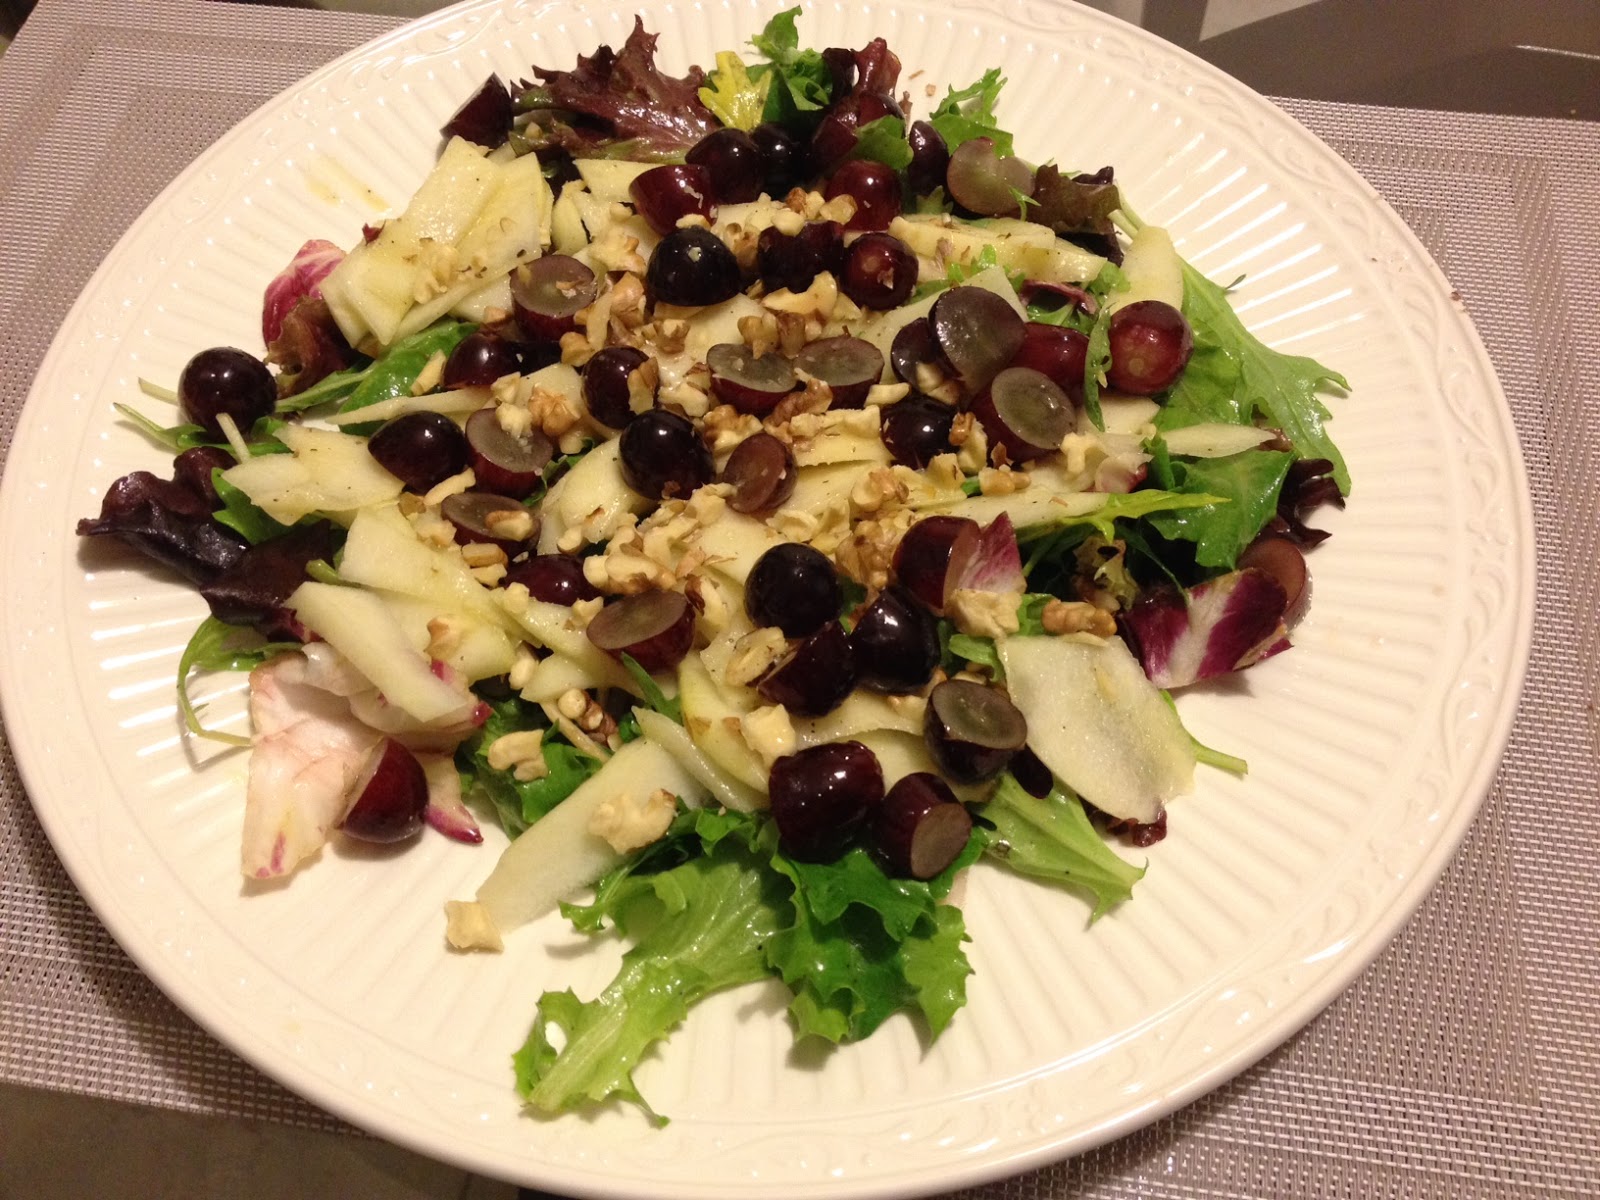
    Apple grape salad

    August 22, 2015 by Fouzia Husainy Leave a Comment

    A refreshing salad for lunch or dinner as a snack or a side dish in summer.  This is a very simple salad to make from the fruits you have at home, especially when you are pressed for time and your imagination has deserted you. Cut up an apple or pear, some grapes or berries and throw them in together with a handful of spring mix, garnish with some chopped walnuts, drizzle some dressing on top and voila your salad is ready in no time! You may any dressing of your choice. I also use lemon poppy seed dressing sometimes.

    Here’s the recipe:

    Ingredients:

    Green apple – 1
    Red grapes  –  1/2 cup
    Spring mix –   1 cup
    Walnuts      –   1tbs

    For the lemon dijon dressing:

    Lemon juice (fresh) – 1 tbs
    Dijon mustard – 1tsp
    Brown sugar   –  a pinch
    Olive oil          – 1tbs
    Salt and Pepper to taste

    1. Wash, peel and thinly slice the green apple. Deseed and cut in half the red grapes.
    2. Layer the spring mix on a plate, then throw in the apple slices followed by the grapes on top.
    3. Mix together all the dressing ingredients in a bottle and shake well to blend.
    4. Sprinkle chopped walnuts and drizzle the dressing on top.
    5. The salad is now ready to be served. Enjoy!


    Food & Drink


    hotell London

    Filed Under: Eating Healthy, Lunch, Quick and easy, Ramadan meals, Salads, Vegetarian Tagged With: healthy salad, refreshing salad

    Stuffed Chilli Bhajjis

    August 5, 2015 by Fouzia Husainy 1 Comment

    stuffed chilli bhajji

    These Stuffed Chilli Bhajjis with a yummy spicy filling and an outer crispy texture are enough to make your mouth water and throw you off balance coz they are so outrageously delicious!

    I have long been craving for the stuffed chilly bhajjis that I used to eat in Chennai, India at one particular location and my mouth still waters thinking about them. I loved them as a child and enjoyed eating them. I don’t find them now when I go to India. The small tea shop by the Cinema theatre where a lady vendor used to sell them is no more, though the theatre is still there. Everything has changed. But the taste is still alive and it evokes fond memories of the past of how we (me with my family) walked home after watching the movie enjoying these hot fuming mouth watering bhajjis. I still remember how her small tea stall was always crowded and how we watched her fry a bazillion of them in a huge wok as we waited impatiently for our turn to buy them These bhajjis were stuffed with a delicious spicy filling and back then I used to wonder what it could be. I tried to recreate it and  kept trying different combinations and finally after many trials i managed to come very close to the taste. This was the best I could do.

    Here’s the recipe:

    Ingredients:
    a few green fat chilli peppers
    1 large potato
    1 tbs MTR chutney powder
    1/2 tsp turmeric powder
    1 tsp amchoor (dried mango) powder
    1/2 tsp ginger powder
    1/2 tsp kashmiri mirch powder
    1/2 tsp cumin seeds
    1/2 cup + 2 tbs besan (chickpea flour)
    1 tsp ghee
    1/2 tsp pomegranate molasses (optional)
    Salt to taste

    Instructions: 

    1. Dry roast the cumin seeds. Grind them in a mortar and pestle and keep aside.

    2. Take a saucepan, add a tsp of ghee (clarified butter) and on medium heat roast the 2 tbsp of besan flour (chickpea flour). When it starts leaving an aroma it means it is well roasted and the raw smell is gone. Remove from the pan into a bowl and keep aside.

    3. Peel, boil and grate the potato when it is cool.

    4. Now add to the grated potato the roasted besan flour, MTR chutney powder, roasted ground cumin and the other spice powders. Mix well. Add salt and pomegranate molasses. The filling is ready  now.

    5. Take a green chilli slit it open vertically, remove the seeds and stuff it with the filling. Then take some more filling and wrap it around the stuffed chilly. Compress it inside your fist and make it smooth. Set aside.

    6. Repeat the same process with the rest of the chillies and set aside.

    7. Make a thick batter with the 1/2 cup besan (chickpea flour), 1/2 tsp turmeric powder, 1/2 tsp cumin powder, 1/2 tsp chilli powder and 1/4 tsp baking soda with a little water.

    8. Dip the wrapped stuffed bhajjis in the batter and swirl them around so that they gather more batter and then slowly slide them in the hot oil on medium heat. Keep splashing the hot oil over them carefully and turn them over from time to time in order to fry them evenly. Remove them when they are crisp and golden.

    9. Drain them on paper towels and serve them hot with mint or tamarind chutney. Enjoy!

    Recipe

    Stuffed Chilli Bhajjis

    Author: Mamasecretrecipes
    Stuffed with a delicious spicy filling these crispy bhajjis are enough to make your mouth water and throw you off balance when you see them. They are just so awesome and irresistible! Here's the recipe:
    Course Appetizer, Snack, Vegetarian
    Cuisine south indian

    Ingredients
      

    Ingredients:

    • a few green fat chillies
    • 1 large potato
    • 1 tbs MTR chutney powder
    • 1/2 tsp turmeric powder
    • 1 tsp amchoor dried mango powder
    • 1/2 tsp ginger powder
    • 1/2 tsp kashmiri mirch powder
    • 1/2 tsp cumin seeds
    • 1/2 cup + 2 tbs besan chickpea flour
    • 1 tsp ghee
    • 1/2 tsp pomegranate molasses optional
    • Salt to taste
    Get Instant Help
    InstacartGet Recipe Ingredients

    Instructions
     

    Instructions:

    • Dry roast the cumin seeds. Grind them in a mortar and pestle and keep aside.
    • Take a saucepan, add a tsp of ghee (clarified butter) and on medium heat roast the 2 tbsp of besan flour (chickpea flour). When it starts leaving an aroma it means it is well roasted and the raw smell is gone. Remove from the pan into a bowl and keep aside.
    • Peel, boil and grate the potato when it is cool.
    • Now add to the grated potato the roasted besan flour, MTR chutney powder, roasted ground cumin and the other spice powders. Mix well. Add salt and pomegranate molasses. The filling is ready  now.
    • Take a green chilli slit it open vertically, remove the seeds and stuff it with the filling. Then take some more filling and wrap it around the stuffed chilly. Compress it inside your fist and make it smooth. Set aside.
    • Repeat the same process with the rest of the chillies and set aside.
    • Make a thick batter with the 1/2 cup besan (chickpea flour), 1/2 tsp turmeric powder, 1/2 tsp cumin powder, 1/2 tsp chilli powder and 1/4 tsp baking soda with a little water.
    • Dip the wrapped stuffed bhajjis in the batter and swirl them around so that they gather more batter and then slowly slide them in the hot oil on medium heat. Keep splashing the hot oil over them carefully and turn them over from time to time in order to fry them evenly. Remove them when they are crisp and golden.
    • Drain them on paper towels and serve them hot with mint or tamarind chutney. Enjoy!
    Print Recipe Pin Recipe Share on Twitter Share on Facebook

    You may also like these:

    Stuffed Paneer Croquettes

    If you are looking for allergy friendly snacks, check this one below:

    Homemade Allergy friendly smillies

    Filed Under: Appetizers, Snacks, Street food, Vegetarian

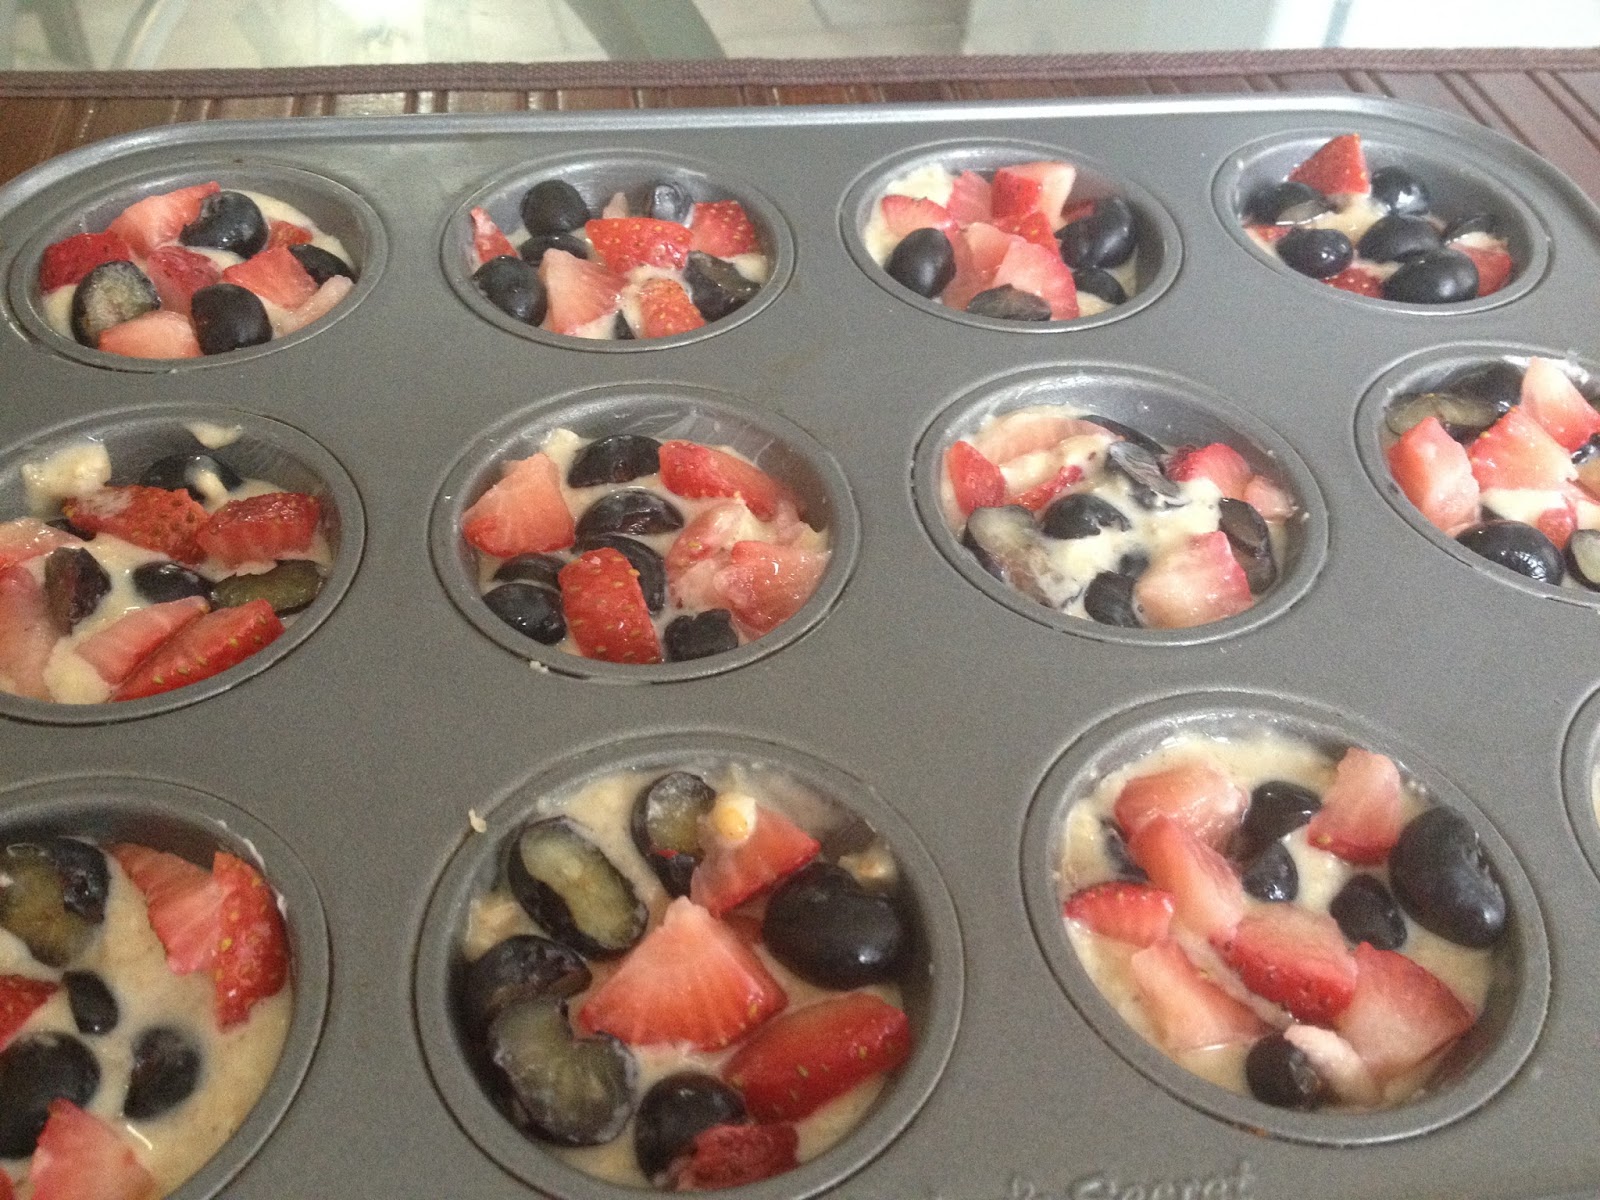
    Mini Oatmeal berry muffins and pancakes for toddlers

    July 20, 2015 by Fouzia Husainy Leave a Comment

    My grandson is a fussy eater. I made these for his morning breakfast and served them with yoghurt, fruits and  peanut butter. It brought a big smile on his face when I placed the plate before him. He sang as he ate and enjoyed every bite, wiping the plate clean.


    Here’s the Recipe:
    Ingredients
     Oatmeal – 1 cup ground
    White flour – 1/2 cup
    Baking powder – 1/4 tsp
    Salt- a small pinch
    Butter melted – 2 tbs
    Egg – 1
    Milk – 1/2 cup
    Strawberries – 4 or 5
    Blueberries – a handful
    Pears/Apples – grated
    Honey – 1- 2 tsp
    Cinnamon for flavouring (optional) – can be used with grated apples
    Method: 
    1. Preheat oven to 350 degrees fahrenheit.
    2. Mix together all dry ingredients – ground oats, flour, baking powder and salt.
    3. Whisk the egg, add the milk followed by the cooled melted butter and honey.
    4. Now add the wet ingredients to the dry ingredients. Whisk well to get a smooth thick batter.
    5. Pour into mini muffin tins, top with berries and bake in the preheated oven for 10 to 12 mins till a tooth pick inserted comes out clean.
    6. You can use the same batter to make mini pancakes and use different toppings such as grated apples or pears, berries etc. Use clarified butter to cook the mini pancakes in the non stick pan.
    7. Turn over and cook gently on low heat till they are done. Remove from pan, cool and serve them to your little toddler with peanut butter or yoghurt.

    Filed Under: Breakfast, Cakes and pastries, Desserts, Toddler meals

    Chicken Dijon

    July 19, 2015 by Fouzia Husainy Leave a Comment

    This is a quick chicken dish for those who are pressed for time and want something quick and easy to make and at the same time is good to eat.

    Here’s the recipe:

    Ingredients:

    Chicken breast – 1 lb
    Garlic paste – 2 tsp
    Djon mustard – 2tsp
    Mayonnaise- 4 tbs
    Salt
    Pepper
    Olive oil- 2 tbs + 1 tsp

    Method:
    1. Cut chicken breast into bite size pieces.
    2. Rub garlic paste, salt and pepper.
    3. Add 2 tbs olive oil to a sauce pan. Stir fry on medium heat till they are well cooked  and are golden and crispy. 
    4. Remove from pan into a serving bowl.
    5. Combine dijon, mayonnaise and olive oil and add it to the chicken. Mix well and enjoy.


    Food & Drink


    hotell London

    Filed Under: Chicken, Dinner, Eating Healthy, Lunch, Non-Vegetarian, Quick and easy, Ramadan meals, Side Dishes

    Anday ki Mithai (Shahi Egg Sweet )

    July 3, 2015 by Fouzia Husainy 27 Comments

    Anday ki Mithai

    Anday ki Mithai (Shahi Egg Sweet) is a popular egg sweet of the muslim community in Chennai. It is considered a delicacy which is reserved to be served on special occasions and important events. I call it the shahi egg sweet because it is so rich and delicious, I am sure it must have been a delicacy enjoyed and relished by the Nawabs. The saffron and rose fragrance elevate its flavour to another dimension. Its soft and silky texture and juicy sweetness melts in your mouth. It is a must to have dessert after eating biryani. It is just so divine!

    This is a family recipe that has been passed on to me by my grandmother and the original version has stayed in our family ever since. My mom used to make it all the time. No family dinner or party was complete without the Anday ki mithai.

    It is so easy to make as you just blend together all the ingredients. But care should be taken to make it using the right proportions and the right technique. If the eggs are not whisked well before adding them to the khoya (milk solids /reduced milk) then you are sure to end up with a lumpy texture.

    As a kid I grew up seeing my mom bake this sweet on charcoal in a huge copper baking vessel. Those were the days of no blenders, no whisks or mixies, so my mom would do everything by hand right from whipping up the eggs to making soft and smooth khoya from scratch. Then she would blend everything together by hand in a big mixing bowl. No doubt it took longer to make this sweet back then, but the end result was excellent. You got to be careful not to cook the mixture in the blender by blending it for too long. It is better to pulse to mix everything together than to blend continuously for a long time.

    Following is the tried and tested recipe:

    Ingredients:
    4 Eggs (extra large)
    125 gm Ghee
    250 gm Sugar
    250 gm Khoya (solidified milk)
    1 tbs Semolina
    3 – 4 tbs Milk
    25 Almonds for paste
    12 Almonds for garnish
    Saffron – a pinch
    2 – 3 drops of Rose essence

    1. Whisk the eggs together in a mixing bowl. Soak the semolina in 2 tbs milk. Add a few drops of hot water to the saffron strands and let them soak as well.

    2. Pulse the khoya in a blender till there are no lumps.  Add the sugar and pulse again. Grind the almonds separately by adding 1- 2 tbs milk to make it into a smooth paste.

    3. Now add the whisked eggs, almond paste and ghee to the khoya mixture in the blender. Blend well by running the motor for not more than 15 secs each time. Do not make it runny.

    4. Now add the soaked semolina, saffron and rose essence. Mix well to combine.

    5. Meanwhile blanch, split and sliver the almonds for garnish.

    6. Smear the baking dish with a little ghee and pour in the egg mixture. Bake in a preheated oven at 350 degrees Fahrenheit for 25 – 30 mins until it is golden brown on top. When you are half way through the baking, sprinkle the slivered almonds on top.

    7. Remove when done. When it cools down cut into diamond shaped pieces, decorate with silver foil and enjoy. You may also chill it in the refrigerator and eat it cold. It stays fresh in the refrigerator for 3 – 4 days.

    Notes:

    1. Pulse quickly to combine all the ingredients in the blender or run for short periods of not more than half a minute. Pause and continue. This is to avoid cooking the egg mixture in the blender.

    2. Follow the instructions correctly and exactly to get the best results.

    3. Khoya is solidified milk not condensed milk. It is available in the Indian stores. The brands I use are “Bapu ka khoya” or “Nanak ka Khoya” – both are equally good.

    You may also like:

    You may also like:

    Panna Cotta

    Anday ki Mithai

    Andey ki Mithai

    Mango Shrikand

    Mango Shrikand

    Bottle Gourd Barfi

    Banana Halwa Cake

    Zafrani Halwa Pies

    Rice Kheer

    Recipe

    Shahi Egg Sweet (Anday Ki Mithai)

    Author: Mamasecretrecipes
    Anday ki Mithai (Shahi Egg Sweet) is a popular egg sweet of the muslim community in Chennai. It is considered a delicacy which is reserved to be served on special occasions and important events.
    Course Dessert
    Cuisine South indian Cuisine

    Ingredients
      

    Ingredients:

    • 4 Eggs extra large
    • 125 gm Ghee
    • 250 gm Sugar
    • 250 gm Khoya
    • 1 tbs Semolina
    • 3 - 4 tbs Milk
    • 25 Almonds for paste
    • 12 Almonds for garnish
    • Saffron - a pinch
    • 2 - 3 drops of Rose essence
    Get Instant Help
    InstacartGet Recipe Ingredients

    Instructions
     

    • Whisk the eggs together in a mixing bowl. Soak the semolina in 2 tbs milk. Add a few drops of hot water to the saffron strands and let them soak as well.
    • Pulse the khoya in a blender till there are no lumps. Add the sugar and pulse again. Grind the almonds separately by adding 1- 2 tbs milk to make it into a smooth paste.
    • Now add the whisked eggs, almond paste and ghee to the khoya mixture in the blender. Blend well by running the motor for not more than 15 secs each time. 
    • Now add the soaked semolina, saffron and rose essence. Pulse to combine everything well.
    • Meanwhile blanch, split and sliver the almonds for garnish.
    • Smear the baking dish with a little ghee and pour in the egg mixture. Bake in a preheated oven at 350 degrees Fahrenheit for 25 - 30 mins until it is golden brown on top. When you are half way through the baking, sprinkle the slivered almonds on top. 
    • Remove when done. When it cools down cut into diamond shaped pieces, decorate with silver foil and enjoy. You may also chill it in the refrigerator and eat it cold. It stays fresh in the refrigerator for 3 - 4 days.

    Notes

    Pulse quickly to combine all the ingredients in the blender or run for short periods of not more than half a minute. Pause and continue. This is to avoid cooking the egg mixture in the blender.
    Follow the instructions correctly and exactly to get the best results.
    Khoya is solidified milk not condensed milk. It is available in the Indian stores. The brands I use are "Bapu ka khoya" or "Nanak ka Khoya" - both are equally good.
    Print Recipe Pin Recipe Share on Twitter Share on Facebook

    Filed Under: Dessert, Desserts, Egg, Indian Cuisine, Indian sweets., Ramadan meals, South Indian Cooking Tagged With: anday ki mithai, desserts, Egg halwa sweet, egg sweet, indian dessert halwa, popular chennai sweet, shahi egg sweet, traditional baked egg sweet, traditional egg sweet

    Rice Ganji (Porridge)

    June 29, 2015 by Fouzia Husainy 5 Comments

    Rice ‘Ganji’ or ‘kanji’ or ‘nombu ganji’ (in tamil) is basically a wholesome porridge which is usually consumed for Ifthaar (at the time of breaking the fast) during Ramadan in Chennai and in the southern states of Tamilnadu and Kerala. It is served to fasting muslims at most of the mosques there and is also prepared in almost every muslim house in Ramadan. It is a satisfying and fulfilling meal and is enjoyed with all kinds of snacks such as different kinds of vadas (lentil fritters), samosas, pakoras (fritters) etc. Sometimes to make it rich and nutritious, some ground lamb or beef is added to the ganji and it is called Aash. As a variation, small fried meat balls are also added.


    Above is the picture of the rice ganji with grated coconut, chopped cilantro and mint and below is the picture without the coconut which is also flavourful but has a lighter taste. Most important of all is the tadka or tempering which (done right at the end with ghee) takes it to the next level by making it rich and aromatic. Grated coconut, a few fresh mint leaves and chopped cilantro added just before tempering enhances its flavour and taste.

    Here’s the recipe:

    Ingredients:
    1 cup rice
    1/4 cup moong dal (yellow lentils)
    1 small onion sliced
    2 small green chillies –
    1/2  tsp Black pepper corns + 5-6 for tempering
    5-6 Fresh mint leaves
    1 tbs cilantro chopped
    2 tbs ghee for tempering
    1/2 tsp ginger garlic paste
    2 cloves
    1 tbs fresh grated coconut
    1 tbs ground beef/lamb (optional)

    Instructions:
    1. Dry roast the moong dal till lightly golden.

    2. Wash the rice and the roasted moong dal till the water runs clear.

    3. Place the rice, the roasted moong dal, salt, pepper corns, green chillies, a few sprigs of cilantro and 2 cups of water in an instant pot/pressure cooker.

    4. Place the lid on the instant pot after switching it on, turn the whistle to the sealing position, press the steam button and set the time for 5 mins. if you are using a pressure cooker, close the lid, place it on the stove on high heat and after the first whistle turn down the heat to medium and pressure cook for 5 mins. If you have time, you could either slow cook in the instant pot or just cook in the normal way by adding enough water and cooking on medium heat till the rice and dal are mushy. But care should be taken to stir the rice mixture from the bottom so that it does not stick to the pot.

    5. Uncover the lid after all the steam is out. The Instant pot would beep after 5 mins. You could either manually release pressure by slowly venting it out or leave it to NPR (natural pressure release). Add 1/2 cup water to get a flowing consistency. It should neither be too thick nor too runny. Select the sauté less function in the instant pot and let it simmer without the lid. Let it simmer in the pressure cooker as well with out the lid.

    6. Now add the fresh grated coconut, mint and cilantro and let it simmer for 2 mins. Please note that the coconut has to be really fresh otherwise all your effort will be lost. Do not use the coconut if you get a stale or rancid smell.

    7. For the tempering, take a sauce pan, set it on medium heat.  Melt the ghee then add 2 cloves, sliced onions and fry till golden brown. Then quickly add the ginger garlic paste, give it a stir and as soon as you get a whiff of the aroma pour it on top of  the prepared ganji.

    8. Gently mix the tadka in the ganji and enjoy with snacks and fritters of your choice. This is usually served with Vadai (lentil fritters) or Samosas.

    Tips:
    1. If using the pressure cooker to make ganji, care should be taken not to burn it as there is a tendency for the rice to stick to the bottom if there’s not enough water added. So cook add enough water, cook on medium heat and stir from time to time when it is left to simmer without the lid.  Make sure to see that the water is at least 3 inches above the rice level.

    2. Do not burn the onions or the ginger garlic paste burn during the tempering process as all the flavours will be lost.

    3. Those who want a meaty flavour can add 1 tbs of sautéed ground beef/lamb to the pot initially along with the rice, dal and other ingredients and follow the same method for the rest of the cooking.

    4. Alternatively you may roast the ground meat in a just a little oil or butter, add ginger garlic paste, and then add the rest of the ingredients and pressure cook. Follow the rest from step 5. Do not add ginger garlic paste again when you do the tempering coz you have already added with the meat. Just brown the onions with the cloves and add to the ganji.

    5. You could also add small fried meat balls and simmer for a while just before tempering.

    Recipe

    Rice Ganji (Porridge)

    Author: Fouzia Husainy
    Course Traditional Soups
    Cuisine South Indian muslim Cuisine

    Ingredients
      

    • 1 cup rice
    • 1/4 cup moong dal yellow lentils
    • 1 small onion sliced
    • 2 small green chillies -
    • 1/2   tsp  Black pepper corns + 5-6 for tempering
    • 5-6 Fresh mint leaves
    • 1 tbs cilantro chopped
    • 2 tbs ghee for tempering
    • 1/2 tsp ginger garlic paste
    • 2 cloves
    • 1 tbs fresh grated coconut
    • 1 tbs ground beef/lamb optional
    Get Instant Help
    InstacartGet Recipe Ingredients

    Instructions
     

    • Dry roast the moong dal till lightly golden.
    • Wash the rice and the roasted moong dal till the water is clear.
    • Put it in a Pressure Cooker/Instant Pot and add 2 cups of water, salt, pepper corns, green chillies and a few sprigs of cilantro.
    • Place the lid on the instant pot after switching it on, turn the whistle to the sealing position, press the steam button and set the time for 5 mins. if you are using a pressure cooker, close the lid, place it on the stove on high heat and after the first whistle turn down the heat to medium and pressure cook for 5 mins. If you have time, you could either slow cook in the instant pot or just cook in the normal way by adding enough water and cooking on medium heat till the rice and dal are mushy.
    • Uncover the lid after all the steam is out. The Instant pot would beep after 5 mins. You could either manually release pressure by slowly venting it out or leave it to NPR (natural pressure release). Add some water to get a flowing consistency. It should neither be too thick nor too runny. Set it on sauté mode less in the instant pot and in the pressure cooker, let it simmer without the lid.
    • Now add the fresh grated coconut, mint and cilantro and let it simmer for 2 mins. Please note that the coconut has to be really fresh otherwise all your effort will be lost. Do not use the coconut if you get a stale or rancid smell. Transfer it to a serving bowl.
    • For the tempering, take a sauce pan, set it on medium heat. Melt the ghee then add 2 cloves, a few more (8-10) pepper corns followed by the sliced onions and fry till they turn golden brown. Now quickly add the ginger garlic paste, give it a stir and as soon as you get a whiff of the aroma pour it on top of the prepared ganji.
    • Gently mix the tadka in the ganji and enjoy with fritters of your choice.

    Notes

    1. Care should be taken not to burn the rice porridge at the bottom of the pressure cooker or pot. So cook on medium heat, add enough water and stir from time to time. Make sure to see that the water is at least 3 inches above the rice level
    2. Do not burn the onions during the tempering process, nor let the ginger garlic paste burn too as all the flavours will be lost if it gets burnt.
    3. Those who want a meaty flavour can add 1 tbs of sautéed ground beef/lamb to the pot initially along with the rice, dal and other ingredients and follow the same method for the rest of the cooking.
    4. Alternatively you may roast the ground meat in a just a little oil or butter, add ginger garlic paste, and then add the rest of the ingredients and pressure cook. Follow the rest from step 5. Do not add ginger garlic paste again when you do the tempering coz you have already added with the meat, Just brown the onions with the cloves and whole black pepper and add to the ganji.
    5. You could also add small fried meat balls and simmer for a while just before tempering.
    Print Recipe Pin Recipe Share on Twitter Share on Facebook

    Filed Under: Coconut, Indian Cuisine, Non-Vegetarian, Porridge, Ramadan meals, Side Dishes, Soups, South Indian Cooking, Vegetarian Tagged With: ganji, ganji bada, ganji for ifthaar., Ramadan ganji, rice porrdige

    Kadai chicken

    June 23, 2015 by Fouzia Husainy Leave a Comment

    The flavour of the melted butter along with the pounded spices added a new dimension to the dish and it tasted intensely delicious!

    Here’s the recipe.

    Ingredients:
    Chicken – 2 legs and 2 wings
    Butter – 1/4 cup
    Olive oil- 2 tbs
    Black pepper – 1 tsp
    Whole Coriander- 1 tbs
    Whole Cumin – 1/2 tsp
    Green cardamom- 8
    Green chillies – 2
    Turmeric powder – 1 tsp
    Tomato – 1 medium size
    Dried Kashmiri red chillies  – 2
    Garlic cloves – 5 medium size
    Chopped ginger – 1 tsp for garnish
    Chopped cilantro – 2 tbs for garnish
    Method:
    1. De skin, clean, wash and drain the chicken. Rub with salt and keep aside.
    2. Melt the butter with the olive oil in a sauce pan on low heat.
    3. Pound the coriander, black pepper, green cardamom and cumin separately. Break the dried kashmiri red chillies.
    4. Add the pounded spices to the pan followed by the crushed garlic cloves.  Stir on medium hear to release a whiff of aroma.
    5. Add the chicken to the sizzling spices in the pan.
    6. Turn over and cook the chicken till it changes colour.
    7. Add the whole green chillies and chopped tomato and give it another stir.
    8. Add 1/2 a cup of water, cover with a lid and leave to cook on simmer for 15 – 20 mins or more till the chicken is soft, tender and juicy.
    9.  Do not forget to stir from time to time. If the water dries up, sprinkle a little more water.
    10. At the final stage add chopped ginger and cilantro, simmer for 2 more minutes and serve hot with rice.


    Food & Drink

    Filed Under: Chicken, Non-Vegetarian

    Murmura chicken ( A Crispy Chicken Snack)

    May 27, 2015 by Fouzia Husainy Leave a Comment

    This is a quick chicken dish which I made for my son. It tastes more like a chicken snack than a main dish. It could be eaten on its own or with rice and curry. Great as an appetizer or side dish.  


    Ingredients:
    Chicken breast pieces – 1lb
    Ginger garlic paste – 1 heaped tsp.
    Red Chilli powder – 1 heaped tsp.
    Turmeric – 1/2 a tsp.
    Garam masala powder -1 tsp.
    Fresh lemon juice – 1tbs.
    Crispy fried onions – 1 handful
    Curry leaves – a few
    Mustard seeds – ¼ tsp.
    Ginger chopped –1/2 tsp.
    Dried red chillies – 2 small
    Green chilli chopped –1 small
    Onion chopped -1 small
     Vegetable oil –1 cup
    Cilantro chopped – ½ cup

    Method:
    1.   Clean, wash and towel dry the chicken breast and cut into bite size pieces.
    2.   Rub salt and lemon juice and leave aside for 5 minutes.
    3.   Meanwhile mix together ginger garlic paste, turmeric, red chilli powder & garam masala powder and rub the chicken pieces with it.
    4.   Heat the vegetable oil in a pot or frying pan and deep fry the chicken pieces till just crisp. Remove and drain on wire rack. (Draining on paper towels makes them soggy).
    5.   Heat one teaspoon vegetable oil in a clean sauce pan. Add mustard seeds and when they crackle add dried red chillies (whole) and curry leaves followed by chopped onion & green chilli.
    6.   Give it a good stir and quickly add the fried chicken pieces to the sauce pan.
    7.   Throw in the crispy fried onions chopped ginger and chopped cilantro. Sprinkle some lemon juice and salt as required, then quickly give it another good stir and remove from pan.
    8.   The crispy (murmura) chicken snack is now ready to enjoy.


    Food & Drink


    hotell London

    Filed Under: Chicken, Lunch, Non-Vegetarian, Side Dishes

    Green Masala Chicken

    May 25, 2015 by Fouzia Husainy Leave a Comment

    The Hara (Green) Masala Chicken has many variations. I like to keep it simple to bring out the flavors of the herbs and spices and not make it too heavy by using coconut, almonds, yoghurt and cream which I feel tones down the actual flavors and makes the dish tangy, sweet and heavy.
    For this dish, I am using the same recipe my mom used for making lamb (hare masale ki phaal) which I loved so much. 

    Again I forgot to take a picture for the blog.

    Here’s the recipe

    Ingredients: 
    Chicken – 4 legs
    Ginger garlic paste – 1 tsp
    Salt to taste
    Vegetable oil – 2 tbs

    Green masala paste:
    Green chillies – 2- 4 (medium size)
    Onions – 1 medium size 
    Garlic clove – 2 medium size
    Fresh coriander – 1/2 cup
    Fresh Mint – 1/4 cup
    Cloves – 4 
    Green Cardamom – 4
    Black Pepper corns – 1 tbs
    Cumin seeds – 1 tsp

    Method: 

    1. Clean, wash the chicken legs, put them in a pot, add a glass of water, 1 tsp ginger garlic paste and 1/2 a tsp turmeric, salt and bring to a boil. Reduce the heat to medium and let it simmer for sometime till it is cooked.

    2. Meanwhile grind together first the dry spices (black pepper, cumin, cloves and cardamoms). Now add the garlic, 1/2 onion, green chillies and fresh mint and coriander leaves. Grind again to make a paste and set aside. 

    3. Heat 2 tbs of oil in a sauce pan. Slice the other 1/2 of the onion and fry in the oil till they caramelize.

    4. Take the cooked chicken pieces from the soup and add them to the pan with the onions. Turn down the heat and lightly fry them turning them over gently from side to side till they are evenly golden brown.

    5. Now add the soup left from the cooked chicken followed by the ground masala and cook till the mixture thickens. Adjust the salt. The green chicken is now ready.

    6. Garnish with some chopped fresh coriander on top and serve hot with some jasmine rice. 

    Boiling the chicken first in water spiced up with turmeric, salt and ginger garlic paste makes it soft, juicy and aromatic. Then, sautéing it with caramelised onions enhances its flavour. Finally adding the ground green masala after the chicken has browned in the pan retains the flavours of the herbs and spices ground together. This chicken is so delicious!!

    Filed Under: Chicken, Non-Vegetarian, Traditional Recipes

    • « Go to Previous Page
    • Page 1
    • Interim pages omitted …
    • Page 9
    • Page 10
    • Page 11
    • Page 12
    • Page 13
    • Interim pages omitted …
    • Page 18
    • Go to Next Page »

    Footer

    ↑ back to top

    About

    • Privacy Policy
    • Disclaimer

    Newsletter

    • Sign Up! for emails and updates

    Contact

    • Contact me

    COPYRIGHT © 2021 MAMA'S SECRET RECIPES